Users and Alerts
Setup other users who can login to Site24x7, individually customize the way each contact interact with Site24x7 account and receive notifications about outages. Once an account is configured, you'll be able to view the new account listed under Users & Alerts in a List View. You can also export all your Users & Alert details in a CSV file.
Video
Here's a quick video to guide you through adding alert contacts:
Add Users/Contact and Customize Alert Settings
- Log in to Site24x7 web client.
- Click Admin > User and Alert Management > Users and Alerts. Click Add User in Users screen.
- Specify the following details to Add User/Contact and Customize Alert Settings:
- Contact Name: Enter the name of the user.
- Job Title: Specify your job title, based on which monitoring recommendations would be populated and listed in Site24x7 Advisor. Learn more.
- Email: Specify the email address of the contact. You must verify your email address to be able to receive Site24x7 alerts and reports on your alert contact email.
While adding a new user, you can only use any one of your email addresses (either primary email address or secondary). If you try to use both of your email addresses while adding a new user, that might alter the configurations created for existing users added using that email address. To modify the details of a user you can edit the details or delete the existing user and create a new user with the alternate email address you wish to use.
To find your primary/secondary email address, log in to the respective account by clicking on the links provided below based on your data center and check the section My Email Addresses.
- United States
- Europe
- India
- Australia
- China
- Japan
- Canada
- Saudi Arabia
- United Kingdom
- United Arab Emirates
NoteEven if you've a Super Admin role in your Site24x7 account, you'll still not be able to add a user to your Site24x7 account, until you have the Organization Account Admin rights. Learn more about User Roles and Privileges.
If you're an Org Admin with Site24x7 super admin rights, you can add users (with the same email domain as yours) to your account.Learn how to create User Alert Groups.

- Receive Voice Call and SMS Alerts:
- Mobile Number: Choose the country code from the drop down list and enter the phone number of the contact. Alerts will be sent to this phone number via voice calls or SMS.
Note
The phone number should be set up and verified to receive any alerts. To receive the verification SMS, you've to choose a required SMS or Voice Call provider from the available list of providers. After a number is verified, you'll be able to send Test SMSs and Voice Calls to that number. If you've shared your mobile number while signing up to Site24x7, you won't receive any alerts until you verify the mobile number. After verification, this number will be automatically treated as your primary number.
Based on the alert configuration, SMS and voice call notifications are delivered to users via service providers that are configured for their account. This configuration ensures region-specific compliance across geographies. As part of our GDPR compliance, we've got into specific agreements with our sub-processors (all supported SMS and voice providers) to ensure they address the pressing needs of the current security and privacy trends. - User Role: Select the desired role from the drop down list for each product; Site24x7, StatusIQ, and CloudSpend. Then provide the appropriate access permission for this contact.
Note- Once the contact (outside Site24x7 organization) is added, he/she will receive an invitation from noreply@zohoaccounts.com to join the Site24x7 organization. The sub user needs to follow the instructions in the email to create an account.
- A user having an account with another organization under Zoho, must delete his/her account from that organization first, to be able to acccept the invitation from Site24x7 organization. Contact Site24x7 support for the same.
Site24x7: - For each role, you can choose to allow the access permissions to all monitors or specific monitor groups.
- Admin user has access permissions to all monitors.
- To add a sub user to your account, you should have the organization admin privilege or the new user should be in the same organization.
- Learn more about different user roles and their corresponding access permissions.
Admins with Group-level permission: Admins with group-level access can not edit / modify profiles created by other users, but will have read-only permission.
- Allowed to Access : Choose the resources that can be accessed by the user.
- Associate to User Groups: Associate the user created to one of the user groups from the drop down list. If user group has not been created, see User Group.
- Notify Medium: Mention the medium through which your contact wishes to receive the alerts. The different medium available for notifying are Email, SMS, Phone.
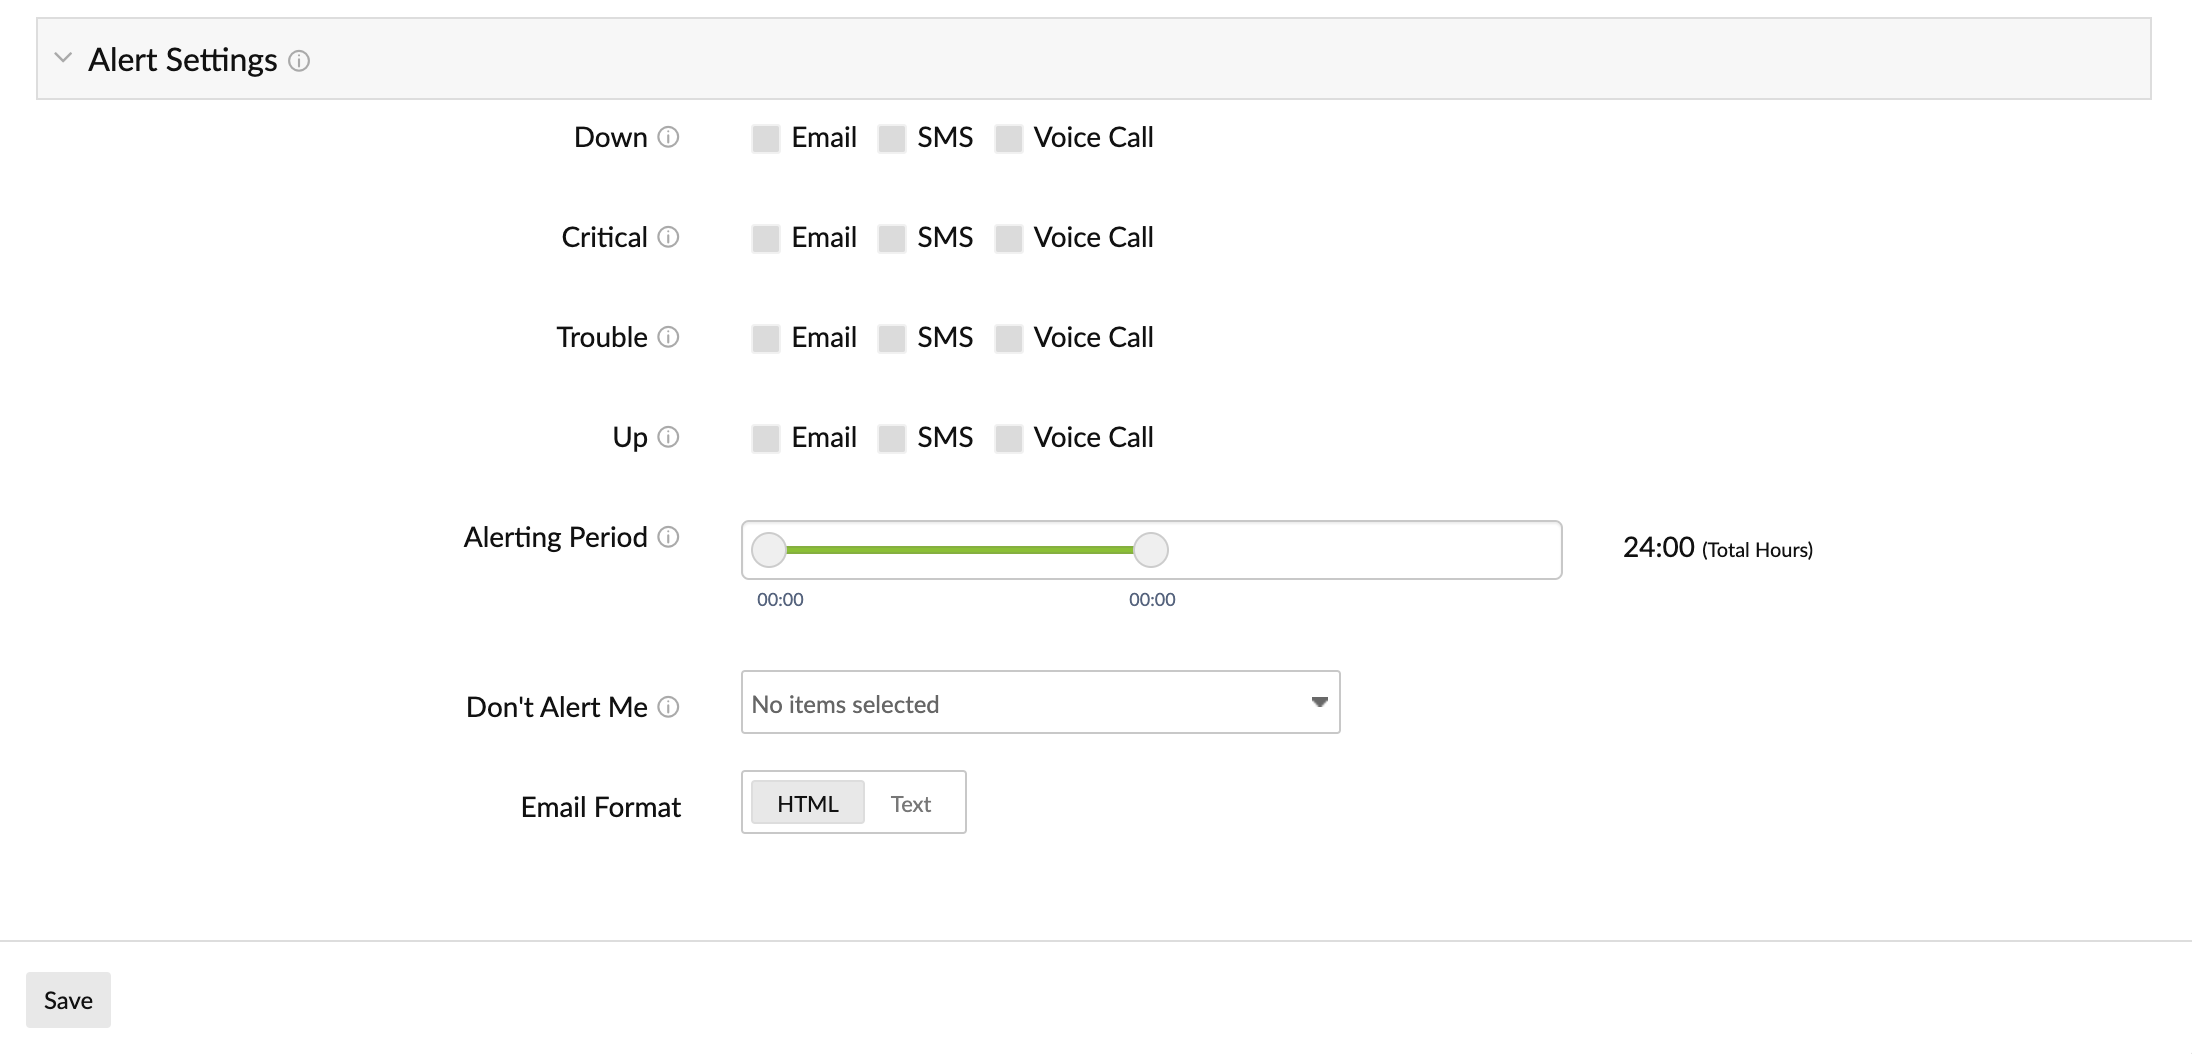
- Alert Settings- Specify the following details to configure Alert Settings:
- Down, Critical, Trouble, Up: Configure the preferred mode of alerting for Down, Critical, Trouble and Up alerts. Choose from different alerting mechanism viz Email, SMS,and Phone.
Note
There is a cap of 500 alert emails per day to prevent your mailbox from flooding with alerts. However, this restriction is only for one day; it would be reset to the default value at midnight and you would start receiving the alert emails until it overshoots the set threshold of 500 emails the next day.
This option is applicable only for Site24x7 users.
You can always customize your notification mode of alerting by clicking on the preferred notification mode boxes. Incase you wish to learn more about the common "Alerts" related queries and solutions, read our Kbase articles on this topic. - Alerting Period: You can move the slider to choose the time window for receiving SMS/Voice alerts. The option is not applicable for email based alerts.
- Don't Alert Me: Define the days of the week when you wouldn't want to receive SMS/Voice alerts. It is not applicable to email based alerts.
Although you'll not receive any SMS/Voice alerts during this period, you will still be able to view the performance log details in the web client. - Email Format: Choose the format of the alert email which you want to receive from Site24x7.
NoteLearn how to customize your alert email template.
- Down, Critical, Trouble, Up: Configure the preferred mode of alerting for Down, Critical, Trouble and Up alerts. Choose from different alerting mechanism viz Email, SMS,and Phone.
- Click Save.
- The new user added will be automatically listed in Users screen along with other users already created.
Edit User/Contact
- Click the profile in the Users screen which needs to be edited.
- Edit the parameters that need to be changed in the Edit User window.
- Click Save.
You can't edit/change the email address you've provided in Add user form.
Delete User/Contact.
To remove users from a particular product, choose None from the drop-down next to the product. To remove a user from all product accounts choose Delete.
- Click the profile in the Users screen which needs to be deleted.
- This will navigate to Edit User window.
- Click Delete.
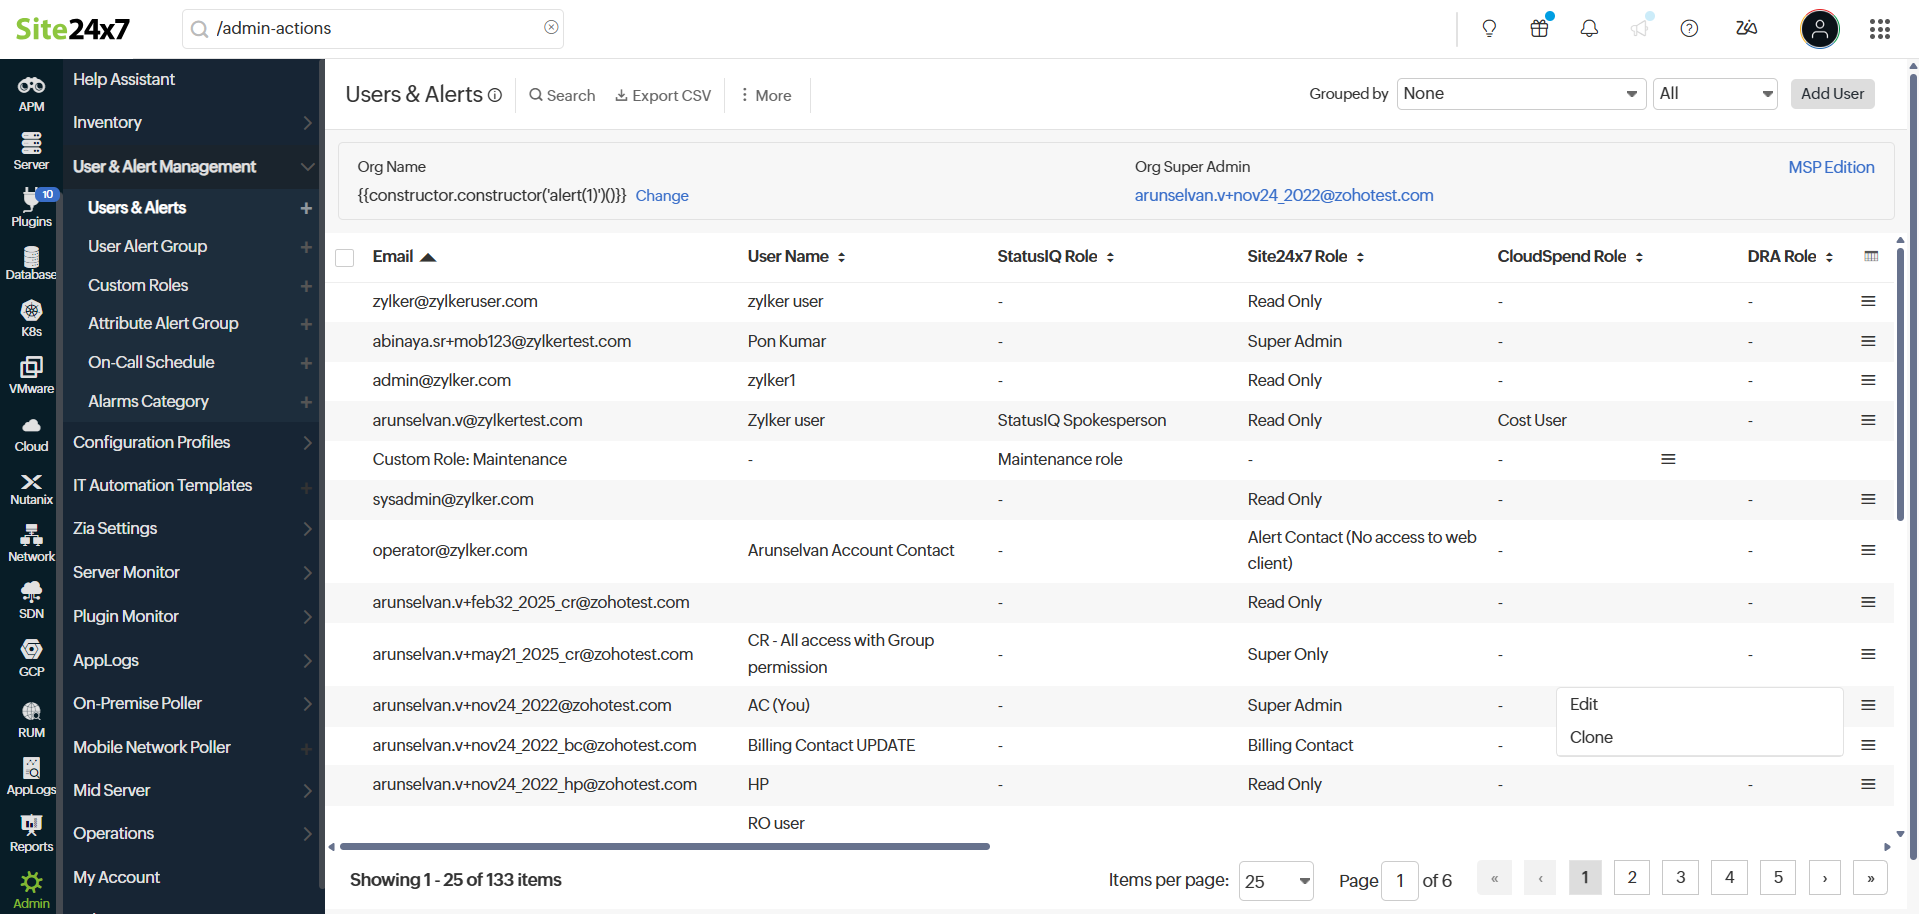
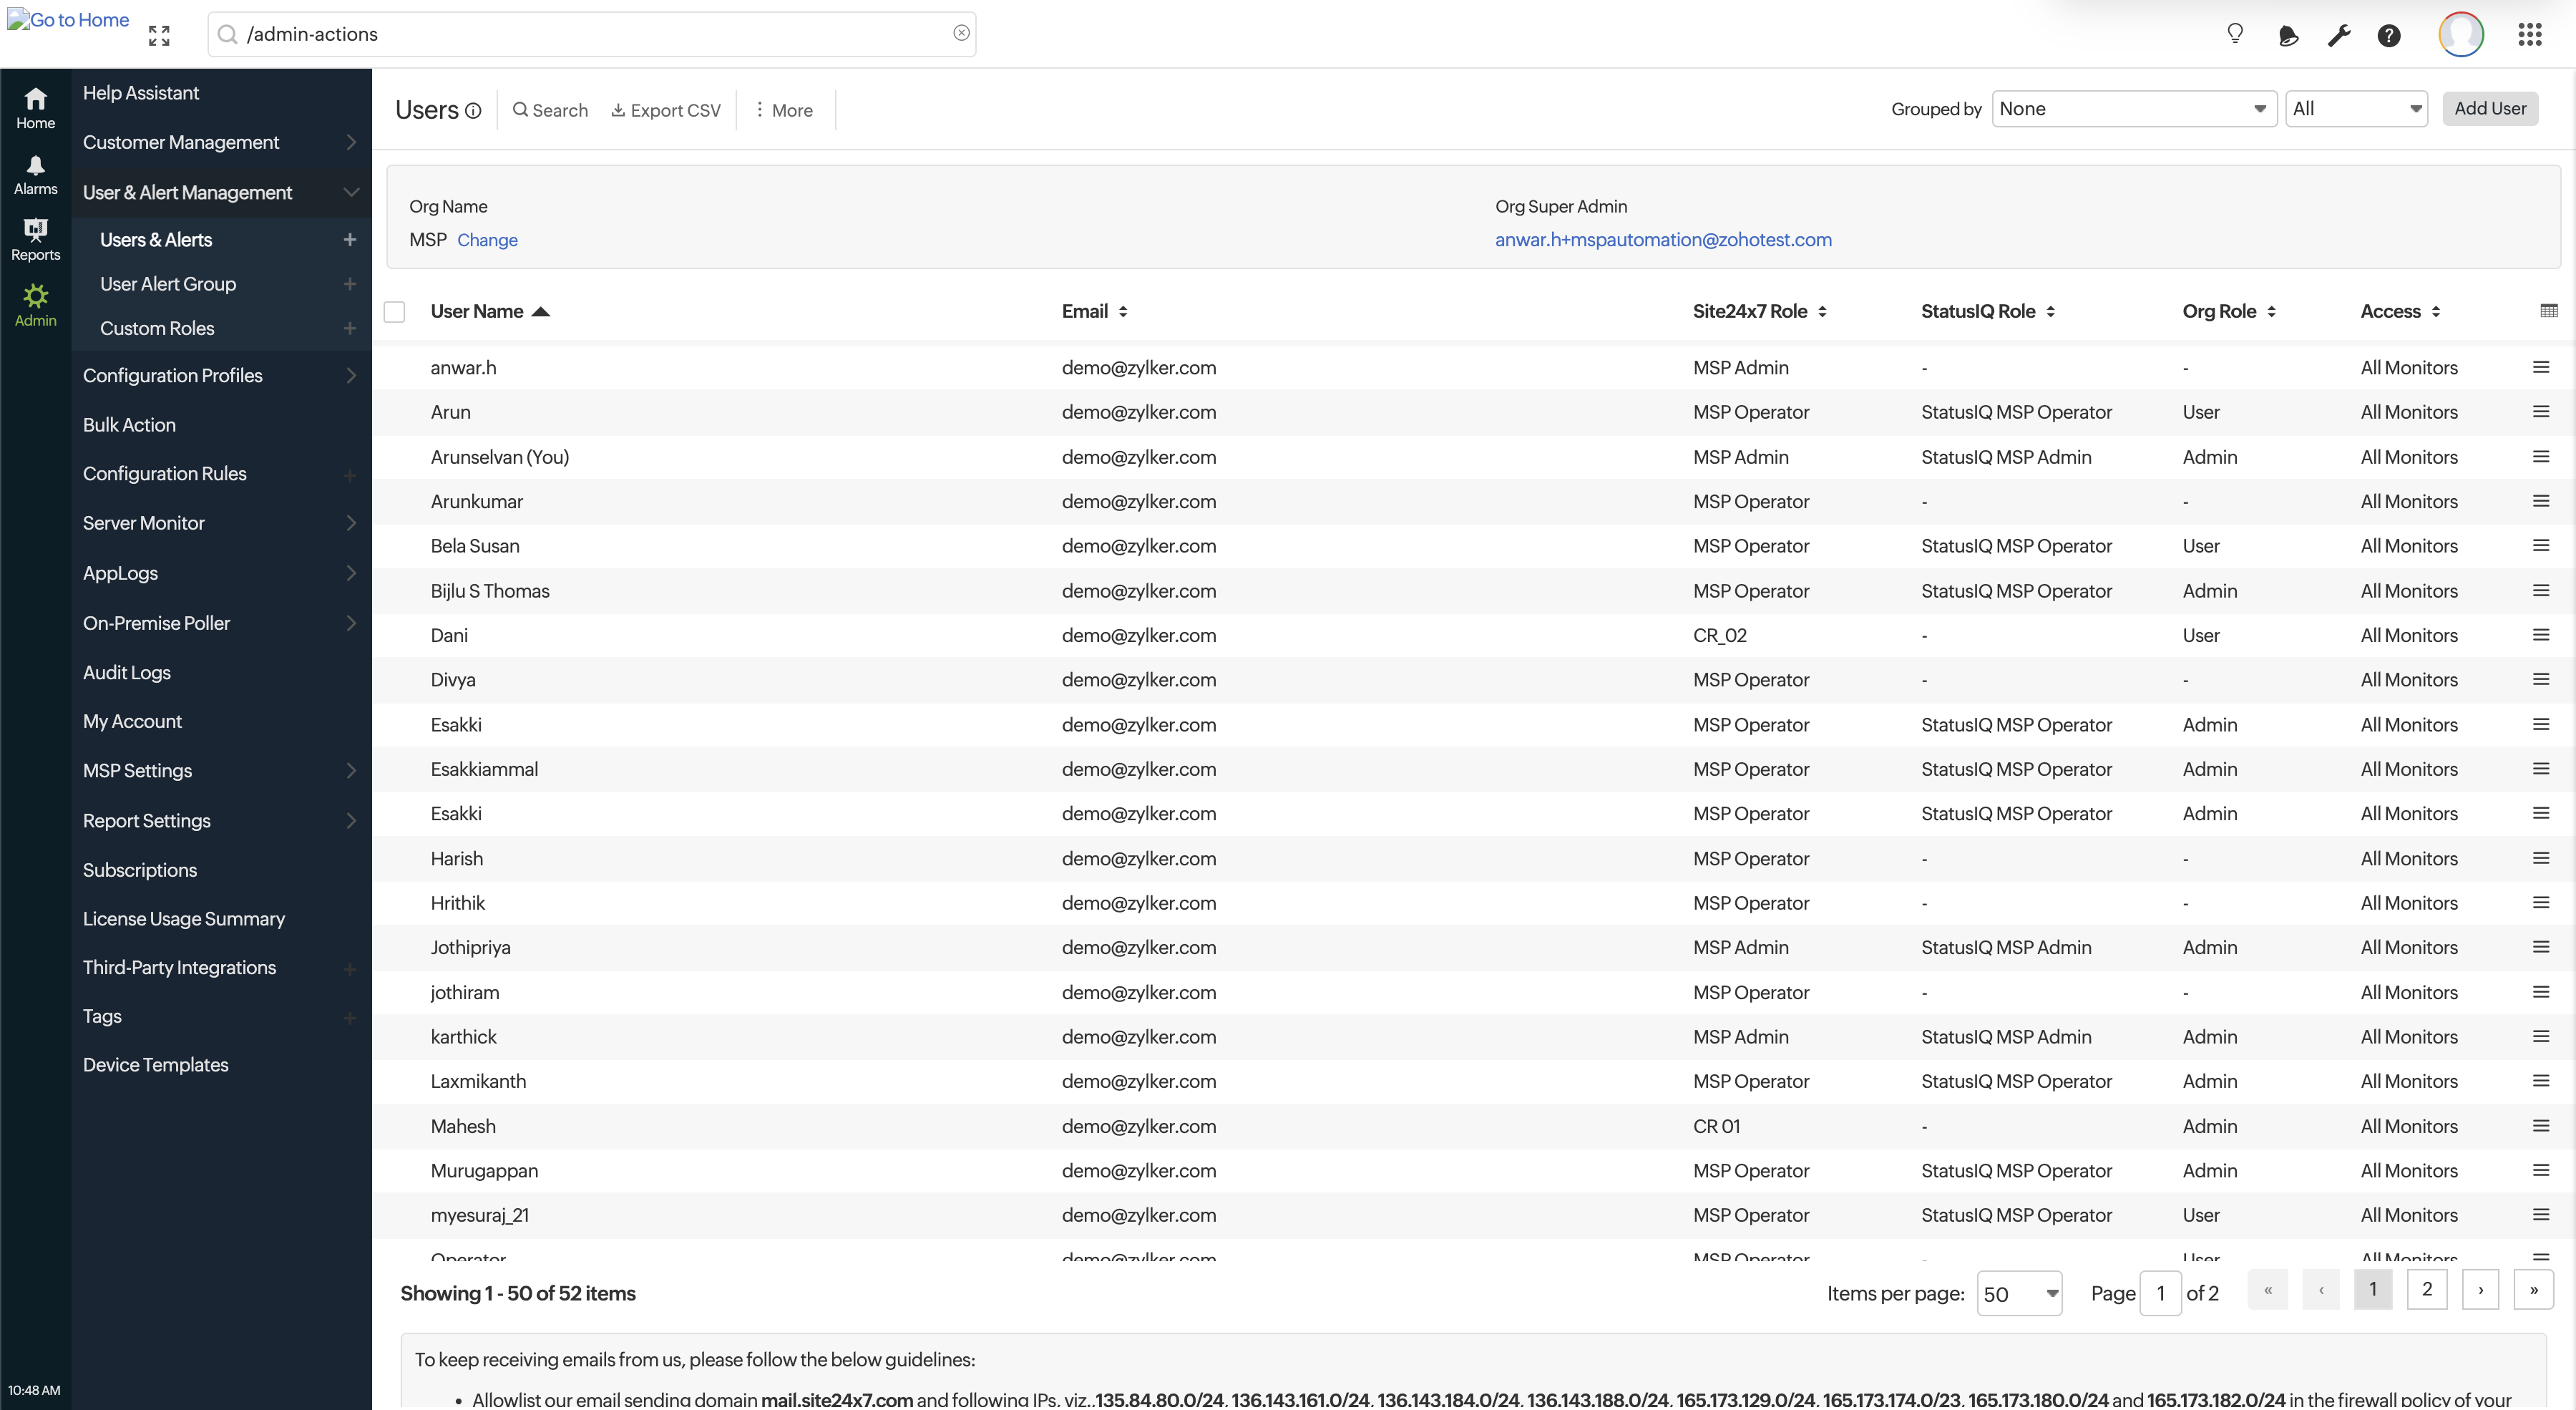
Users and Alerts view
Get a comprehensive overview of the user information and their activities associated with the organization.
- User Name: Displays the name of the user.
- Email: Displays the email address of the user.
- Roles: Product roles represent the specific user roles associated with related products. These roles are designed to define permissions and responsibilities within the respective platforms, ensuring that users have the appropriate access to perform their tasks effectively. The available product roles include:
- Site24x7 Role
- CloudSpend Role
- StatusIQ Role (for Status Page)
- Digital Risk Analyzer Role
- Mobile Number: Displays the contact number that receives alerts based on the alert settings and notifications.
- Org Role: Displays the user's role in the organization. Based on the role, the user's access varies. Learn more.
- Status: Displays the status of the user under three different categories:
- Allowed: A user who has access to Site24x7.
- Invited: A user who has been invited but they are yet to accept the invitation.
- Verified: A verified alert contact who is configured to receive alerts.
- Access: Displays whether the user has access to all monitors or only specific monitor groups.
- Invited By: Displays the name of the person who sent the invitation.
- Onboarded: Displays when the user was granted access to Site24x7.
- Updated By: Gives information about the individual who updated the corresponding user information.
- Last Updated: Displays when the user information was last updated.
- Last Login: Mentions the date of the user's last login.
- The Last Login field is not available for MSP and BU customers.
- The fields Updated By, Updated On, Invited By, and Joined On display information starting from December 2024. Data before this date is not available.
Enable MSP
MSP Edition lets you manage your customers' IT stack efficiently with our secure, scalable, and affordable monitoring suite for MSPs and CSPs. White label your monitoring platform and reports with a custom name, logo, and URL so that you can promote your brand, and customers can identify with it. You can enable MSP Edition during evaluation. However, you must have a Super Admin access.
Learn how to convert Site24x7 eval account into MSP Edition.
Enable Teams Management
Teams Management enables you to segregate and streamline IT monitoring among different teams in your organization from a single console. It lets you organize and administer individual monitoring accounts based on business application, geography, type, and resource ownership. You can enable Teams Management if you're subscribed to any of the following Site24x7 Paid plans: Business, Advanced, Premier, Pro, Classic, Elite, Enterprise, Enterprise Web, Enterprise Plus Web, and have a Super Admin access. Read our Kbase article to learn how to enable Teams Management.

User Roles and Role based Access Permissions
Understanding the key concepts like Zoho Organization Role and Site24x7 Roles is essential to operate and manage your Site24x7 account. Explore more about the various access privileges.
Learn how to view and update your Site24x7 account settings.