Adding a Zerto backup monitor
Zerto backup monitoring provides continuous data protection, disaster recovery, and backup capabilities. It offers real-time insights into recovery point objectives and recovery time objectives, which help in creating an effective disaster recovery plan.
In backup strategies, organizations typically schedule backups at set intervals, often weekly. However, this means that a disaster could permanently erase any data created between backup cycles. Zerto addresses this risk by utilizing continuous replication, which significantly reduces the risk of data loss and improves recovery objectives.
Zerto does not align with traditional backup job structures. To address this architectural difference, we have introduced two dedicated performance metric types specifically for Zerto environments:
- Zerto Analytics: This performance metric type functions similarly to a parent-level monitor, delivering a unified summary view across geographically distributed environments.
- Zerto organization (ZORG): This metric type functions as a child-level monitor, representing the individual Zerto instance deployed at a specific client location.
Prerequisites
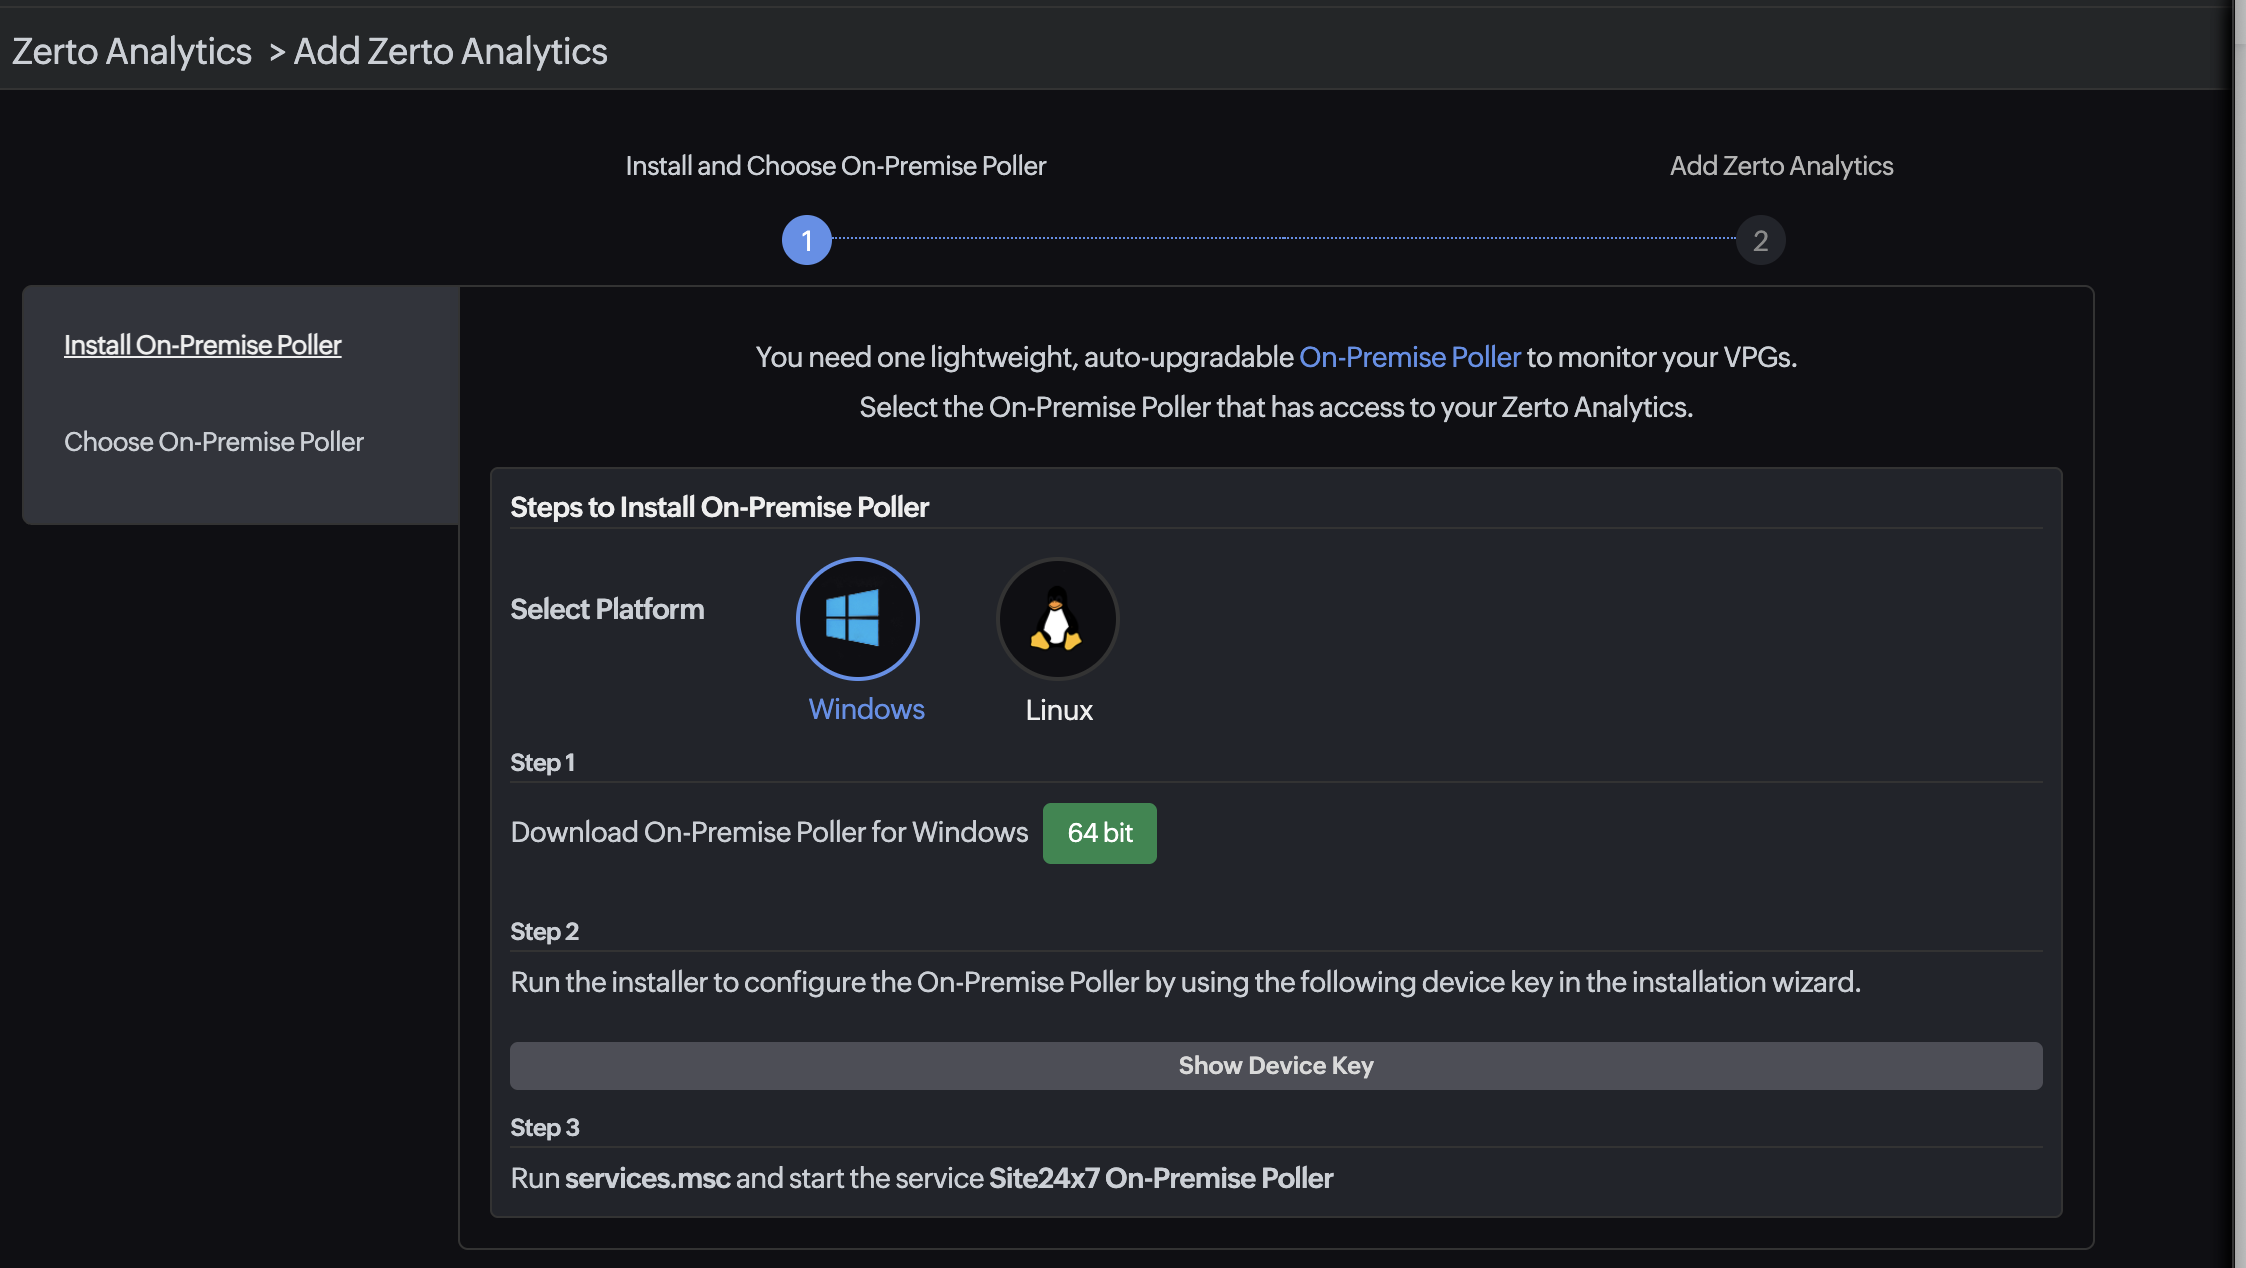
- Install the latest version of the Site24x7 On-Premise Poller to ensure efficient data collection.
- Ensure the Zerto Analytics monitor can access the cloud host URLs listed in your intranet access list.
Adding a Zerto Analytics monitor
- Log in to your Site24x7 account.
- Follow any of these navigation paths for adding a monitor. Each path leads to the same configuration page, where you can set up monitoring for your Zerto monitor:
- Navigate to Admin > Inventory > Add Monitor > Zerto Analytics.
- Navigate to Server > Backup Monitoring > Zerto Analytics (+) on the left panel.
- Alternatively, navigate to Home > Monitors (+) > Zerto Analytics.
- Click Install On-Premise Poller if you don’t have any existing ones set up to monitor your Zerto monitor. Then, follow the steps to add an On-Premise Poller. Once it's added, select the required On-Premise Poller as directed in the next step.
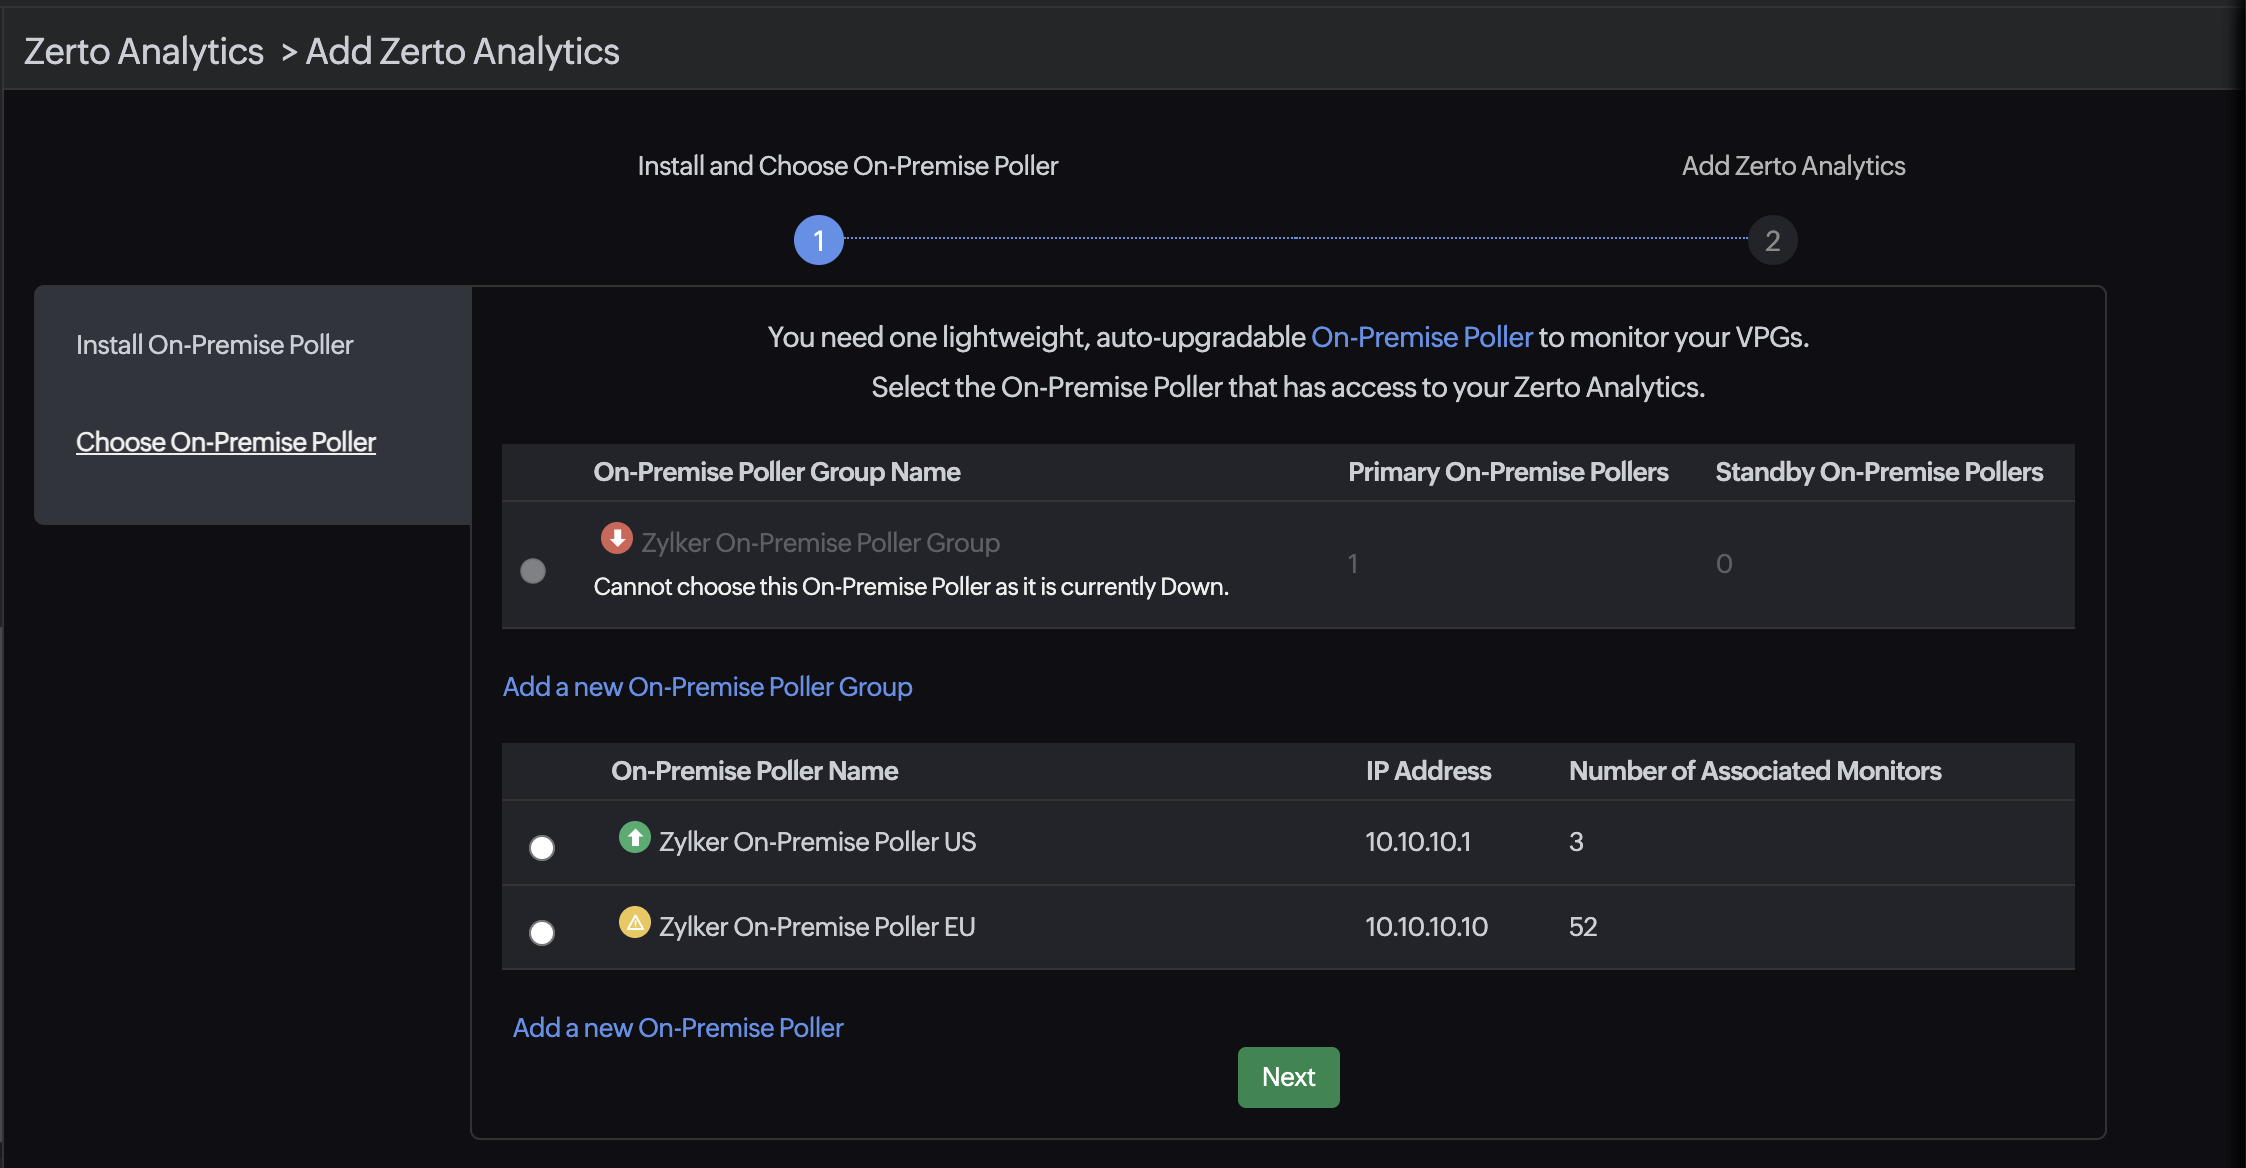
- If you already have an On-Premise Poller installed, click Choose On-Premise Poller and select the required one. Then, click Next.
- Click the Add Zerto Analytics button.
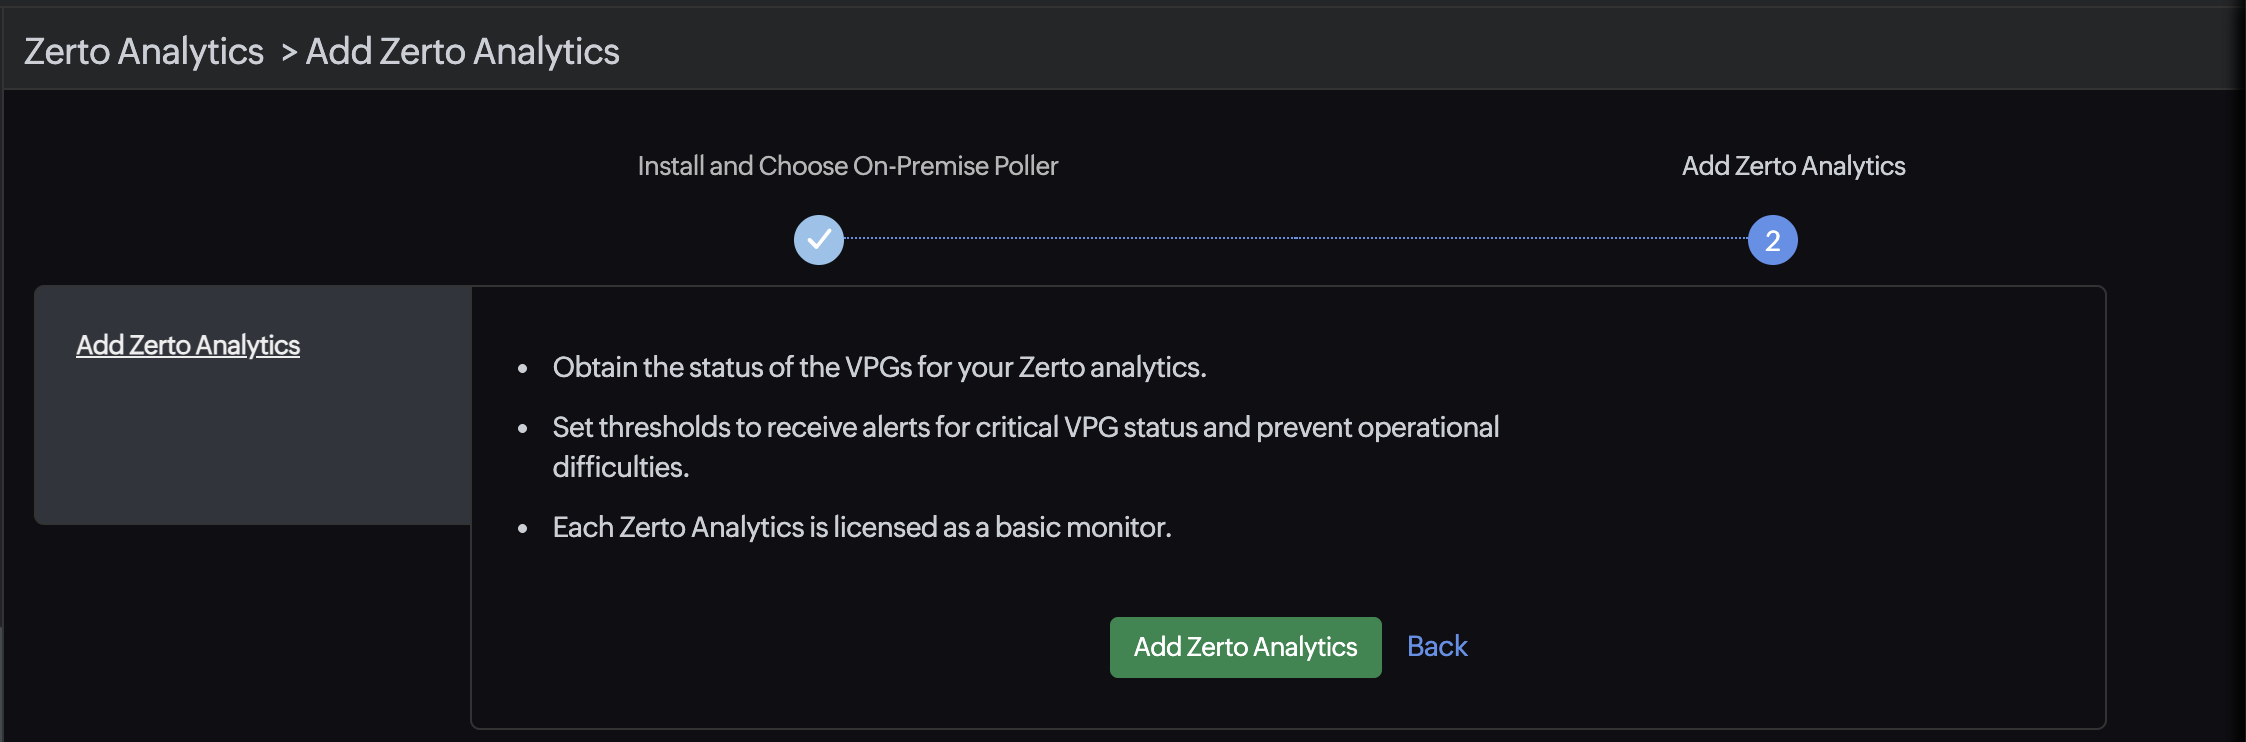
- Provide the following details to configure the Zerto Analytics backup monitor:
- Display Name: Set a display name to easily identify the Zerto Analytics monitor.
- Check Frequency: Select the desired polling frequency from the available options in the drop-down menu.
- Location Profile: Select the location profile from the drop-down menu to determine where the Zerto Analytics monitor will be monitored from.
- Associate with Monitor Group(s): Select a Monitor Group from the drop-down menu to logically organize your monitors.
- In the Zerto Analytics User Credentials section, select the appropriate credentials from the Site24x7 Credential Profile or add new ones by clicking the plus icon + beside the field. Click the pencil icon
 to edit an existing one.
 - In the Add resources based on ZORG names section, you can choose to add a separate monitor for the ZORGs.
- Add separate monitor for every ZORGs: Toggle to Yes to add a distinct monitor for every ZORG present in Zerto Analytics. Toggling to No will result in a summary view that excludes ZORG performance metrics.
- Specify the details for Configuration Profiles:
- Threshold and Availability: Select a threshold profile from the drop-down menu, use the default threshold profile available, or create a new one. You will be notified if the resources surpass the defined thresholds and availability.
- Tags: Associate your monitor with predefined tags to help organize and manage your monitors creatively. Learn how to add tags.
- Specify Alert Settings:
- User Alert Group: Select the user group that needs to be alerted during an outage. Learn how to add multiple users to a group.
- On-Call Schedule: Select an On-Call Schedule from the drop-down menu to stay updated via notifications in the event of any incident or outage. Learn how to use On-Call Schedule.
- Notification Profile: Select a Notification Profile from the drop-down menu or select the default profile available. A Notification Profile helps you configure who gets notified and when in the event of downtime. Learn how to create a Notification Profile.
- In the Third-Party Integrations section, associate your monitor with a preconfigured third-party service. This lets you push your monitor alarms to selected services and facilitate improved incident management.
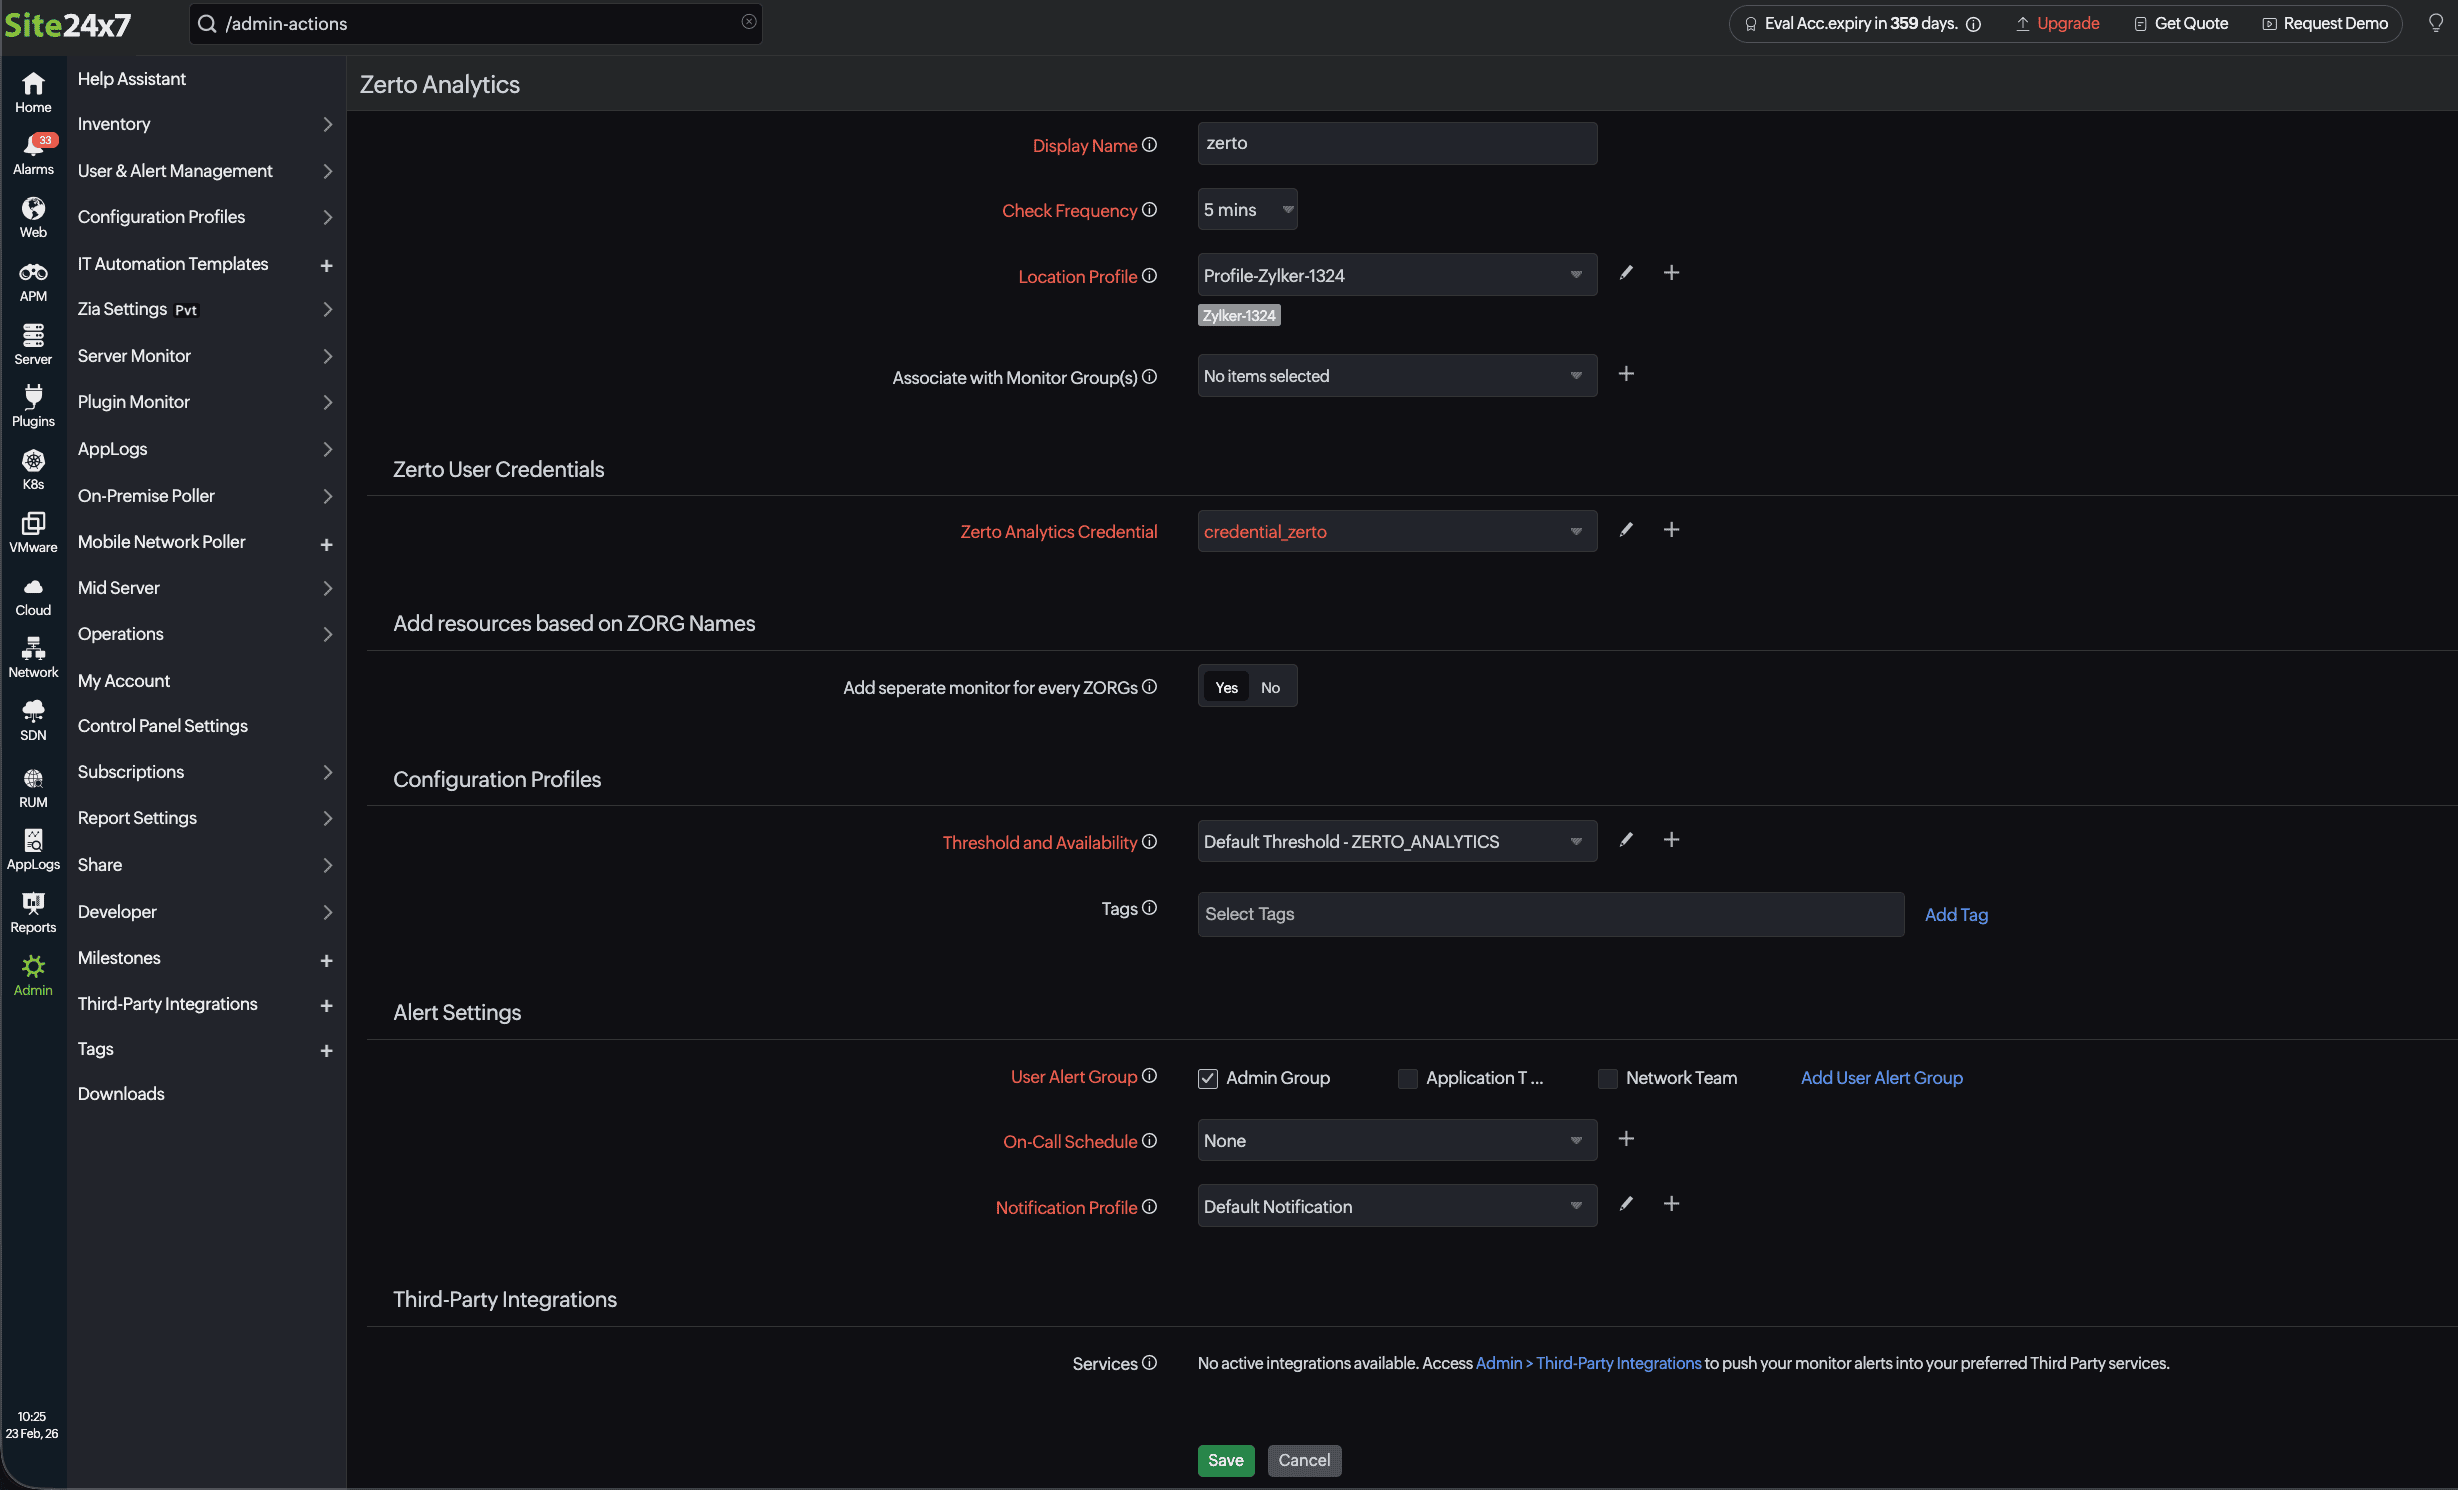
- Click Save.
Related article
-
On this page
- Prerequisites
- Adding a Zerto Analytics monitor