What is Bulk Action?
Bulk Action in Site24x7 helps you identify and select multiple monitors in a search and assign them to a particular admin action, such as monitor activation, deletion, suspension, modification of threshold groups, user alert groups, location profiles, or even actions like adding tags to sort monitors into a smarter view. It gives you the ability to perform bulk monitor actions seamlessly inside the web client, without using the APIs.
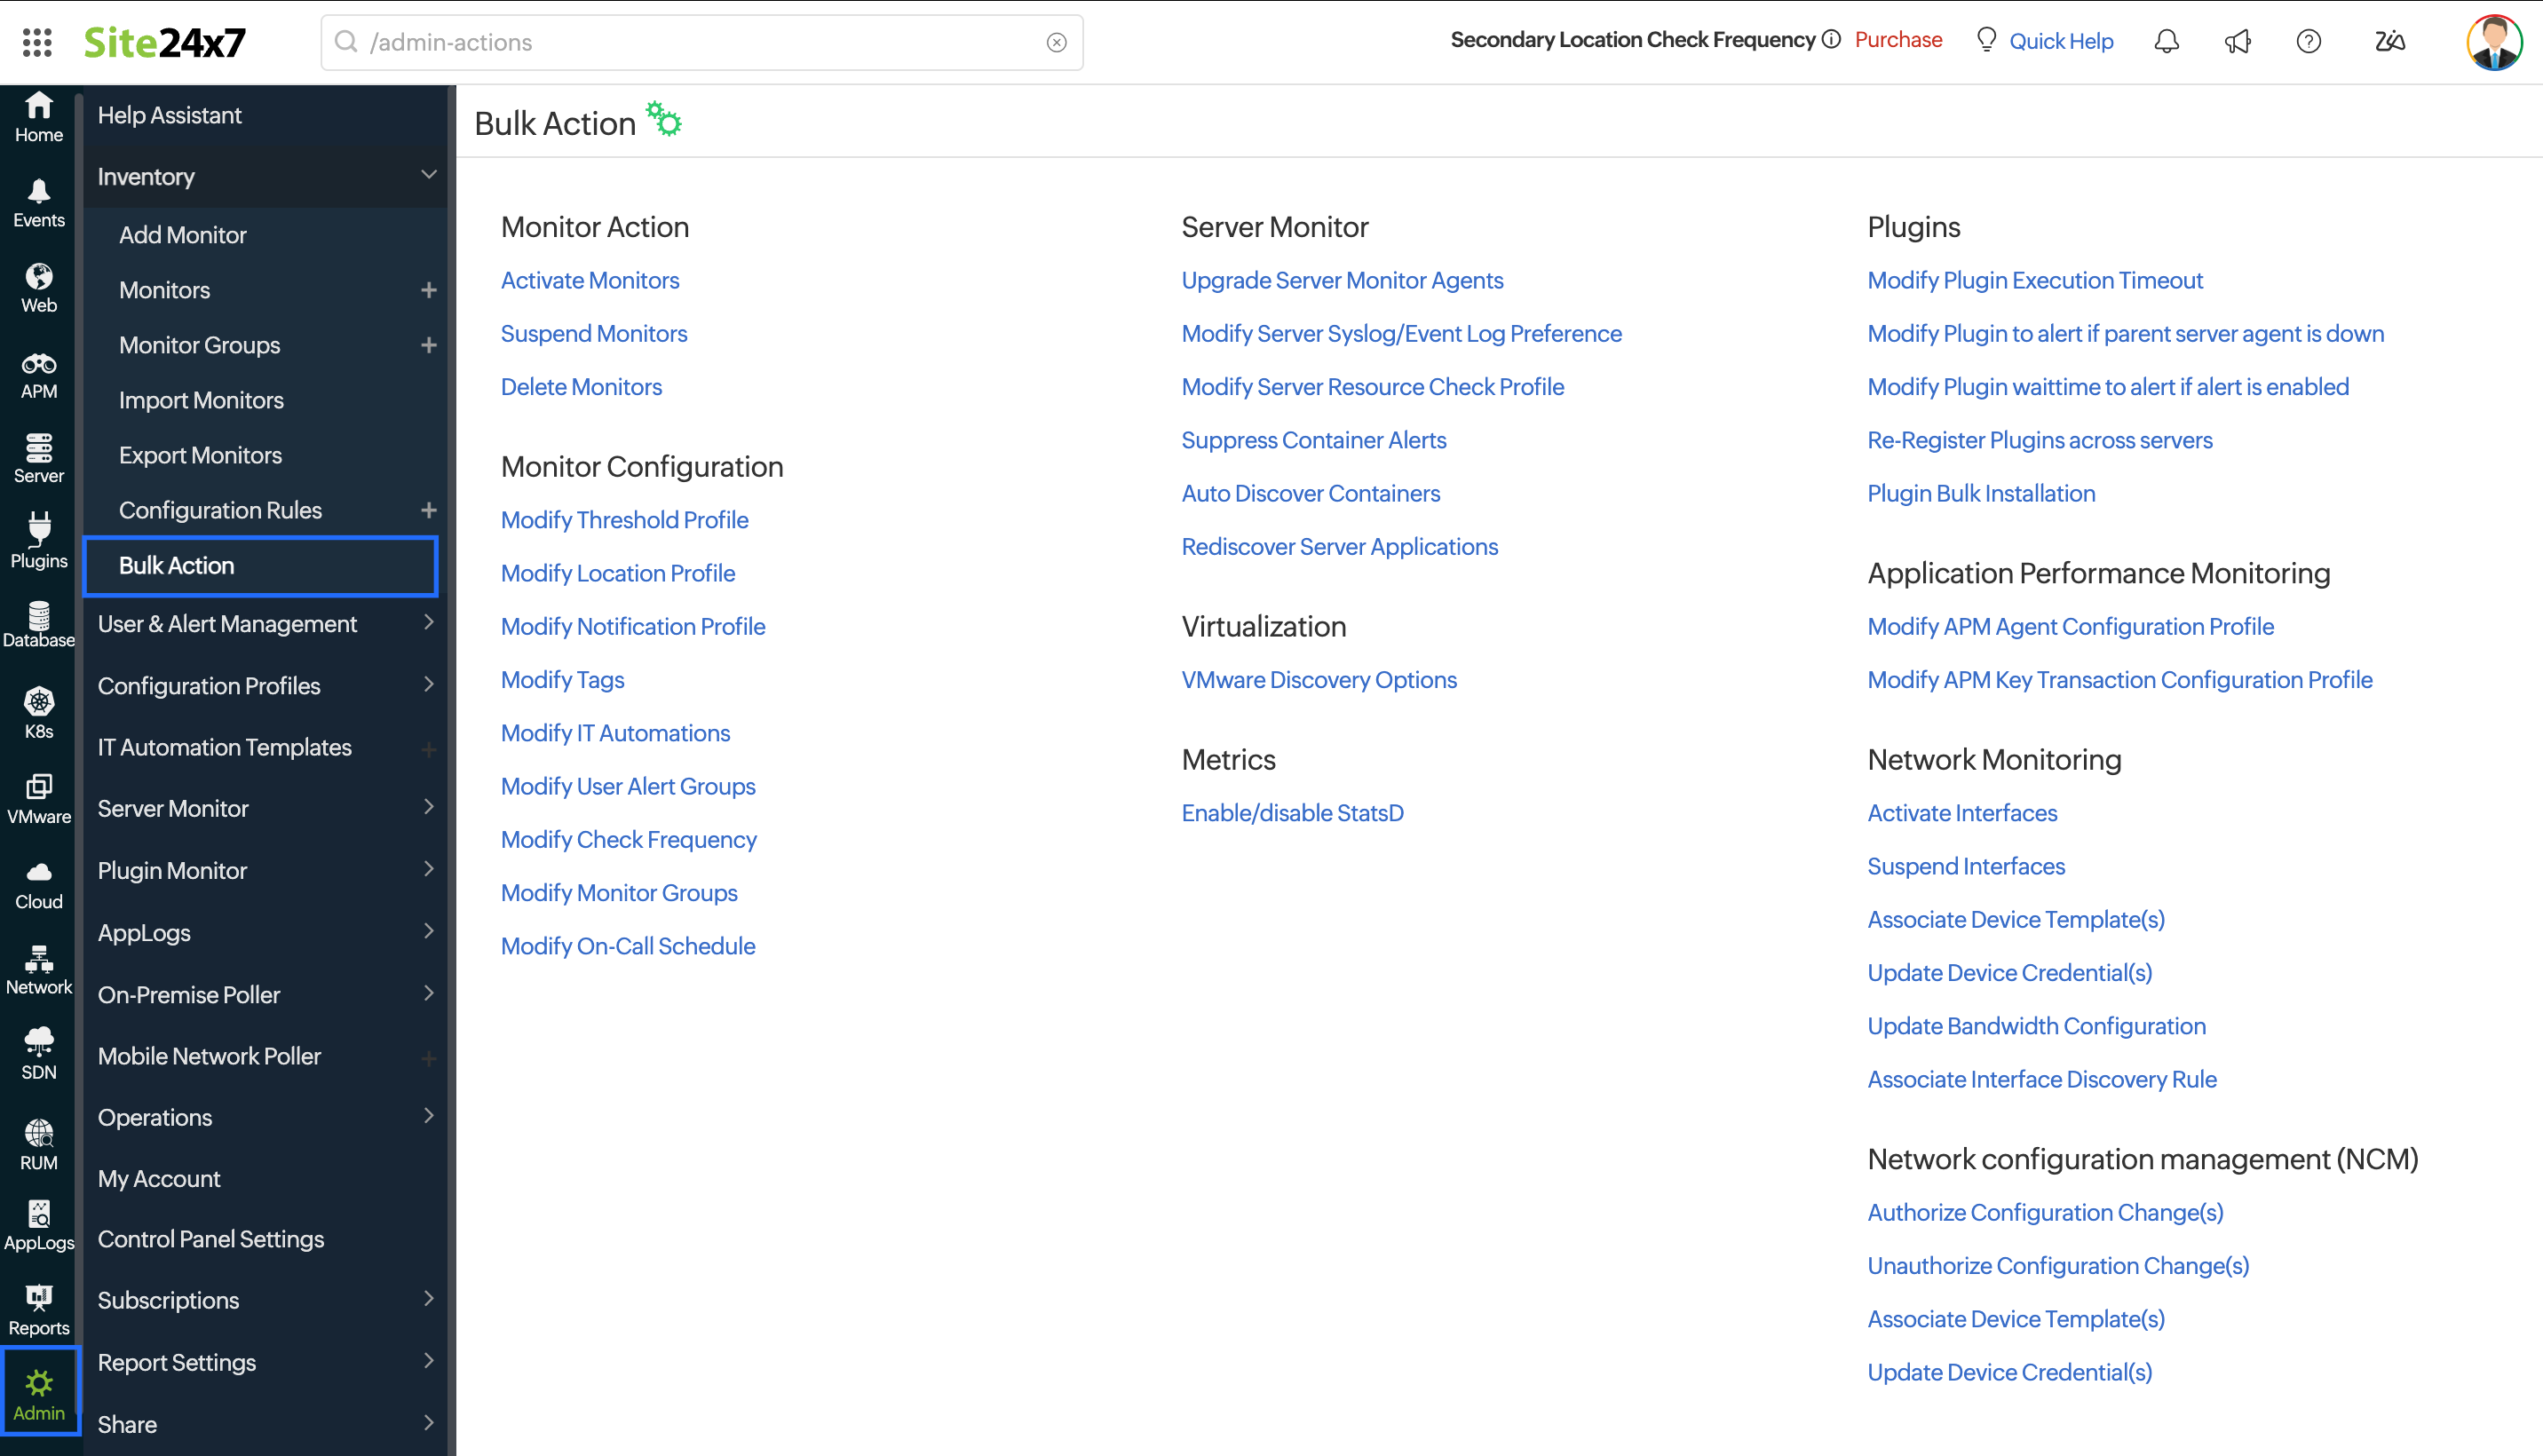
Site24x7 Bulk actions use built-in advanced search filters to identify monitors. You can then execute your required admin action on the selected monitors. Site24x7 allows you to perform all the bulk actions listed in the image below.
Perform Bulk Action
To perform a Bulk Action, follow the steps listed here:
- Login to Site24x7 webclient
- Go to Admin > Inventory > Bulk Action.
- Click the Bulk Action that you want to execute.
- You'll be directed to the Advanced Search Filter window. The search fields are like any other advanced custom fields—allowing you to create unlimited monitor search expressions. The search filter comes pre-selected with the All of these conditions (AND). With this selection, monitors will be filtered and listed when all the defined conditions are met. You can also use the radio button to choose the Any of these conditions (OR). With this selection though, monitors will be filtered when any of the defined conditions are met.
Note
As per your monitor search criteria, you can define unlimited search expressions using the field type, operator, and field value. The users can create and make use of these search expressions to identify monitors of choice.

- Based on your search expressions, you'll be able to filter a specific set of monitors. You can even delete or modify search expressions. Once the expressions are defined, click the Filter Monitors button to generate the relevant monitor list.
Note
While defining a search expression, you can add multiple values and press enter to define the criteria. Each value defined in the value field will be considered as an OR condition. For example—in the image below, the first search expression value has two separate values specified "Add Website Monitor_1532562458989" and "MailServerMonitor_edit". During the filteration, the OR condition will be implemented, meaning only monitors concuring to any of these conditions will be displayed.

- You're now shown all the monitors pertaining to your search criteria.
NoteYou can also re-use a recently created search filter by accessing the Recently used filters link. It'll list the previous five filters that you'd created.

- Execute Action:
Based on the Action that you've selected, associate the pre-configured profiles to relevant monitors. Once this is done, click the Save button to complete the bulk action.
If you want to change the profiles, (i.e, Threshold, Location, Notification, and Resource profiles) applied to your monitors in a single shot, simply select the required profile from the drop down, select the monitors and click Save.

- In case of User Alert Groups, similarly select any Alert Groups that you want to associate your montors with. Then, click Save.

- If you want to modify the monitor check frequency for multiple monitors, specify the poll interval, associate it to all your monitors, and click Save.
For monitor types like website, Rest API, SOAP, Ping, Port, SMTP, POP, and FTP under Enterprise, Enterprise Web, Enterprise Plus Web, Elite and Elite Web Packs the minimum check frequency can be set as 30 seconds. For all other users 1 minute will be the minimum supported check frequency.NoteConfiguring 30 seconds check frequency will be consuming the license of two basic monitors.

- You can similarly enable Event Log/Syslog monitoring for your selected Server Monitors using the toggle button. Also, you can specify a Script execution timeout period in seconds and apply it across your Server monitors.
-
In case of APM monitors, you can add, suspend, or delete in bulk based on instance type or instance status.

-
Use associate with monitor groups bulk action to associate many resources (Monitors/Monitor Groups) with multiple Monitor groups in a single go. You can use Disassociate from monitor groups bulk action feature to disassociate multiple monitors from your chosen monitor group or numerous monitor groups—on a single click. A monitor that gets disassociated will only be removed temporarily from the group, and not deleted permanently. You can always associate back the monitors using the Bulk Action feature. If you wish to associate/disassociate monitors from your Monitor Group(s), select the monitors and pick the group(s) to which you want to associate/disassociate from. Then click Save.

Bulk Action: Activate/Suspend/Delete
While performing the following actions: Activate/Suspend/Delete monitors/groups in Bulk, a backgroud task is also activated in the Monitor list view for a better user management. On clicking the task icon, you'll be prompted with a detailed message about the actual status of the bulk action. An email will also be triggered to the user based on the status of the operation.
The following task icons will help you distinguish among the different task statuses.
Task Status Icon Success 
Complete Failure/
Partial Success
Under Progress 

- You can associate tags to monitors. In the Execute Action window, pick the tags you wish to associate with your monitor, select the monitors and then all the tags your monitor was associated with previously will be replaced with the new tag. Then click Save.

- Execute IT Actions: You can modify your existing IT automation actions, by adding multiple actions, status and associating the actions and status to your selected monitors. If you click the Save button without adding any automations, all previously mapped automations will get removed.

Modify Tags/Monitor Groups/IT Automation/ User Alert Groups
Modify the tags associated with monitors, existing monitor groups, IT automation or any of your alert groups using Bulk Action.
For instance, to modify your tags, click on Modify Tags in the Bulk Action page and in the new Execute Action page that opens, provide the tags of your preference in the Tags field. Choose the action which you'd like to perform using the Operation field, from the three options provided:
- Append: Choose this option to add a new tag along with the existing tags.
- Overwrite: Choose this option to replace an existing tag with a new tag.
- Remove: Choose this option if you wish to remove an existing tag.
Click Save.
Delete monitor groups in bulk
The bulk delete monitor groups feature lets you remove multiple monitor groups and their subgroups in one step. By using advanced filters such as monitor group name and tags, you can easily identify outdated or unused groups and clean up your inventory. This is useful for large environments where deleting groups one by one is time consuming and hard to manage.