Cisco Meraki topology views
Visualizing your Meraki network infrastructure is key to identifying dependencies, performance bottlenecks, and failure points. Site24x7's Cisco Meraki topology view provides intuitive visualization options to help you understand and monitor your network at a glance.
If your Meraki organization contains multiple networks (such as by site, region, or function), Site24x7 lets you filter the topology view based on these classifications. This mirrors the network groups defined in the Meraki dashboard.
- Where to find it: Use the Network drop-down at the top-left of the topology view.
- Why it's useful: It allows you to focus your view on a specific Meraki network—for example, a branch office, data center, or test environment—without clutter from other segments.
Use case: Select the New York office network to troubleshoot a local access point issue without displaying devices from other regions.
Available topology views
- Node Link view
The node link view provides a flat, real-time map of how devices are interconnected. Each device appears as a node, with links representing direct communication paths.- Ideal for: Quickly understanding peer-to-peer relationships and interdevice communication.
- Use case: Spotting redundant or missing links between switches and access points to identify potential points of failure.
- Node Tree view
This view presents a structured, hierarchical layout of devices in the Meraki network. It organizes devices across logical levels.
Orientation options:- Vertical view: Displays the hierarchy top-down, making it easier to follow command flow and trace down from the core.
- Horizontal view: Expands the view from left to right, useful when presenting on wide-screen displays or analyzing lateral device relationships.
- Ideal for: Understanding the overall network design and hierarchy, identifying cascading failures, and verifying network segmentation.
- Use case: Diagnosing connectivity issues from an access point to the core router by visually tracing through each hierarchy layer.
Viewing the Meraki topology map
- Log in to your Site24x7 account.
- Navigate to SDN > Meraki. Then, click the required device.
- Click the Topology tab to view the map.

Figure 1. Node Link topology map. - Select the required network from the top-left section of the map. Zoom in to view detailed device icons; use your mouse scroll to zoom in and out of the topology map.
- Use the fit to view icon
 on the top-right section to center and scale the entire topology map to fit within your screen.
 - Hover over a node to view the device details. Then, click the open in a new tab icon
 to view the Monitor Summary.
 - Toggle between Node Link and Node Tree views on the top-right section of the map. Figure 1 displays a Node Link view while Figure 2 shows a Node Tree view.
- In Node Tree view, click the adjustment icon
 to change the Orientation (Vertical or Horizontal), Level Spacing, and Node Spacing. If a node displays a number, you can click it to expand and view the individual devices grouped under that node.
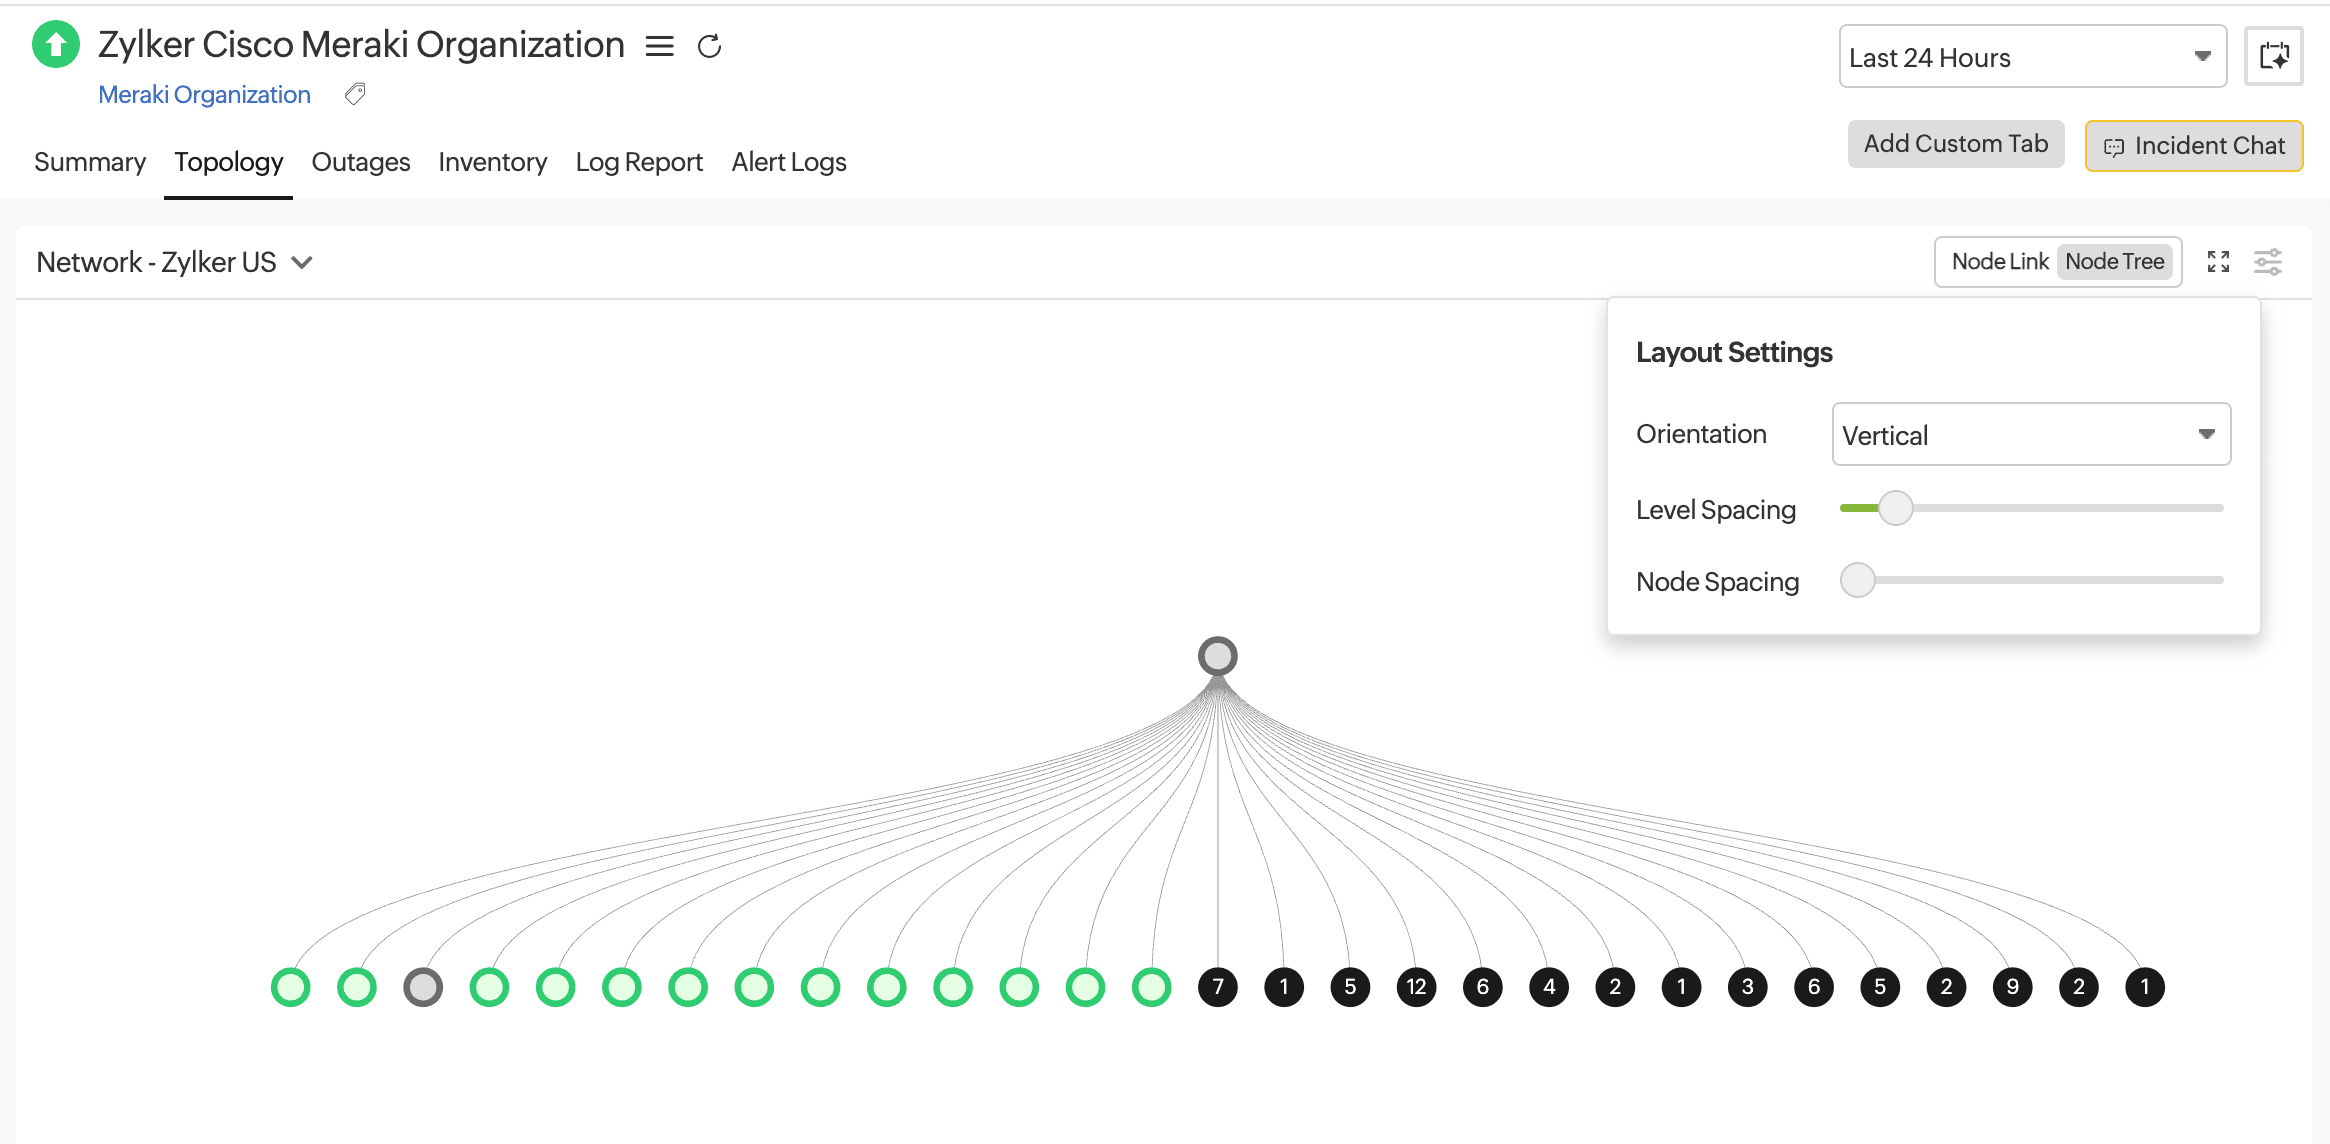
Figure 2. Node Tree topology map.
Related articles
-
On this page
- Available topology views
- Viewing the Meraki topology map