
Flow Controls in Workflows
Flow Controls help you control the sequence, conditions, timing, and outcome of Workflow execution. While you're orchestrating a Workflow, these controls enable you to pass data between states, create conditional paths, run tasks simultaneously or in batches, introduce delays, and explicitly mark an execution as successful or failed.
Flow Control states
Workflows support the following Flow Control states:
| State | Purpose |
| Pass | Passes input data to the next state and can also add or modify data before passing it forward |
| Branch | Evaluates conditions and directs execution through the appropriate path |
| Parallel | Runs multiple paths simultaneously and continues after the parallel executions are completed |
| Wait | Pauses Workflow execution for a specified duration before continuing to the next state |
| Batch | Processes multiple items from an input collection in batches using a Function, Webhook, or Workflow |
| Success | Terminates the Workflow and marks the execution as successful |
| Failure | Terminates the Workflow and marks the execution as failed, with an error message and reason |
How to access Flow Controls
Follow the steps below to access the Flow Controls:
- Log in to your account.
- Navigate to Admin > Automations > Workflows > Add Workflow. In the default builder that is rendered in the builder view, a visual flow structure containing the following states will appear:
- Start
- State 1
- Pass
- End
- You can add more Flow Controls to orchestrate the Workflow from the right panel by following the steps below:
- Select Flow Control from the right panel.
- Select and configure the desired state to include it in the Workflow.
Pass
The Pass state lets you forward data from one state to another without performing an action. You can also use it to add new information or modify the input data before it reaches the next state. This is useful when you need to prepare or enrich data between two processing steps.
For example, after retrieving server details, you can use a Pass state to add additional information such as an environment or location before passing the data to the next state.
Configuration
Follow the steps below to configure a Pass state:
- Add the Pass state to the Workflow.
- Configure the common state attributes.
- Configure the required input and output paths.
- To add data to the input, specify the Result Path and the corresponding value in the Result.
- Connect the Pass state to the next state.
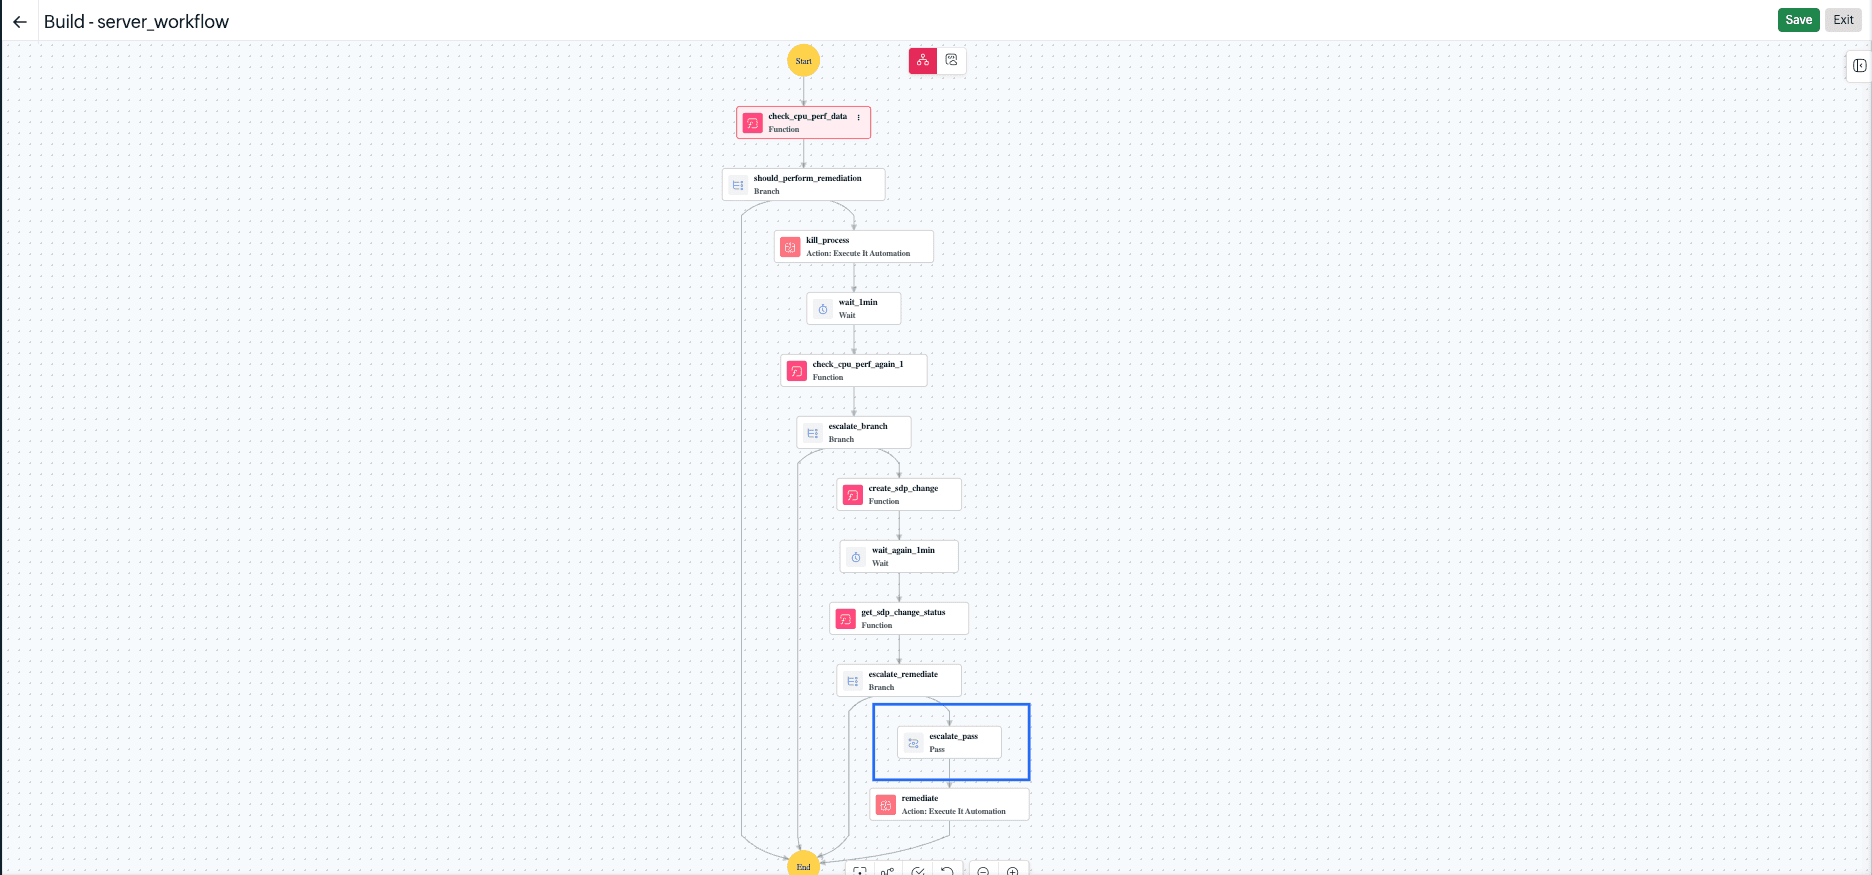
If the Result and Result Path are not configured, the Pass state will forward the input data as it is.
Branch
The Branch state lets you create conditional execution paths in a Workflow. It evaluates the input against configured conditions and directs execution to the corresponding state. This is useful when different actions need to be performed based on the result of an earlier step.
For example, a Workflow can check whether a server's CPU utilization exceeds a specified value. Based on the result, the Branch state can either trigger a remediation action or continue with the Workflow without taking corrective action.
A Branch state can contain multiple conditions, but only the path with the met condition is executed. You can also configure a default path for cases where none of the conditions are met.
Configuration
Follow the steps below to configure a Branch state:
- Add the Branch state to the Workflow.
- Configure the common state attributes.
- Select Add Condition to create an execution branch.
- Specify the condition and the state to execute when the condition is met.
- Add additional conditions as required.
- Configure a default path for cases where none of the conditions are satisfied.
- Configure the required input and output paths.
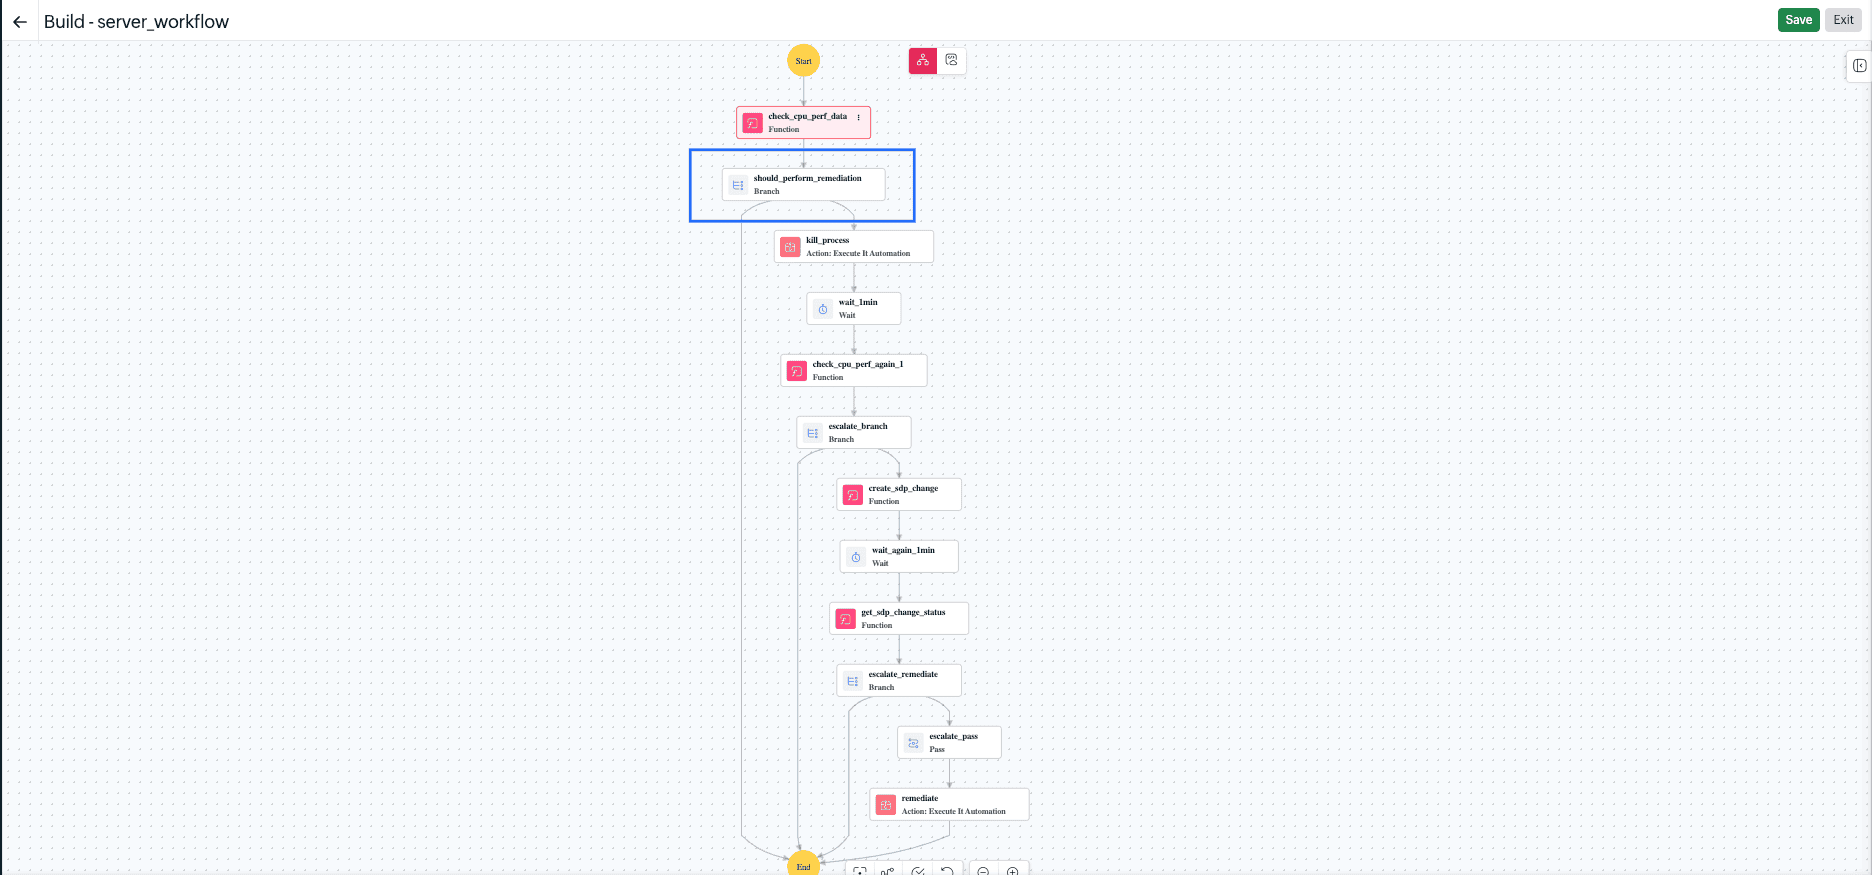
Branch conditions support operators for Boolean, numeric, and string comparisons, including &&, ||, ==, !=, >, >=, <, and <=< /strong>.
Parallel
The Parallel state lets you execute multiple Workflow paths simultaneously. Instead of waiting for one task to finish before starting another, you can run independent tasks at the same time and continue the Workflow after the parallel paths are completed.
For example, after identifying an affected server, a Workflow could simultaneously retrieve server details, collect logs, and send a notification to the operations team.
The Parallel state waits for all configured paths to be completed before moving to the next state. If a path fails due to an unhandled error or a Failure state, the Parallel state is considered failed.
Configuration
Follow the steps below to configure a Parallel state:
- Add the Parallel state to the Workflow.
- Configure the common state attributes.
- In the Path section, select Add Path.
- Specify the starting state and name for each path.
- Add the required states to each path.
- Configure the required input and output paths.
- Connect the Parallel state to the next state.
Wait
The Wait state introduces a delay into Workflow execution. It pauses the Workflow for the specified duration and resumes execution after the delay has elapsed.
For example, you can add a Wait state after sending a restart command and pause the Workflow before checking whether the service has started successfully.
The wait duration can be configured in seconds, with a maximum wait period of 30 days.
Configuration
Follow the steps below to configure a Wait state:
- Add the Wait state to the Workflow.
- Configure the common state attributes.
- Specify the required duration in seconds.
- Configure the input and output paths if required.
- Connect the Wait state to the next state.
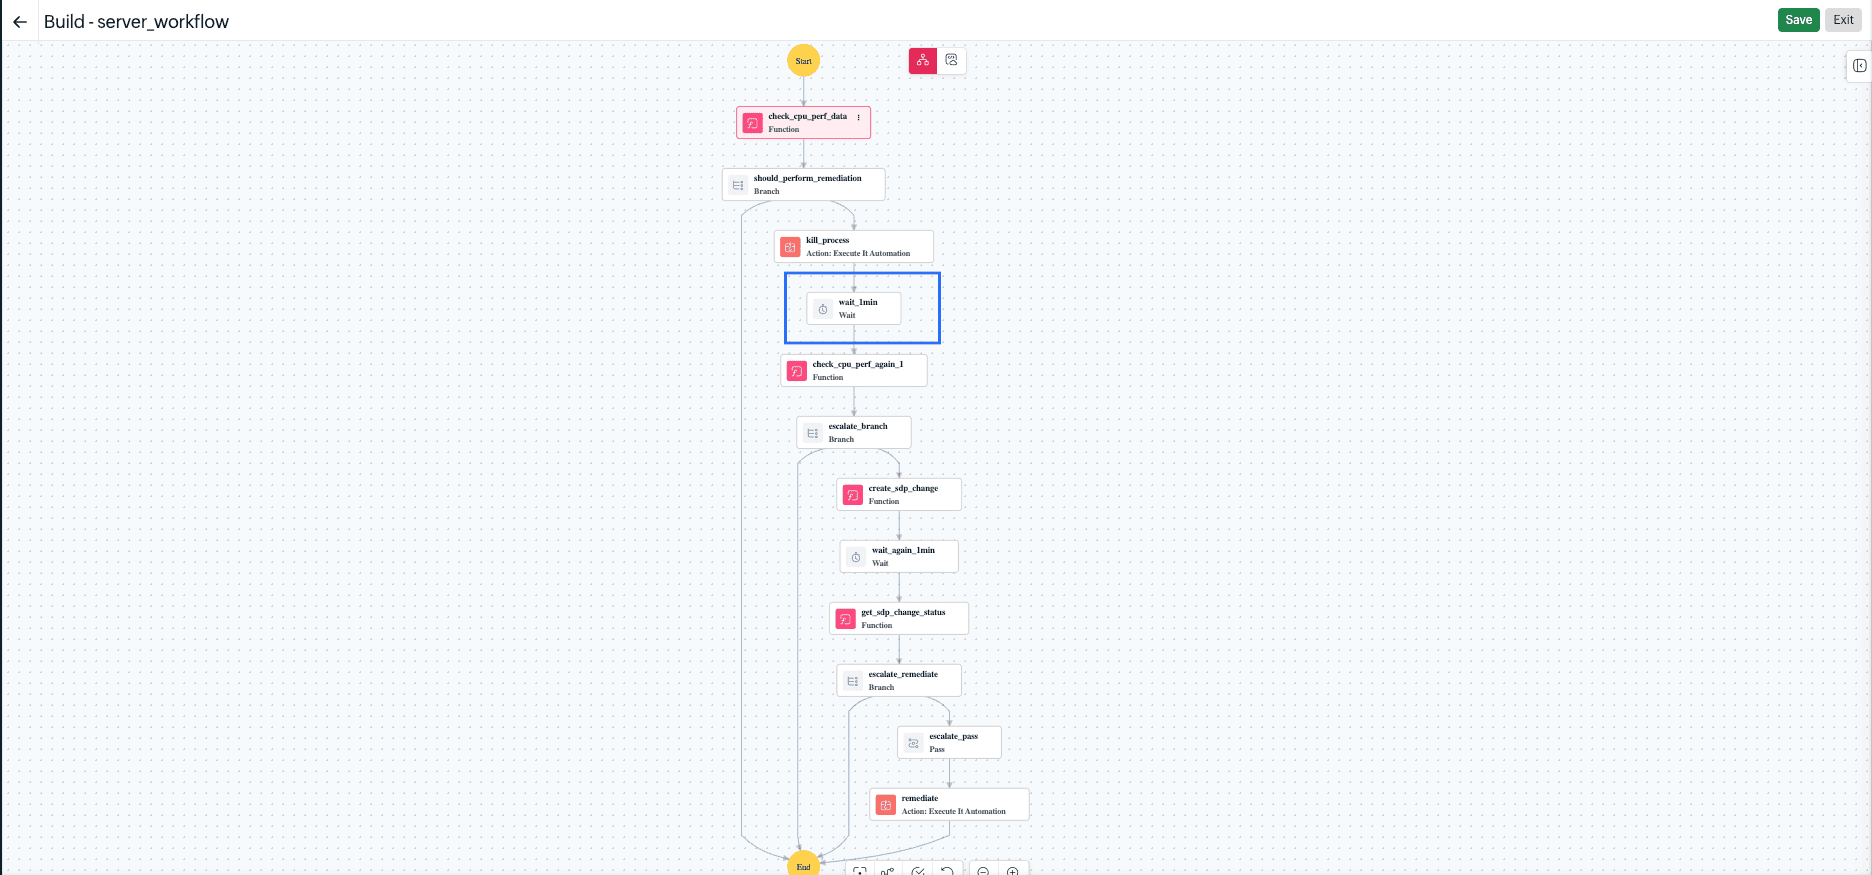
Batch
The Batch state lets you process multiple items from an input collection as separate jobs. It is useful when a Workflow needs to perform the same operation on a large number of resources without processing them all as a single execution.
For example, if a Workflow receives a list of servers that require a configuration change, you can use a Batch state to process the servers in groups rather than handling the entire list at once.
The Batch state can bind to a Function, Webhook, or Workflow. You can specify the input collection, the variable used for each item, and the number of jobs processed in each batch.
Configuration
Follow the steps below to configure a Batch state:
- Add the Batch state to the Workflow.
- Configure the common state attributes.
- Specify the Collection Path containing the array of items to process.
- Specify the Collection Variable used to access each item.
- Select the required Bind Type and associate the state with a Function, Webhook, or Workflow.
- Specify the number of jobs to run in each batch.
- Configure the required input, output, and result paths.
- Connect the Batch state to the next state.
The number of jobs determines how many items are processed concurrently in each batch.
Success
The Success state terminates a Workflow execution and marks it as successful. Use it when the required Workflow actions have been completed successfully and no further processing is required.
For example, after a remediation action is completed and the required validation succeeds, you can use a Success state to indicate that the Workflow has been completed successfully.
The Success state does not have a next state or input or output path. You can configure its name for identification in the Workflow and execution details.
Configuration
Follow the steps below to configure a Success state:
- Add the Success state to the Workflow.
- Provide a name for the state.
- Connect the preceding state or Branch path to the Success state.
Failure
The Failure state terminates a Workflow execution and marks it as failed. Use it when a condition or Workflow action prevents the process from being completed successfully. You can also specify an error message and reason to make the failure easier to understand and troubleshoot.
For example, if a server remediation action cannot be completed, you can direct the Workflow to a Failure state with an error message describing the unsuccessful action and a reason explaining why it failed.
The Failure state does not have a next state or input or output path because it terminates that execution path.
Configuration
Follow the steps below to configure a Failure state:
- Add the Failure state to the Workflow.
- Configure the Error Message.
- Optionally provide a Reason for the failure.
- Connect the appropriate preceding state or Branch path to the Failure state.
The configured error message and reason are displayed in the execution response and can help with troubleshooting.
Related articles
-
On this page
- Flow Control states
- How to access Flow Controls