Azure Entra ID monitoring
Site24x7's Azure Entra ID monitoring provides visibility into selected identity and application lifecycle metrics, including application secret and certificate expiry timelines, authentication events, and the specific metrics listed below. Use the monitor to receive timely alerts for secret and certificate expiries and the other enumerated metrics so you can rotate credentials and avoid application downtime.
Key features
Site24x7’s Azure Entra ID monitoring provides visibility into applications, secrets, and their expiry timelines to strengthen identity and access management. This helps users by:
- Preventing downtime: Automatic alerts before client secrets expire ensure uninterrupted application access.
- Ensuring compliance: Monitoring expiries supports audit requirements and avoids policy violations.
- Proactive management: IT teams can rotate secrets in advance, minimizing last‑minute disruptions.
- Improved visibility: Centralized monitoring of applications and credentials simplifies governance across large Azure tenants.
By keeping a close watch on these critical identity components, Site24x7 enables organizations to maintain secure, compliant, and reliable access management without unexpected service interruptions.
Prerequisites
Create an application in Azure for Entra ID monitoring
- Go to https://portal.azure.com and sign in with an account that has permissions to create app registrations.
- From the left menu, select Microsoft Entra ID > App registrations > New Registration.
- Enter a descriptive name (e.g., “Site24x7 Entra ID Monitoring”). Choose supported account types as needed.
- Click Register.
- On the app’s Overview page, copy the Application (client) ID and the Directory (tenant) ID for later use.
- Go to Certificates and secrets > New client secret. Add a description, set an expiry, then click Add.
- Immediately copy the Value of the client secret and store it securely. You will not be able to view it again.
You can also use an existing application used for Site24x7's Azure monitoring to monitor Microsoft Entra ID. Ensure you assign these permissions:
Assign permissions for the application
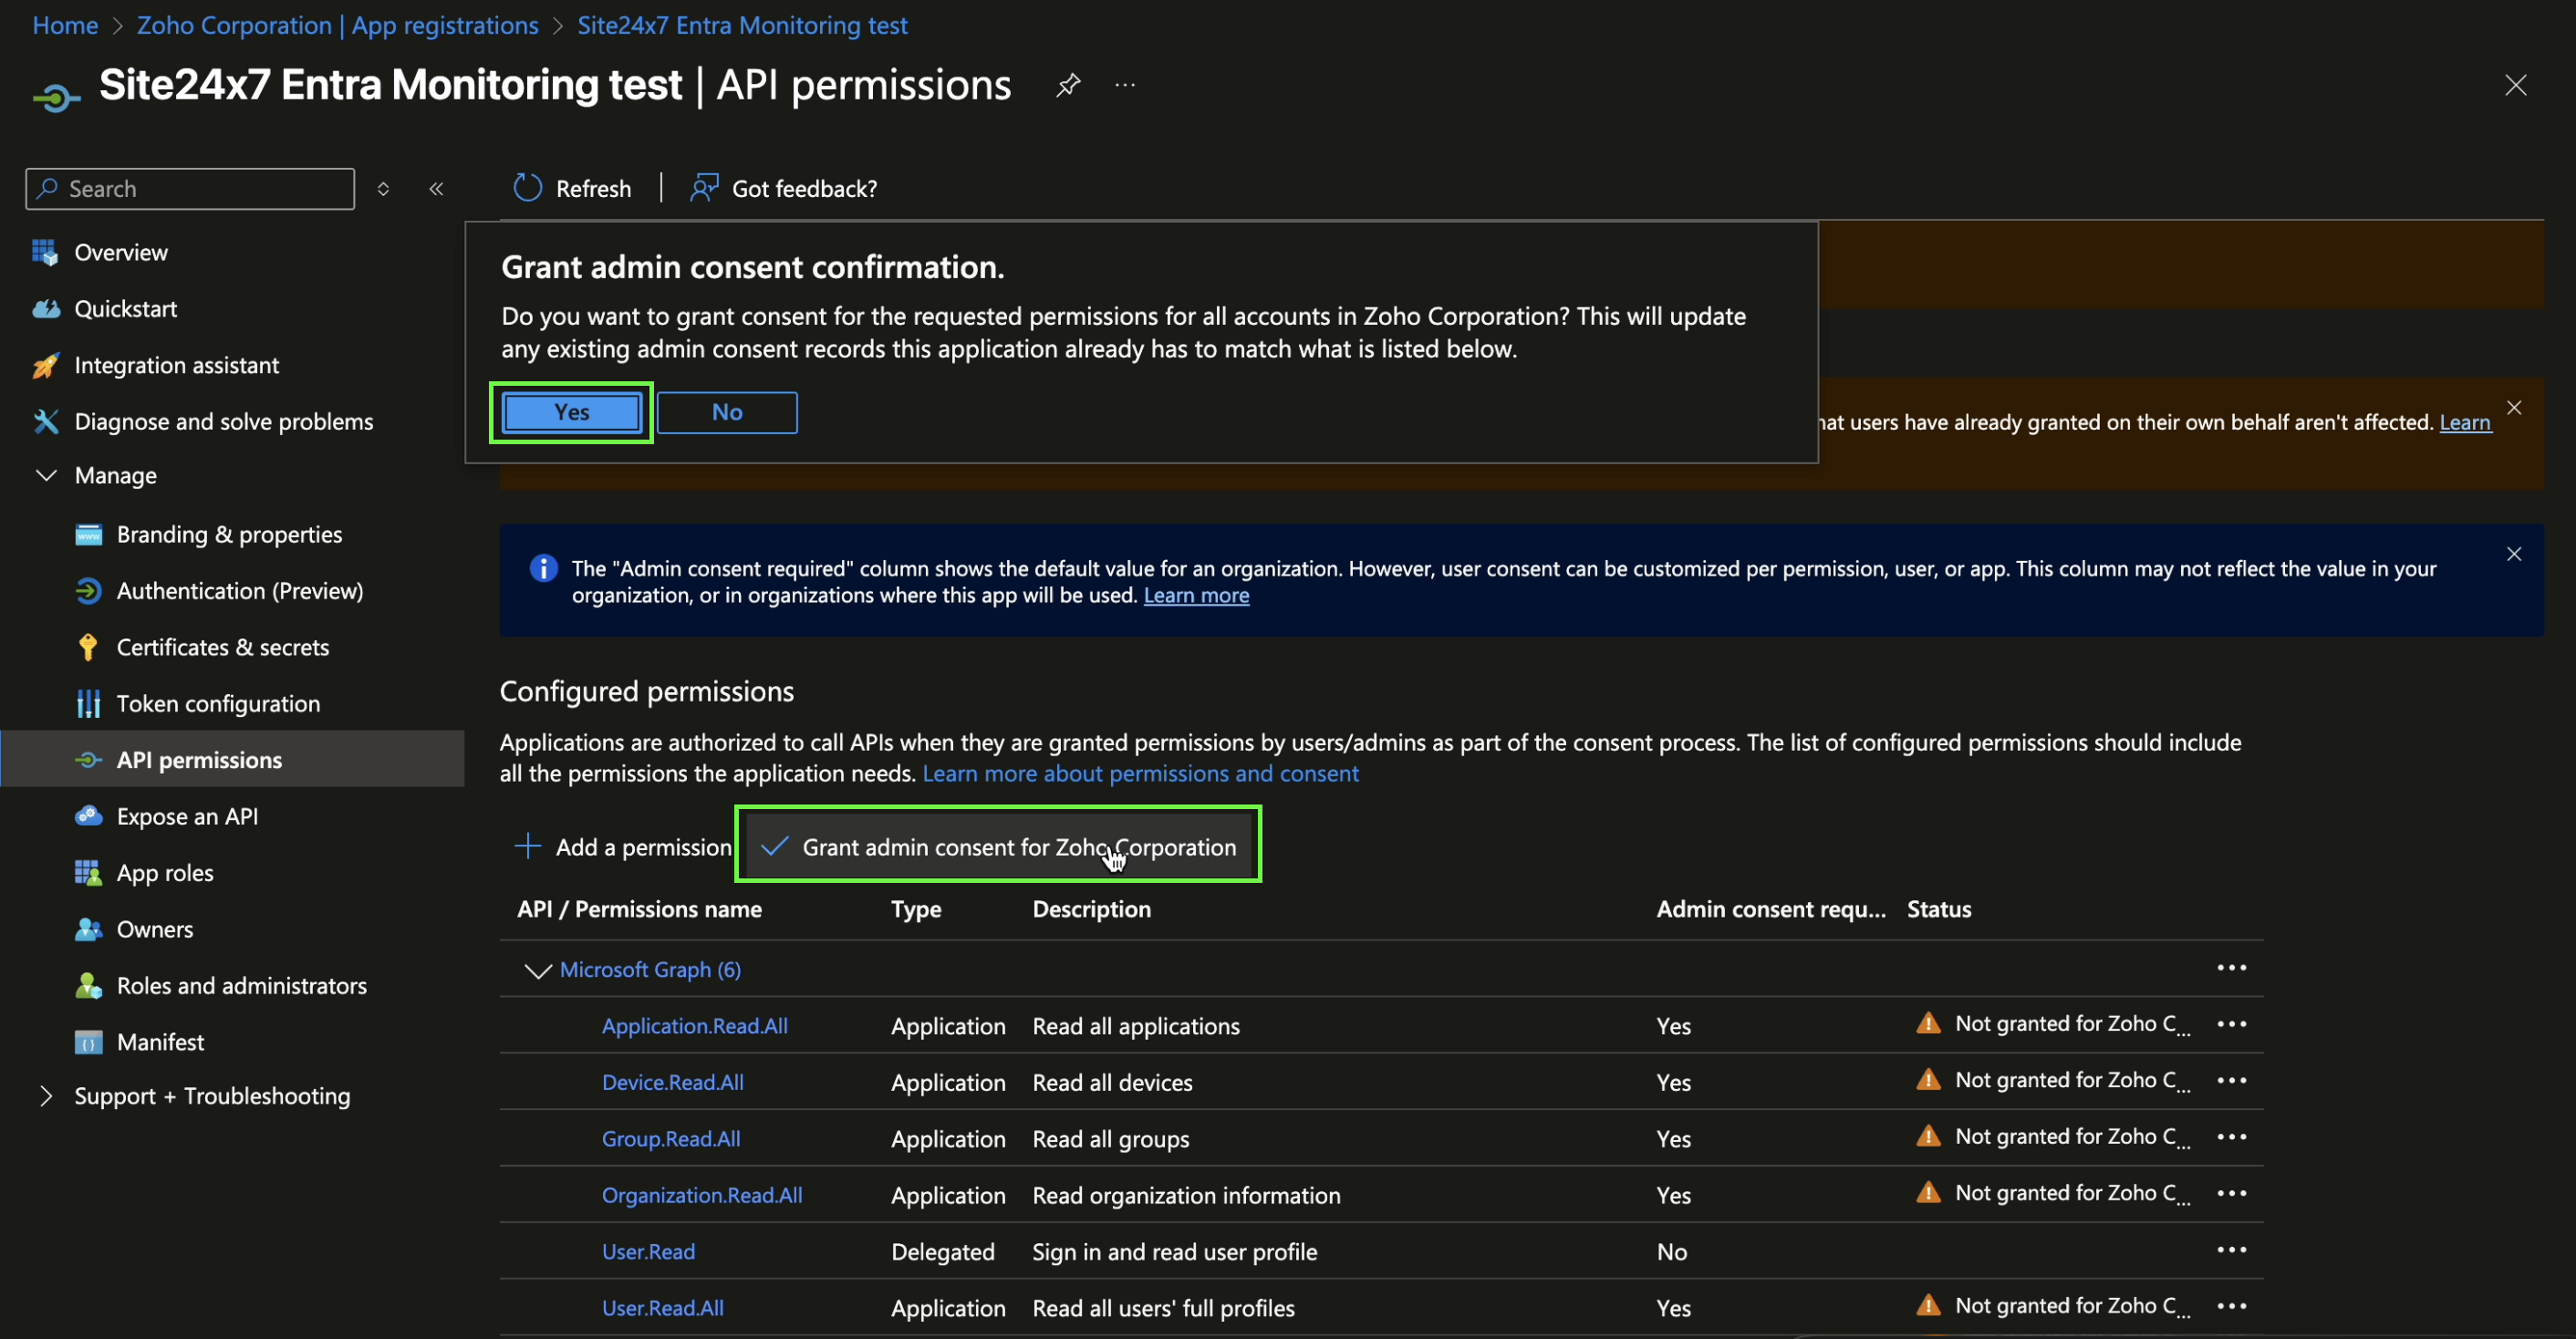
- In the app, go to API permissions.
- Click Add a permission > Microsoft Graph.
- Select Application permissions.
- Provide the following permissions:
- To read App registrations: Application.Read.All
- To read devices: Device.Read.All
- To read groups: Group.Read.All
- To read organization information: Organization.Read.All
- To read user profiles: User.Read.All
- Click Add permissions to confirm.
- Click Grant admin consent and confirm to grant tenant-wide consent.
- Ensure each permission shows “Granted for the tenant's name” under the Status column.
Setup and configuration
You can add Azure Entra ID services while adding a new monitor, or you can add it to an existing Azure monitor.
- Navigate to Cloud > Azure > + icon next to Microsoft Entra ID Monitors.
- Display Name: Provide an appropriate display name for the Entra ID monitor.
- Client Credentials section:
- Choose an Azure Monitor (or) Add New Credentials: Select an existing Azure monitor to use the credentials used for the selected Azure monitor or select + Add New Credentials to provide credentials.
- Tenant ID: Enter the Tenant ID from your Azure console.
- Application/Client ID: Enter the Application or Client ID from the Azure console.
- Client Secret Value: Enter the Client Secret value from the Azure console.
- Client Secret Expiry: Enter the expiry date for the provided client secret's expiry. This helps Site24x7 provide reminders before expiry and enable seamless monitoring coverage.
- Configuration Profiles section:
- Threshold and Availability: Select the appropriate Threshold Profile for this Entra ID monitor. The default Entra ID monitor threshold profile has been developed to be appropriate for most use-cases.
- Tags: Select the tags to be assigned to this Entra ID monitor.
- IT Automation Template: Select the appropriate IT Automation template to trigger auto-heal actions for this Entra ID monitor.
- Exclude IT Automation during Scheduled Maintenance: Enable this checkbox to prevent IT Automation actions from being triggered during planned maintenance windows.
- Associate with Monitor Group(s): Select the monitor group to associate the Entra ID monitor with.
- Alert Settings section:
- User Alert Group: Select the user alert group that should receive the alerts from this Entra ID monitor.
- On-Call Schedule: Select the On-Call Schedule from the drop-down menu.
- Notification Profile: Select the appropriate Notification Profile from the drop-down menu.
- Third-Party Integrations: Utilize third-party integrations to receive alerts or raise tickets on your preferred platforms.
- Click Save.
Monitored data
You can view the following data in the Entra ID monitor:
| Attribute | Description | Statistic | Unit |
|---|---|---|---|
| Summary | |||
| Total Secrets | Total number of secrets in Entra ID | Not Applicable | Count |
| Expiring Secrets (<30 days) | Secrets expiring within 30 days | Not Applicable | Count |
| Expired Secrets | Secrets already expired | Not Applicable | Count |
| Total Certificates | Total number of certificates in Entra ID | Not Applicable | Count |
| Expiring Certificates (<30 days) | Certificates expiring within 30 days | Not Applicable | Count |
| Expired Certificates | Certificates already expired | Not Applicable | Count |
| Users | Total number of users in directory | Not Applicable | Count |
| Applications | Total registered applications | Not Applicable | Count |
| Devices | Total devices registered | Not Applicable | Count |
| Groups | Total groups in directory | Not Applicable | Count |
| Applications | |||
| Application Name | Name of the application Click the application to view the respective application monitor. | Not Applicable | Text |
| Application ID | Unique identifier of the application | Not Applicable | Text |
| Status | Current status of the application | Not Applicable | Text |
| Total Secrets | Total secrets linked to the application | Not Applicable | Count |
| Expired Secrets | Secrets expired for the application | Not Applicable | Count |
| Total Certificates | Total certificates linked to the application | Not Applicable | Count |
| Expired Certificates | Certificates expired for the application | Not Applicable | Count |
| Application Secrets | |||
| Application Name | Name of the application Click the application to view the respective application monitor. | Not Applicable | Text |
| Description | Description of the secret | Not Applicable | Text |
| Secret ID | Unique identifier of the secret | Not Applicable | Text |
| Application ID | Application identifier linked to the secret | Not Applicable | Text |
| Created Time | Time when the secret was created | Not Applicable | Date or Time |
| End Time | Expiry time of the secret | Not Applicable | Date or Time |
| Status | Current status of the secret | Not Applicable | Text |
| Days Until Expiry | Remaining days before expiry | Not Applicable | Days |
| Application Certificates | |||
| Application Name | Name of the application Click the application to view the respective application monitor. | Not Applicable | Text |
| Description | Description of the certificate | Not Applicable | Text |
| Certificate ID | Unique identifier of the certificate | Not Applicable | Text |
| Application ID | Application identifier linked to the certificate | Not Applicable | Text |
| Created Time | Time when the certificate was created | Not Applicable | Date or Time |
| End Time | Expiry time of the certificate | Not Applicable | Date or Time |
| Status | Current status of the certificate | Not Applicable | Text |
| Days Until Expiry | Remaining days before expiry | Not Applicable | Days |
Threshold configuration
Associating a threshold profile can be done from the monitor's Edit page:
- Under Configuration Profiles > Threshold and Availability > select the corresponding threshold profile from the drop-down.
The changes made to this threshold profile will be applied to all the associated monitors. You can either add or edit a threshold profile by clicking the plus icon + or pencil icon
Bulk Action
Bulk association of threshold profiles can be done from the Admin page (Admin > Inventory > Bulk Action > under Monitor Configuration, go to Modify Threshold Profile).
You can set threshold values for the metrics by selecting the Threshold and Availability option. You can also configure IT automation at the attribute level.
Setting thresholds for individual Application Secrets and Certificates
- Navigate to your Azure Entra ID monitor in Site24x7.
- Under Applications > select the application whose secrets/certificates you want to manage.
- For the specific Application Secret or Application Certificate row, click the hamburger icon
 at the right end of that row.
 - Choose Edit Thresholds from the menu.
- In the dialog, configure expiry warning and critical thresholds (for example, 30 days and 7 days before expiry), then click Save.
- Repeat for each secret or certificate that requires a custom threshold.
Thresholds configured at the Entra ID monitor level are global and will apply to all secrets and certificates discovered by that monitor.
IT automation
Site24x7 offers a set of exclusive IT automation tools to auto-resolve performance degradation issues. These tools react to events proactively rather than waiting for manual intervention.
How to configure IT automation for a monitor
Configuration Rules
With Site24x7's Configuration Rules, you can set parameters like Threshold Profile, Notification Profile, Tags, and Monitor Group for multiple monitors. These rules can be configured and run for the existing or new monitors (during addition) matching the given criteria.
How to add a configuration rule