Cloud Inventory Report
The Cloud Inventory Report in Site24x7 gives you a complete view of all your cloud resources across providers like AWS, Azure, GCP, and OCI in a single place.
It collects and organizes metadata about your resources such as resource type, region, account, tags, configuration, and current state. Instead of checking each cloud console separately, you can view and analyze everything from one report.This report acts as a centralized inventory that helps you understand what resources exist, where they are running, and how they are grouped.
Benefits of the Cloud Inventory Report
The Cloud Inventory Report provides you with the following benefits:
- Centralized visibility: get a unified view of all resources across multiple cloud accounts, regions, and providers. This reduces the need to switch between different cloud consoles.
- Improved resource tracking: Track all active resources including compute instances, databases, storage, and networking components across AWS, Azure, GCP, and OCI. This helps avoid missing or unmanaged assets.
- Better cost awareness: By knowing what resources are running, you can quickly identify unused or underutilized assets that may be increasing your cloud spend.
- Tag-based organization: Filter and group resources using tags such as environment, business unit, or project. This makes it easier to align resources with ownership and purpose.
- Simplified auditing and compliance: The report helps with audits by giving a clear inventory of resources, their configurations, and their distribution across regions and cloud providers.
- Faster troubleshooting: When an issue occurs, you can quickly locate the affected resource and understand its context without navigating multiple dashboards.
Use cases
- In a typical multi cloud setup, teams often manage resources across AWS, Azure, GCP, and OCI. Over time, it becomes difficult to keep track of what is running where. The Cloud Inventory Report gives a single view of all resources, so teams can quickly understand their overall cloud footprint without switching between multiple consoles.
- For cost optimization, teams regularly review their infrastructure to identify unnecessary spend. For example, a team might discover idle compute instances, unattached storage volumes, or unused public IPs across different regions. Using the Cloud Inventory Report, they can filter and locate these resources easily, and take action to remove or downsize them.
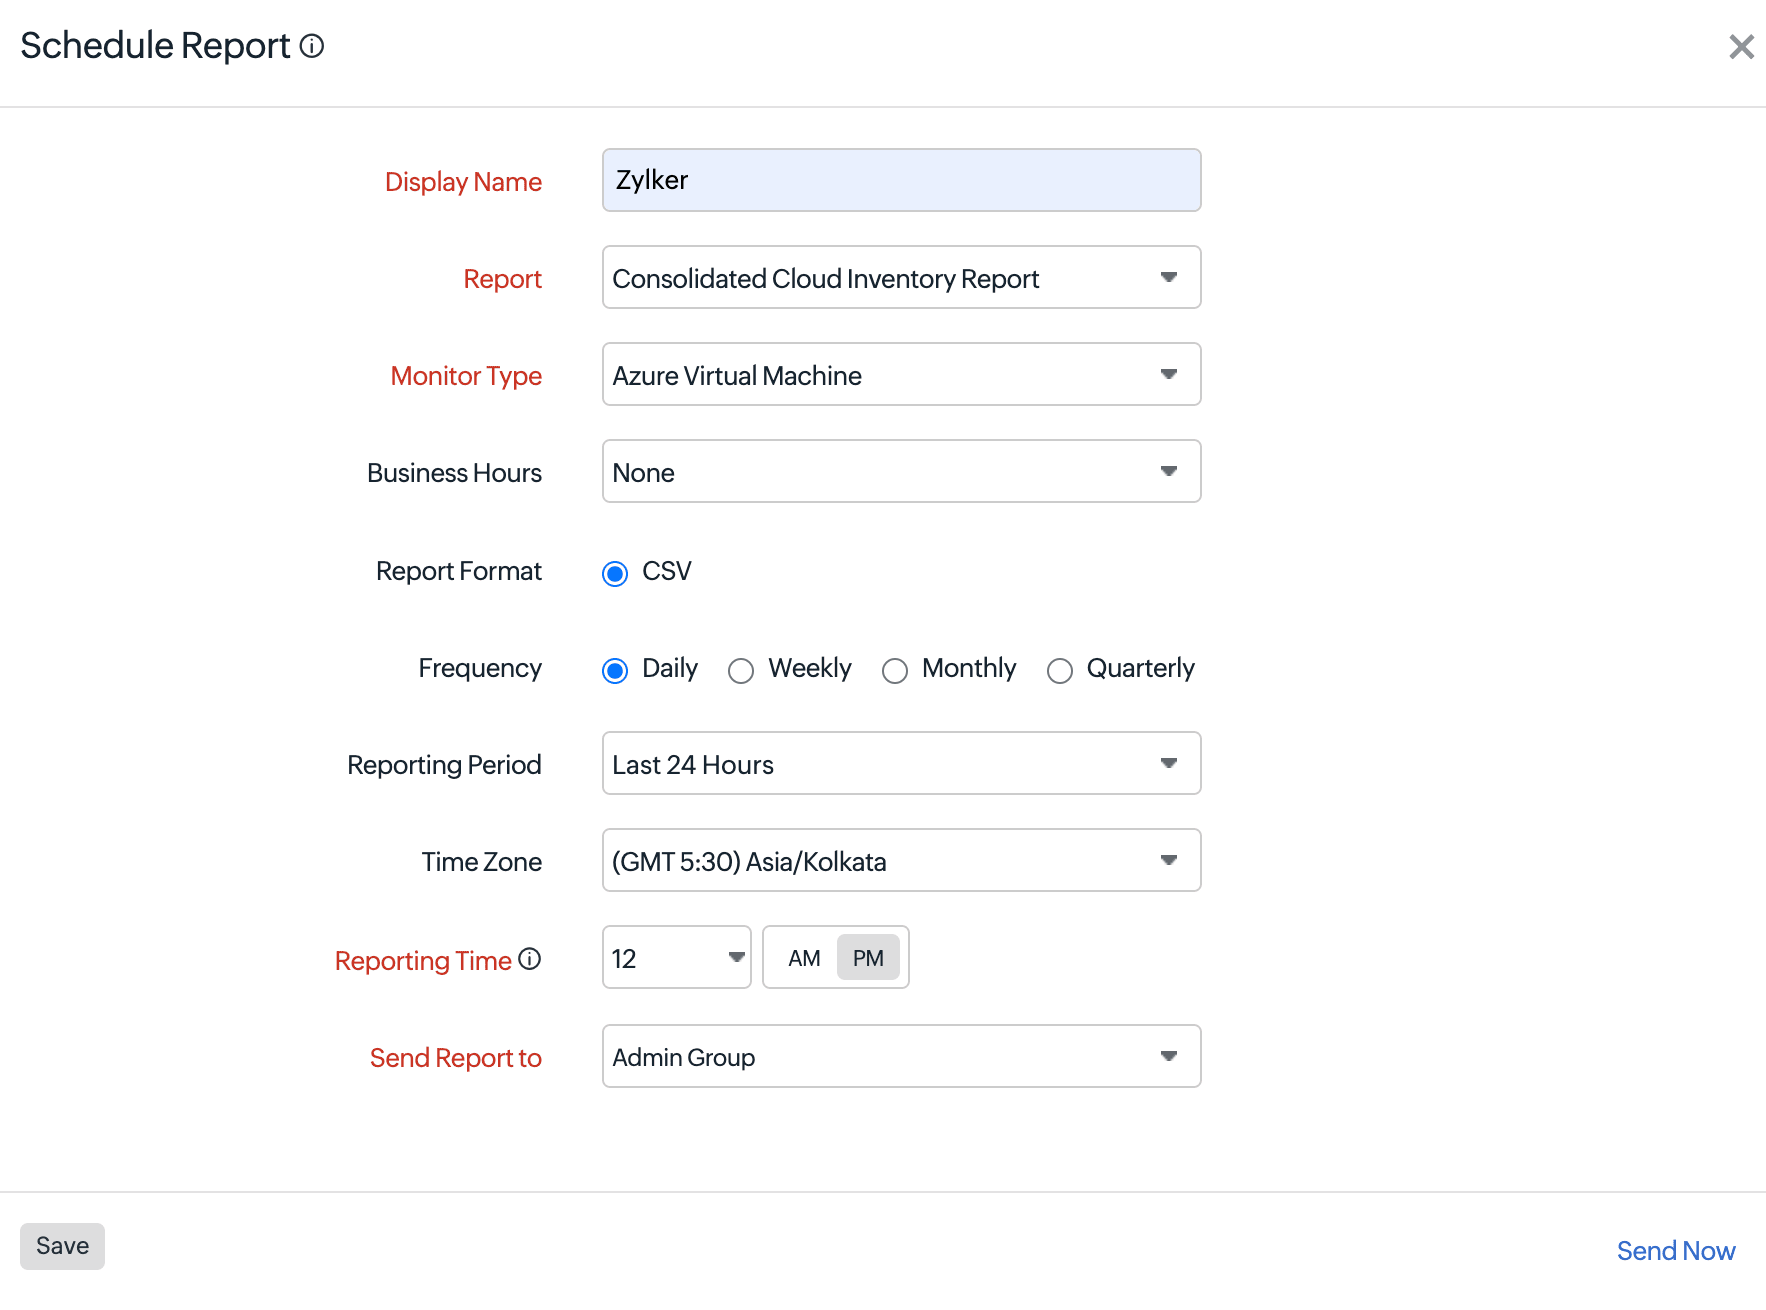
Schedule Cloud Inventory Report
- Log in to Site24x7.
- Navigate to Admin > Report Settings > Schedule Reports.
- In the Schedule Reports page, enter the following details.
- Display Name: Provide a display name.
- Report: Select Consolidated Cloud Inventory Report.
- Monitor Type: Choose the applicable monitor type.
- Business Hours: Defines whether the report should consider a specific business hours configuration.
- Report Format: The reports can be exported in CSV format. This option is selected by default.
- Frequency: The frequency of the report can be set on a daily, weekly, monthly, or quarterly basis.
- Reporting Period: Defines the time range of data included in each report. For example, Last 24 Hours includes data from the previous day.
- Time Zone: Select the applicable time zone option to generate scheduled reports.
- Reporting Time: Set the exact date and time when you want the report to be generated.
- Send Report to: Choose the necessary contact to whom the report should be sent.
- Click Save.
- Click Send Now to trigger the report instantly to the designated user alert group.
The report created will automatically be listed in the Scheduled Reports page along with the other reports that were previously created.
Suspend the report
To suspend a report follow these steps:
- Click on the report that you want to suspend in the Scheduled Reports page.
- Click Suspend.
- The suspended status of the report will be displayed under Status in the Scheduled Reports page.
Delete the report
To delete a report follow these steps:
- Click on the report that you want to delete in the Scheduled Reports page.
- Click Delete in the Edit Schedule Report page.