Capacity Planning Analysis report
The Capacity Planning Analysis report lets you schedule and receive periodic reports based on the Capacity Planning Analysis feature in Site24x7.
Instead of manually checking the Capacity Planning Analysis tab for your Capacity Planning monitor, you can create a scheduled report task that sends the analysis as an email to selected alerting groups at a defined frequency. The report captures the same insights available in the Capacity Planning Analysis view, including resource utilization trends, the projected growth, and potential capacity risks.
By receiving this report regularly, you can review infrastructure capacity without logging in to the console each time. You can configure the report schedule, choose the recipient alerting group, and define how often the report should be generated.
Benefits of the Capacity Planning Analysis report
The Capacity Planning Analysis report provides you with the following benefits:
- Automated reporting: This eliminates the need to manually access the Capacity Planning Analysis tab to review data.
- Better capacity visibility: Teams receive regular updates on resource utilization trends and the projected growth.
- Improved planning: This helps teams anticipate infrastructure requirements and avoid resource shortages.
- Easy distribution: Reports are automatically sent to the selected alerting groups, making it easier to share insights across operations and management teams.
- Consistent monitoring: Scheduled reports ensure that capacity data is reviewed regularly as part of operational workflows.
Use case
The Capacity Planning Analysis report helps teams receive regular insights into infrastructure capacity without manually checking the Capacity Planning Analysis tab for their Capacity Planning monitor. By scheduling this report, operations and engineering teams can automatically receive capacity trend data and utilization forecasts for the selected monitors.
For example, an operations team running applications on Amazon Elastic Compute Cloud instances may want to track CPU and memory usage trends to ensure the infrastructure can handle increasing workloads. By scheduling a weekly Capacity Planning Analysis report, the team receives a summary of capacity trends and projected resource usage in its inbox. If the report indicates that resource utilization is steadily increasing and may reach capacity limits soon, the team can plan instance scaling or resource upgrades in advance.
This helps teams identify potential capacity constraints early, avoid performance issues caused by resource exhaustion, and make informed decisions about infrastructure scaling and resource allocation.
Schedule a Capacity Planning Analysis report
- Log in to Site24x7.
- Navigate to Admin > Report Settings > Schedule Reports.
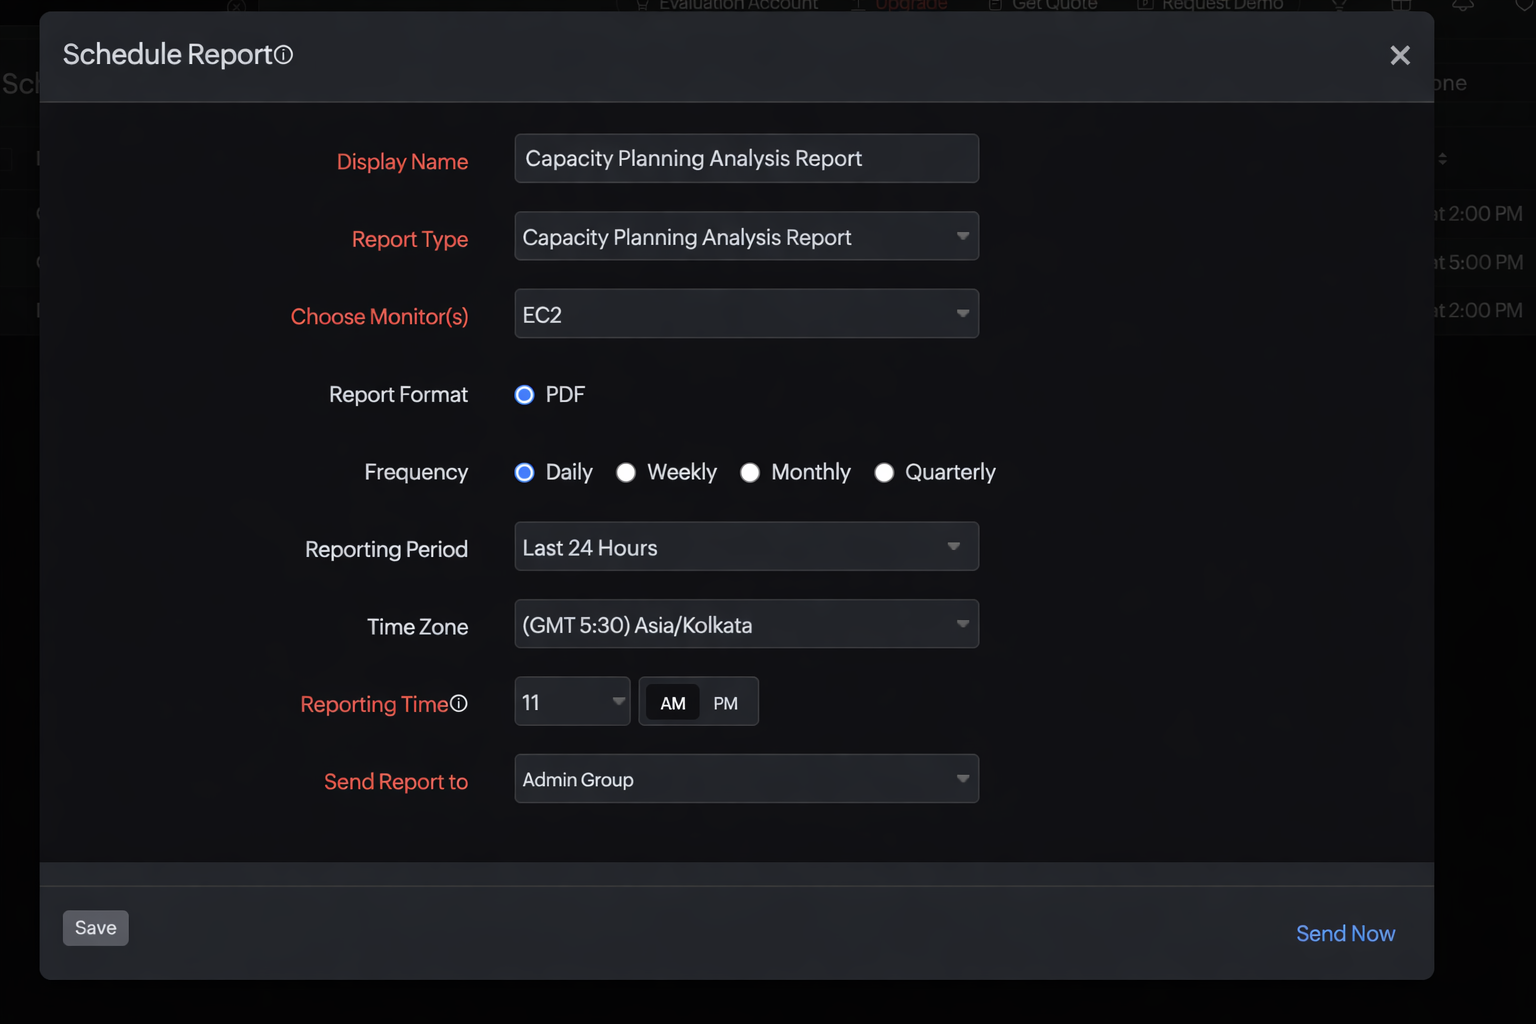
- On the Schedule Report page, enter the following details:
- Display Name: Provide a display name.
- Report Type: Select Capacity Planning Analysis Report.
- Choose Monitor(s): Choose the applicable monitors for which you want to generate the Capacity Planning Analysis report.
- Report Format: The reports can be exported in PDF format. This option is selected by default.
- Frequency: The frequency of the report can be set to Daily, Weekly, Monthly, or Quarterly.
- Reporting Period: Select the time range to determine which data should be included in the report. For example, Last 24 Hours includes capacity analysis data from the previous 24 hours.
- Time Zone: Select the applicable time zone option to generate scheduled reports.
- Reporting Time: Set the exact date and time when you want the report to be generated.
- Send Report to: Choose the necessary contact group to whom the report should be sent.
- Click Save.
- Click Send Now to send the report instantly to the designated user alert group.
The created report will be listed automatically on the Scheduled Reports page along with the other reports that were previously created.
Edit a report
To edit a report, follow these steps:
- Click the report that you want to edit on the Scheduled Reports page.
- Make the applicable changes and click Save on the Edit Scheduled Report page.
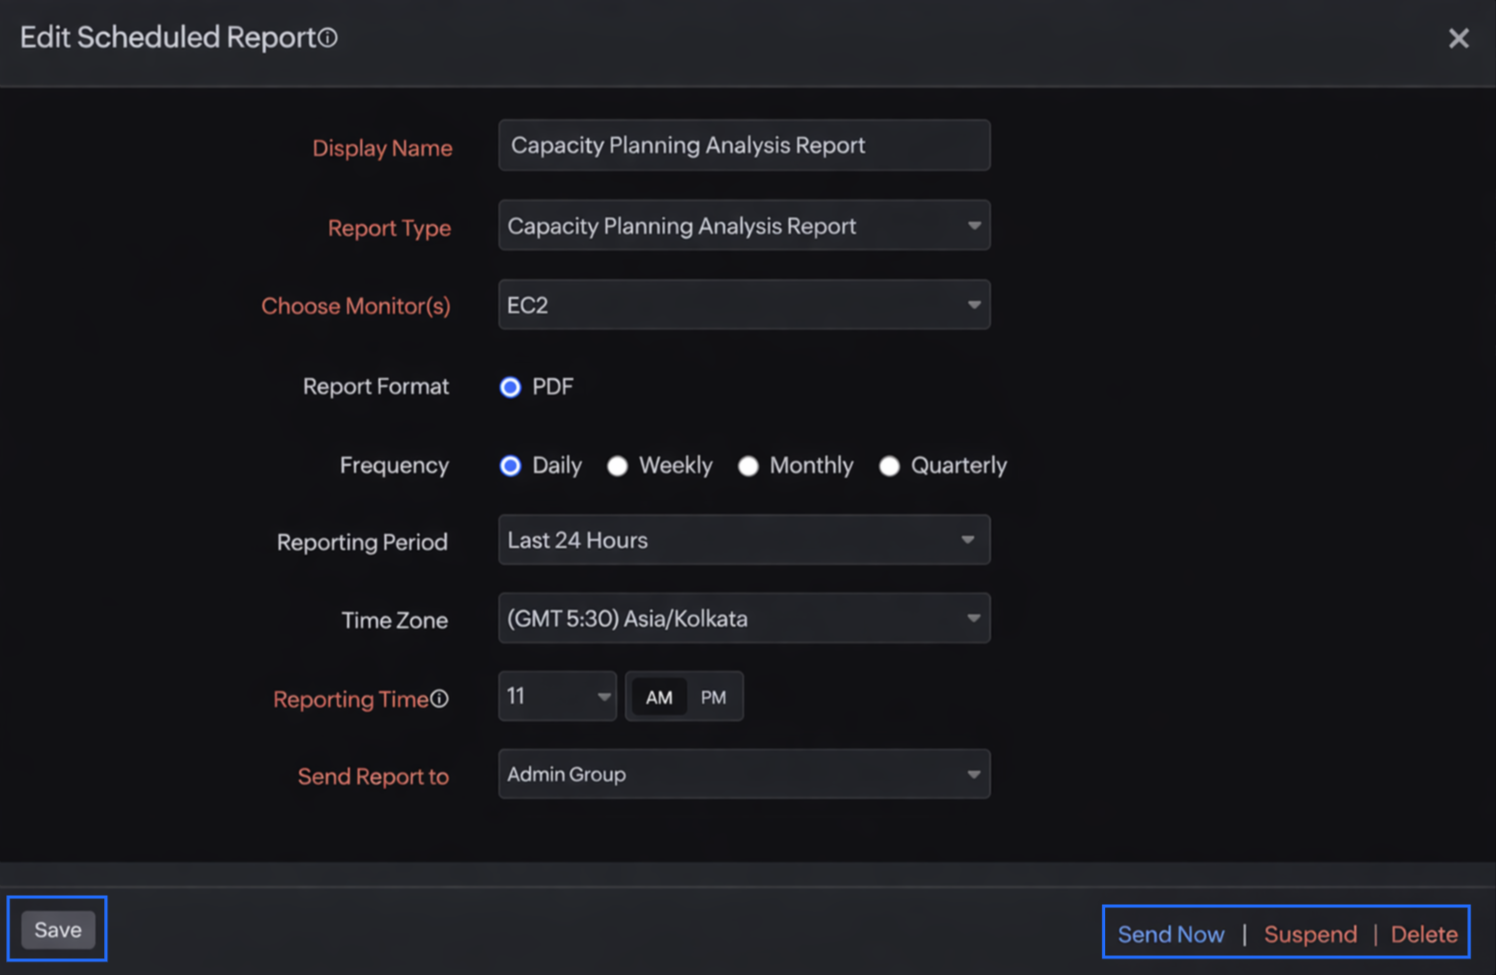
Suspend a report
To suspend a report, follow these steps:
- Click the report that you want to suspend on the Scheduled Reports page.
- Click Suspend.
The suspended status of the report will be displayed under Status on the Scheduled Reports page.
Delete a report
To delete a report, follow these steps:
- Click the report that you want to delete on the Scheduled Reports page.
- Click Delete on the Edit Scheduled Report page.
Related articles