Adding a NetApp ONTAP (Cluster) storage monitor
Monitor your NetApp ONTAP (Cluster) storage systems using Site24x7 to ensure storage availability, track performance metrics, and receive alerts before storage issues impact your business operations. Gain insights into disk utilization and more to troubleshoot faster and optimize storage usage.
Prerequisites
- Before adding a NetApp ONTAP (Cluster) for monitoring, ensure that the device is accessible from the required On-Premise Poller through ICMP ping and HTTPS. Port 443 must be available.
- Make sure that the On-Premise Poller version is 6.4.2 or above. Upgrade the On-Premise Poller, if necessary.
- Both the On-Premise Poller and the Network Module should be up and running.
- A NetApp API credential should be available. Learn how to add one.
Adding a monitor
- Log in to your Site24x7 account.
- Navigate to Admin > Inventory > Add Monitor. Then, click NetApp Monitor in the Network section.
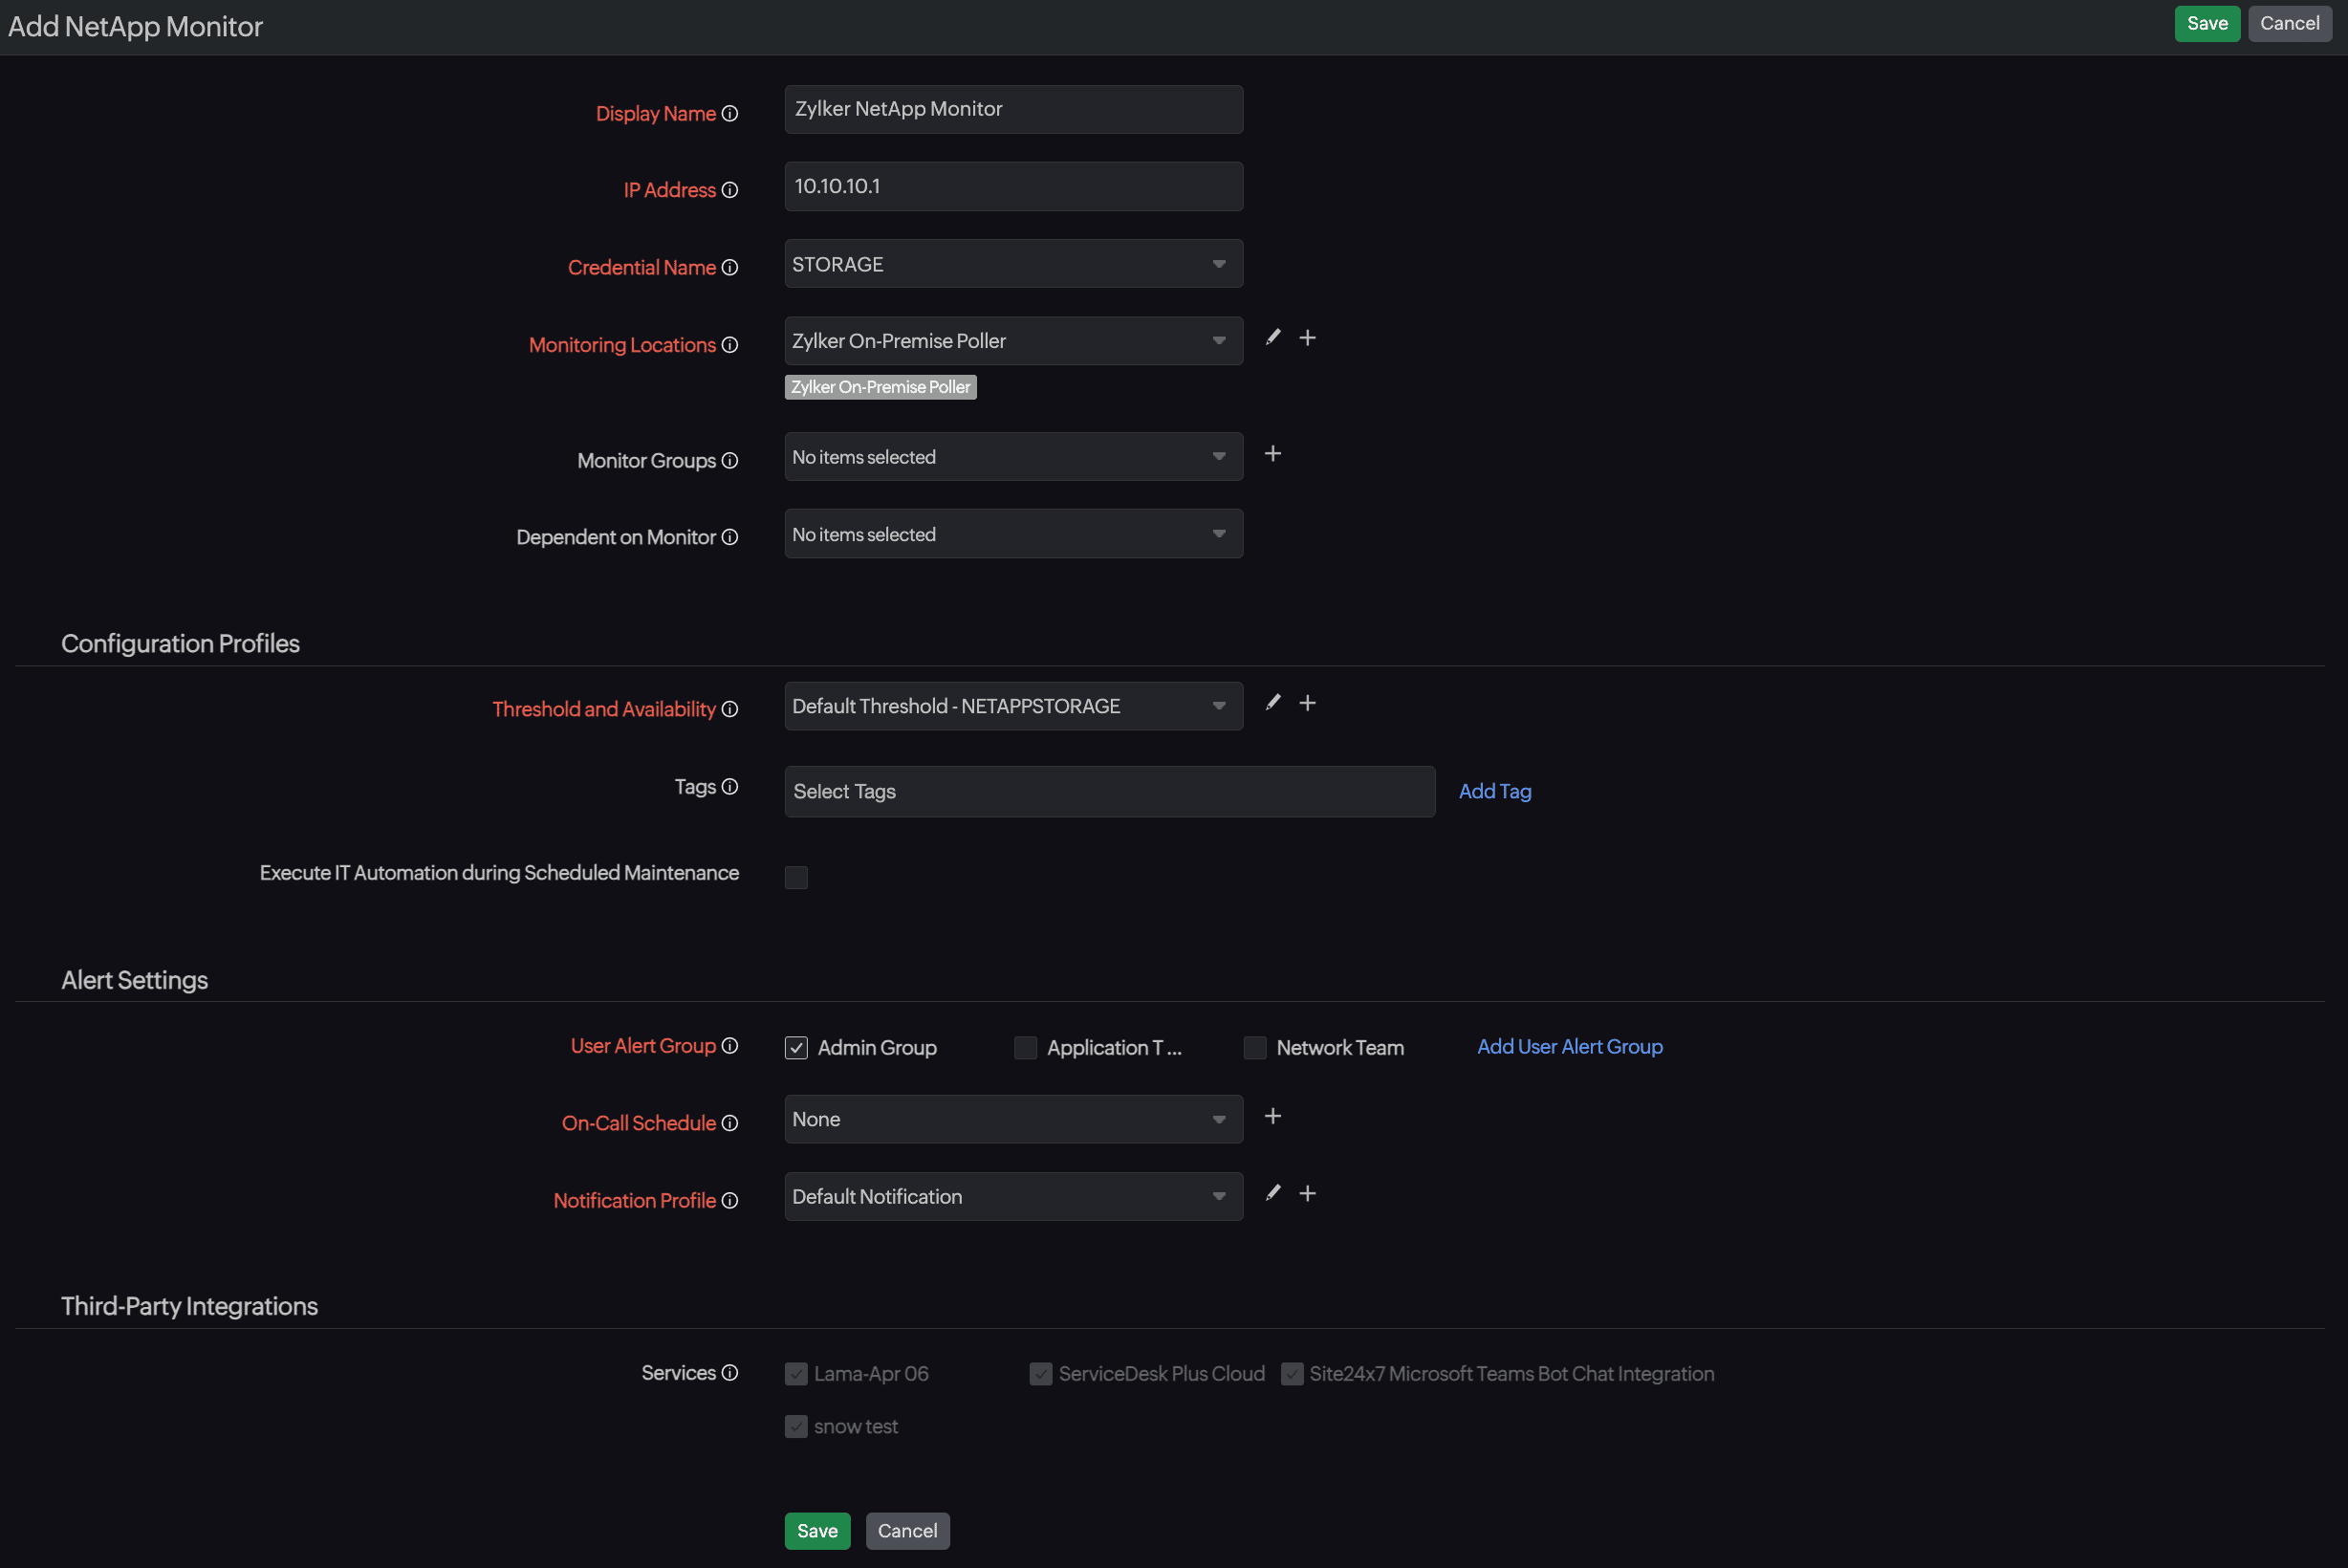
- Provide the following details:
- Display Name: Provide a unique name to identify the monitor.
- IP Address: Provide the IP address without the protocol or port of the device.
- Credential: Select the credential for storage devices from the drop-down menu.
- Monitoring Locations: Select the On-Premise Poller that will be used for monitoring the subnet from the drop-down menu. You can also add a new On-Premise Poller by clicking the plus icon + or edit it by clicking the pencil icon
 beside the field.
 - Monitor Groups (Optional): Select an option from the drop-down menu or add a new group by clicking the plus + icon beside the field to add the monitor to a monitor group,
- Dependent on Monitor (Optional): Select an option from the drop-down menu to suppress the number of alerts based on the down status of the selected monitor.
- In the Configuration Profiles section, provide the following values:
- Threshold and Availability: Select an existing profile from the drop-down, edit it by clicking the pencil icon beside the field, or add a new one by clicking the plus icon + to add a new one.
- Tags: Select one from the existing tags or click Add Tag beside the field to add a new one.
- Execute IT Automation during Scheduled Maintenance: Select the checkbox to execute automation even if the monitor is under scheduled maintenance.
- Threshold and Availability: Select an existing profile from the drop-down, edit it by clicking the pencil icon
- In the Alert Settings section, provide the values for the following fields:
- User Alert Group: Select the groups that must be notified when there's an alert.
- On-Call Schedule: Select an On-Call Schedule to send alerts to users available during a particular shift from the drop-down, or click the plus + icon beside the field to add a new one.
- Notification Profile: Select a value to specify to whom or how the notifications must be sent. You can edit an existing Notification Profile by clicking the pencil icon or click the plus icon + to add a new one.
- Third-Party Integrations: Select the third-party integration services to integrate Site24x7 alarms.
- Click Save.
Related articles
-
On this page
- Prerequisites
- Adding a monitor