Monitor over 100 Azure resources with Site24x7's Azure monitoring tool for optimal Azure performance.
Out of the wide range of available cloud architectures, serverless computing offers top-tier efficiency and optimization.
In serverless computing, trigger events execute the key code, so you don’t have to manage the underlying server infrastructure. When an event is triggered, the microservice code runs, performs the related task, and then halts. If no event is triggered, depending on your chosen cloud cost plan, the cost is reduced or eliminated.
Compared to monolithic applications running on bulky and costly physical or virtual servers, a serverless and microservices architecture significantly reduces costs while enhancing application performance.
Prominent serverless cloud solutions include Lambda in Amazon AWS, Cloud Functions in Google GCP, and Azure Functions in Microsoft Azure. This article focuses on Azure Functions, a compelling choice to build serverless applications, especially for .NET Core.
Using a functions-based solution like Azure Functions, you can build applications by connecting various functions with other components. For example, Functions can communicate directly with database services, storage solutions, and other web-based and API-based services. Serverless platforms automatically handle the microservice’s scaling, resource allocation, and performance tuning. Therefore, with Azure Functions, you don’t have to manually manage the underlying infrastructure components, so you can focus on writing code.
This tutorial demonstrates how to develop an Azure Function using .NET within Visual Studio Code. The Function you’ll create adds a watermark to an uploaded image file in Azure Blob Storage, saving the outcome as a new image file. You’ll also learn how to publish the code to Azure Functions and execute it as a cloud application.
To follow this tutorial, you need:
Additionally, you need administrative or contributor access to an Azure subscription to set up the Azure Storage Account and the Azure Function. (Note: If you’re not using an Azure Free subscription, expect a cost between $1 and $5 for the Azure Resources). Here are the necessary steps:
If you’re a NET C# developer, Azure Functions offer several advantages:
With robust support for the .NET Core framework in Azure Functions, serverless computing is an excellent choice to create scalable, cost-efficient, and event-driven serverless applications.
The application you’ll build does the following:
The graphic below illustrates the entire process:
 Fig. 1: Flow diagram of the application built with Azure Functions and .NET
Since this scenario uses the Blob Trigger Azure Function type, it runs each time you upload a new image to the Blob Storage source container.
This setup is ideal for an Azure Functions serverless architecture. Azure Functions will automatically scale and process each image file with minimal Azure consumption, regardless of how many you upload. If no images are uploaded, the Function won’t consume any Azure compute resources—this would not be the case if you were using an Azure App Service Plan or running the process within an Azure Virtual Machine.
To set up Azure Functions, first, you need to install Azure Functions Core Tools.
For Windows, download the Azure Functions Core Tools MSI-installer package and run the installation.
For macOS, the easiest method is to use Homebrew. Run the following commands in the CLI:
brew tap azure/functions
brew install azure-functions-core-tools@4
For Linux machines running Ubuntu, execute these apt-based commands:
sudo apt-get update
sudo apt-get install azure-functions-core-tools-4
For other distributions on Linux, download the installation zip package from the Azure Functions Core Tools GitHub repo. Run the installation as per the README details for your distribution.
Next, create a new folder on your local development workstation to hold the Azure Functions source code. Navigate to it:
mkdir watermark
cd watermark
Within this subfolder, run the following command to create a new Azure Functions project locally:
func init WatermarkFunction --worker-runtime dotnet-isolated --target-framework net6.0
In the command above:
After running this command, you should receive a response similar to this:
C:\watermark\WatermarkFunction\.vscode\extensions.json
In the same directory, type dir or ls to list the contents of the WatermarkFunction subfolder:
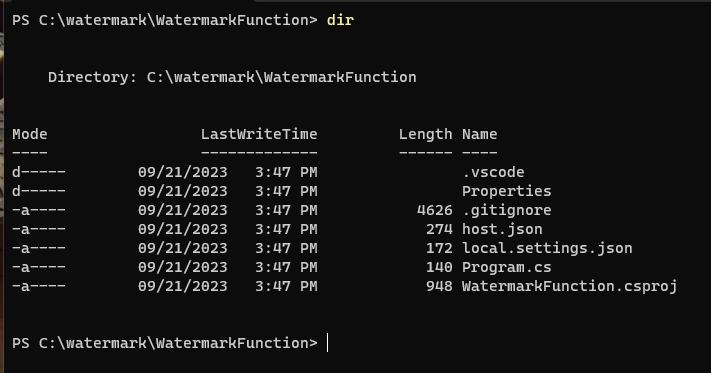 Fig. 2: Using dir to get the output view of the Azure Function template created source code files
This command generates all the files required to develop the actual Azure Function. The most important files include:
You’ve now created the Azure Function project. In the next step, you’ll add the Function code to the Program.cs file and update settings in the local.settings.json file.
First, open the Azure Function project folder in Visual Studio Code to edit, test, and debug the template files easily.
Specify the necessary NuGet packages your Function will use, similar to a traditional .NET application. Open the watermarkfunction.csproj file and look for the <ItemGroup> containing the <PackageReference> elements:
<ItemGroup>
<PackageReference Include="Microsoft.Azure.Functions.Worker" Version="1.19.0" />
<PackageReference Include="Microsoft.Azure.Functions.Worker.Sdk" Version="1.14.0" />
</ItemGroup>
Add the following line after the Microsoft.Azure.Functions.Worker.Sdk package reference:
<PackageReference Include="SkiaSharp" Version="2.88.0" />
This line injects the SkiaSharp image NuGet package into the Function at runtime. SkiaSharp is a Microsoft-recommended package for handling images for .NET applications, although other similar NuGet packages may be available.
The rest of the information from this Project file can remain the same. It specifies the net6.0 framework in the <TargetFramework> property and the latest version of Azure Functions (v4) in the <AzureFunctionsVersion> property.
The complete watermarkfunction.csproj should now look like this:
<Project Sdk="Microsoft.NET.Sdk">
<PropertyGroup>
    <TargetFramework>net6.0</TargetFramework>
    <AzureFunctionsVersion>v4</AzureFunctionsVersion>
</PropertyGroup>
<ItemGroup>
    <PackageReference Include="Microsoft.Azure.WebJobs.Extensions.Storage" Version="4.0.5" />
    <PackageReference Include="Microsoft.NET.Sdk.Functions" Version="4.2.0" />
    <PackageReference Include="SkiaSharp" Version="2.88.0" />
</ItemGroup>
<ItemGroup>
    <None Update="host.json">
      <CopyToOutputDirectory>PreserveNewest</CopyToOutputDirectory>
    </None>
    <None Update="local.settings.json">
      <CopyToOutputDirectory>PreserveNewest</CopyToOutputDirectory>
      <CopyToPublishDirectory>Never</CopyToPublishDirectory>
    </None>
</ItemGroup>
</Project>
Save the changed file.
Next, open Program.cs, which holds all the C# code for the Azure Function. Copy the following code snippet in full:
using System;
using System.IO;
using Microsoft.Azure.WebJobs;
using Microsoft.Extensions.Logging;
using SkiaSharp;
public static class AddWatermarkToImageFunction
{    [FunctionName("AddWatermarkToImage")]
    public static void Run(
        [BlobTrigger("input/{name}", Connection = "AzureWebJobsStorage")] Stream imageStream,
[Blob("output/{name}", FileAccess.Write)] Stream outputImageStream,
        string name,
        ILogger log)
    {
        log.LogInformation($"C# Blob trigger function processed image: {name}");

        try
        {
            using (var inputStream = new SKManagedStream(imageStream))
            using (var image = SKBitmap.Decode(inputStream))
            {
                // Create a surface and canvas to draw on
                using (var surface = SKSurface.Create(new SKImageInfo(image.Width, image.Height)))
                using (var canvas = surface.Canvas)
                {
                    // Draw the original image onto the canvas
                    canvas.DrawBitmap(image, 0, 0);

                    // Define the watermark text and paint
                    string watermarkText = "Your Watermark Text";
                    SKPaint paint = new SKPaint
                    {
                        Color = SKColors.White, // Change color as needed
                        TextSize = 36,
                        TextAlign = SKTextAlign.Center,
                    };

                    // Calculate the position to center the watermark
                    float x = image.Width / 2;
                    float y = (image.Height + paint.TextSize) / 2;

                    // Add the watermark to the image
                    canvas.DrawText(watermarkText, x, y, paint);

                    // Encode the canvas to a JPEG image
                    using (var imageEncoded = surface.Snapshot().Encode())
                    {
                        imageEncoded.SaveTo(outputImageStream);
                    }
                }
            }
            log.LogInformation($"Watermark added to image: {name}");
        }
        catch (Exception ex)
       {
            log.LogError($"Error adding watermark to image {name}: {ex.Message}");
            throw;
        }
    }
}
The following section explains this code.
These statements include:
using System;
using System.IO;
using Microsoft.Azure.WebJobs;
using Microsoft.Extensions.Logging;
using SkiaSharp;
The first few lines at the top of the Program.cs file specify the NuGet Packages that the application uses.
The System packages come by default. Azure Functions require the Microsoft.Azure.WebJobs and Microsoft.Extensions.Logging packages. The WebJobs class holds the methods that Azure Functions can use as triggers, whereas Logging offers logging functionality. SkiSharp refers to the NuGet Package you previously added to the csproj file.
The definition includes:
 [BlobTrigger("input/{name}", Connection = "AzureWebJobsStorage")] Stream imageStream,
[Blob("output/{name}", FileAccess.Write)] Stream outputImageStream,
string name,
 ILogger log)
   {
        log.LogInformation($"C# Blob trigger function processed image: {name}");
The BlobTrigger keyword indicates that you’re using the Azure Functions Blob Trigger and defines the path to the Blob used as input for the function. You pick up the Connection parameter from the local.settings.json, which contains the Azure Storage Account connection string details. Next, you call the class Stream, which holds the image file in memory. Finally, you declare the Blob attribute as output, writing the content of the Stream object to a new file and saving it in the /output blob container.
This code element includes:
 try
         {
            using (var inputStream = new SKManagedStream(imageStream))
            using (var image = SKBitmap.Decode(inputStream))


   log.LogInformation($"Watermark added to image: {name}");
    }
        catch (Exception ex)
The code above adds the watermark to the image file. It contains some descriptive text to help you understand what each section is doing.
A new variable, inputStream, is created using the object SKManagedStream and imageStream as parameters. SkiaSharp processes this object’s width and height, turning it into a canvas.
Next, a watermarkText text string is defined. It contains some text strings and additional parameters specifying the font color, size, and alignment.
The float x and float y values determine the center point of the canvas.
Finally, a new image snapshot object, imageEncoded, is created and saved to the outputImageStream object, resulting in a new image file stored in the blob output container.
Now, it’s time to create the Azure Storage Account in the Azure CLI. From your local machine’s command prompt or Terminal window, authenticate to Azure:
az login
You should see the message below indicating that the browser authentication page has opened:
 Fig. 3: Authenticating to Azure using Azure Command Line az login command
Log in with your Azure administrative credentials and wait for the browser prompt to confirm a successful login:
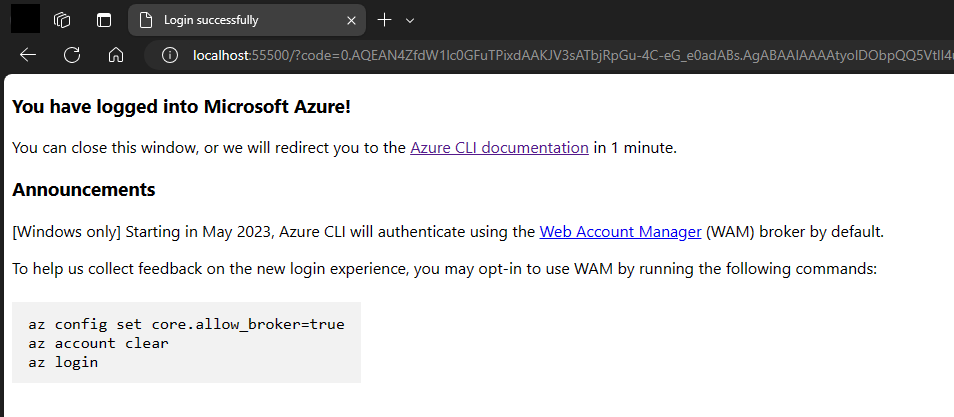 Fig. 4: Browser prompt confirming successful login to Azure
From the same terminal window, execute the following Azure CLI command to create an Azure Resource Group. Update the parameters, such as name, location, and Azure Resource Group, to your specifications:
az group create --name watermarkfunctionRG --location centralus
Here’s the output of this command in JSON format:
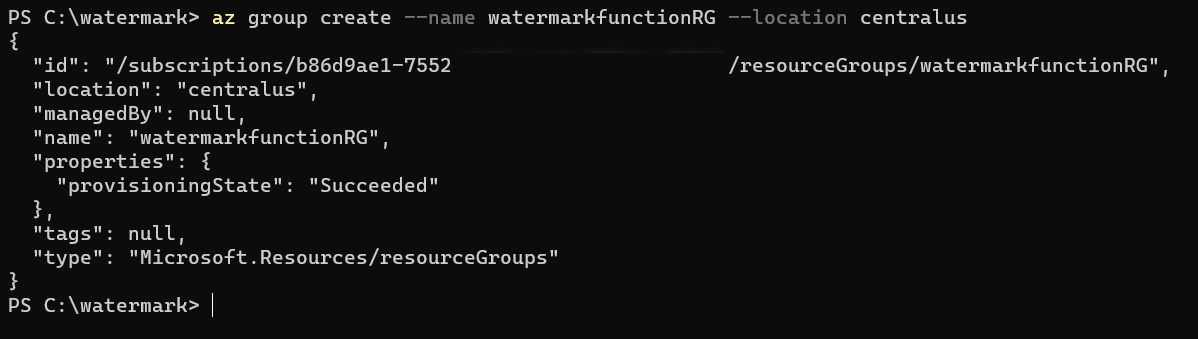 Fig. 5: Creating a new Azure Resource Group from the command line with the corresponding output
Now, run the following command to create the Azure Storage Account:
az storage account create --name watermarkfunctionstoracc --resource-group watermarkfunctionRG --location centralus --sku Standard_LRS --kind StorageV2
The output in the terminal details all the properties of the storage account:
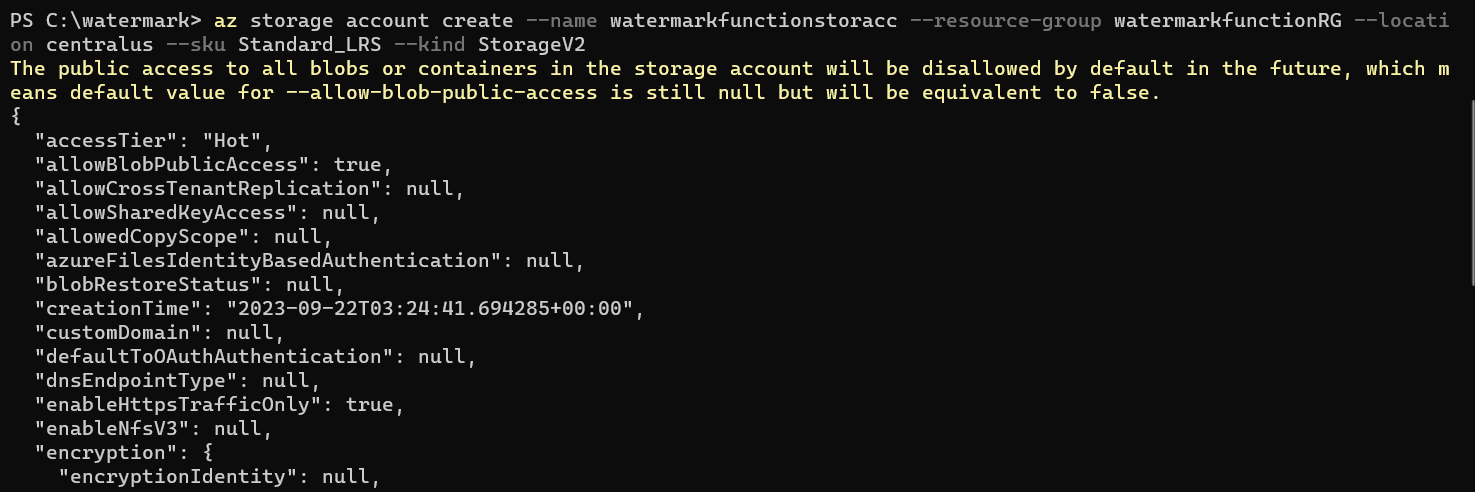 Fig. 6: Creating a new Azure Storage Account from Azure Command Line and corresponding output
Navigate to the Azure Storage Account resource from the Azure Portal. From the Azure Storage Account blade, navigate to Containers and create two new containers named input and output:
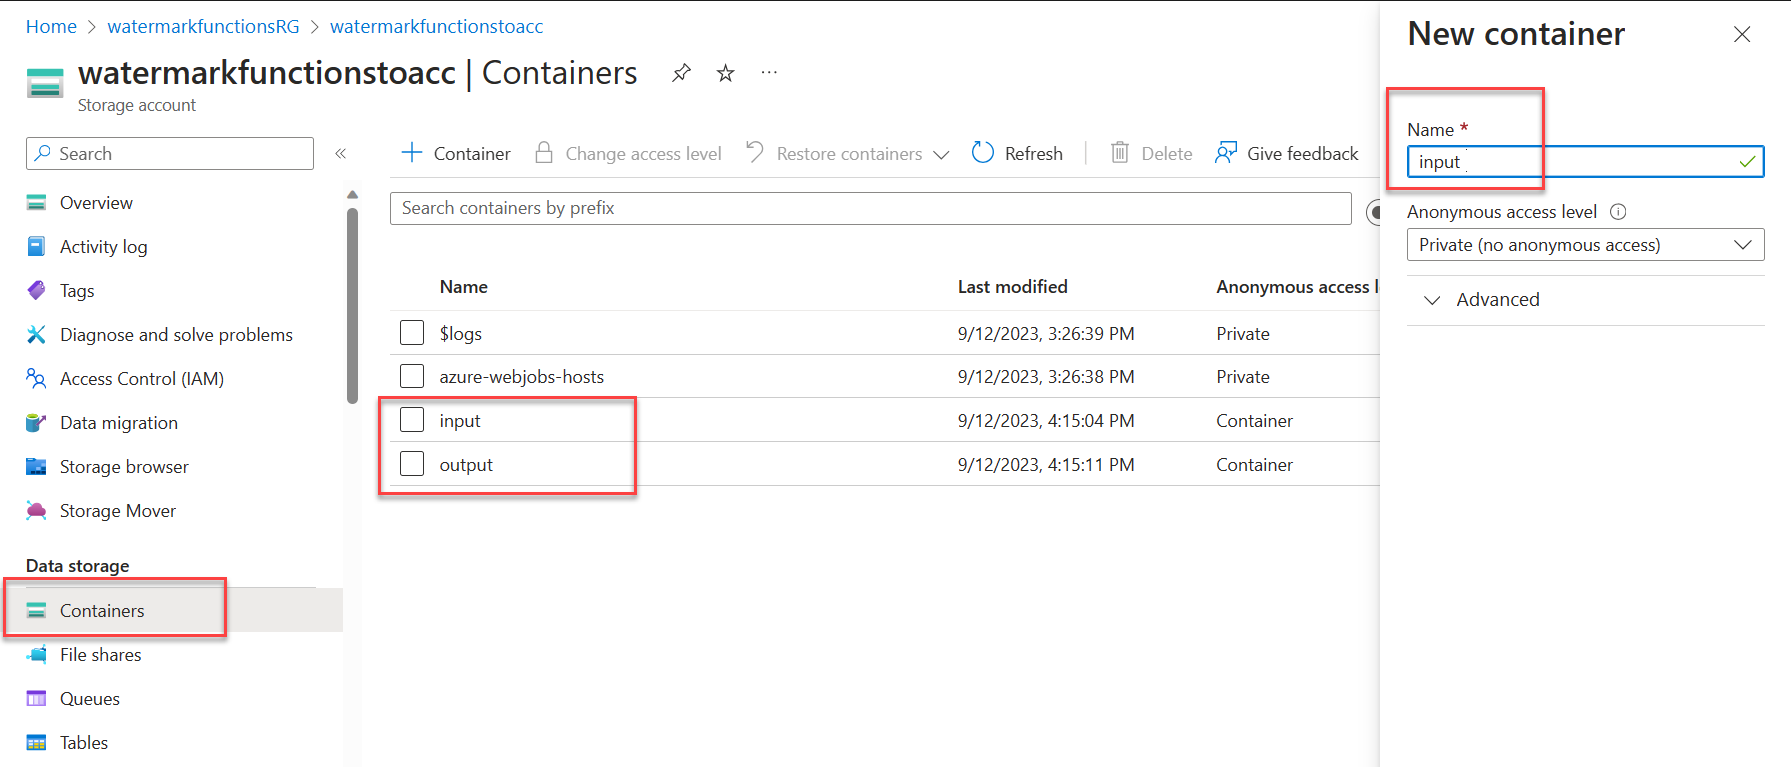 Fig. 7: Azure Storage Account view showing the Blob Containers section with input and output containers
From within the same blade, navigate to Access Keys. Unhide the connection string under the key 1 section, and copy the full connection string key inside—you’ll need it in the next step:
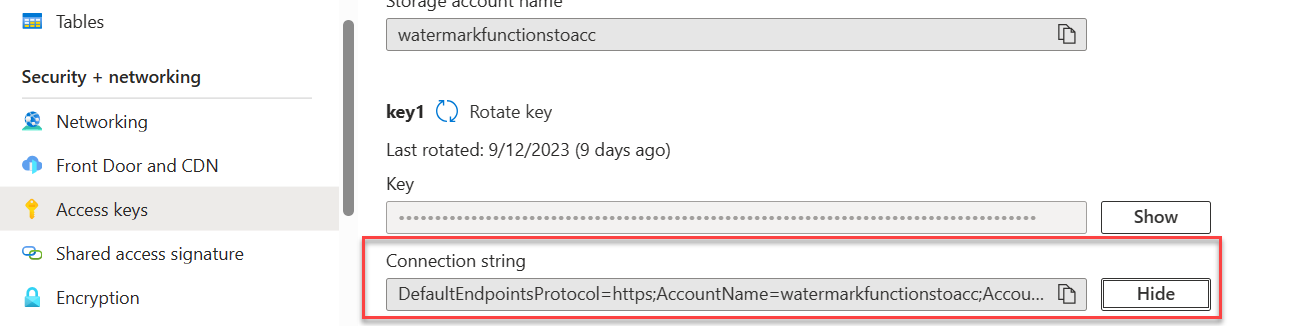 Fig. 8: Finding the Connection string under the Storage Account Access Keys section
Return to the Azure Function project in Visual Studio Code and open the local.settings.json configuration file.
Update the template code to the following snippet, replacing the <YOUR_CONNECTION_STRING> placeholders with the actual value of the connection string you copied earlier. The Functions program.cs calls the value for AzureWebJobsStorage:
 {
 "IsEncrypted": false,
 "Values": {
   "AzureWebJobsStorage": "<YOUR_CONNECTION_STRING>",
   "FUNCTIONS_WORKER_RUNTIME": "dotnet",
  "watermarkfunctionstoacc_STORAGE": <YOUR_CONNECTION_STRING>"
   }
}
Note: In a real-world scenario, consider storing secret values like connection strings in a local secrets file or Azure Key Vault.
You’re now ready to validate and run the Function code locally. From within Visual Studio Code, press F5 (Windows/macOS) or Ctrl + F5 (Linux) or choose Run > Start Debugging from the top menu.
Wait for the build process to complete, followed by the Azure Function Runtime showing the running Function:
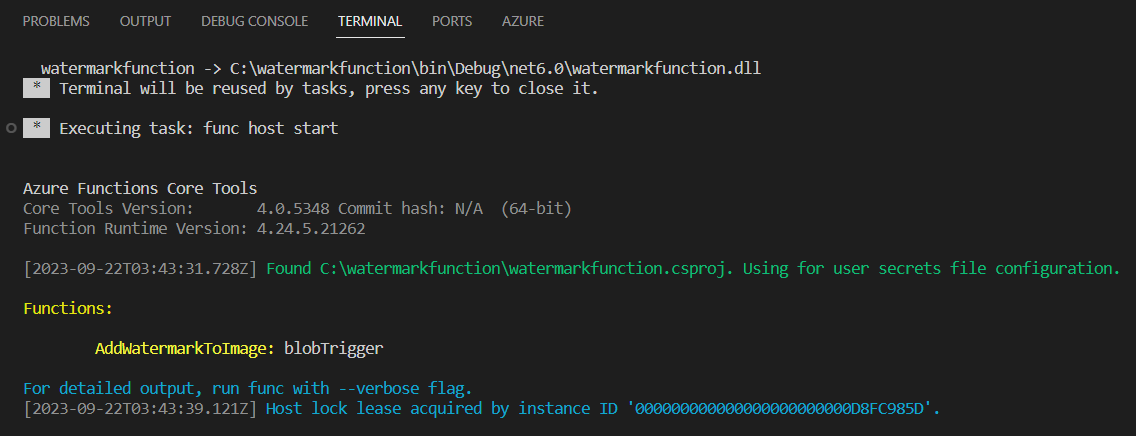 Fig. 9: Visual Studio Code Terminal window showing the Azure Functions Core Tools output with a running Function
With the Function running, switch back to the Azure Portal and navigate to the Azure Storage Account resource. Open the detailed blade and click Storage Browser, then Blob Containers, then Input container:
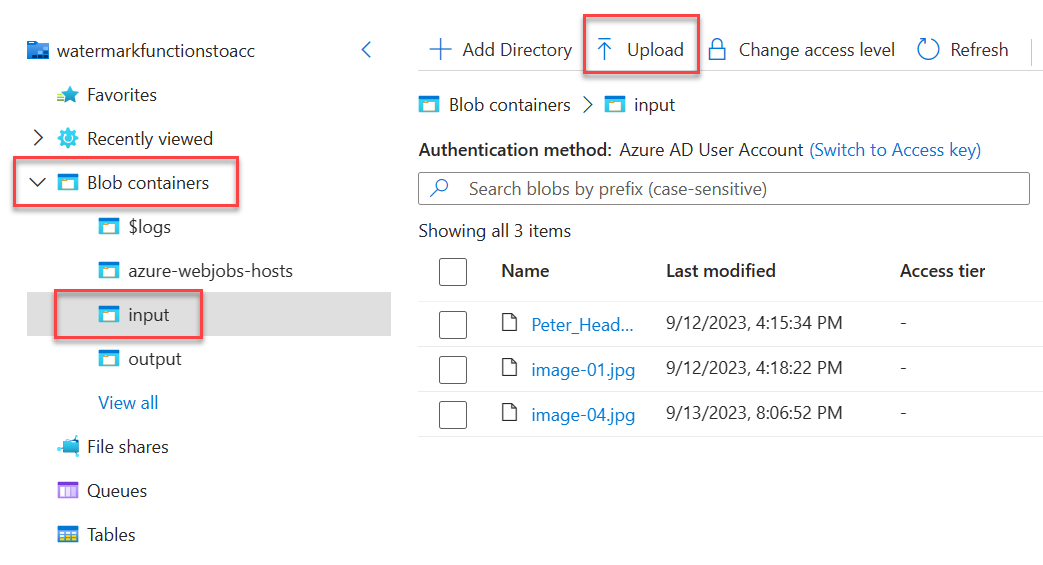 Fig. 10: Uploading an image file from the Azure Storage Account Blob container explorer view
Click Upload File(s) and upload an image file:
 Fig. 11: Upload blob confirmation window from the Azure Storage Account Explorer view
Next, switch back to the Visual Studio Code Terminal window for a confirmation that the Azure Function has successfully executed:
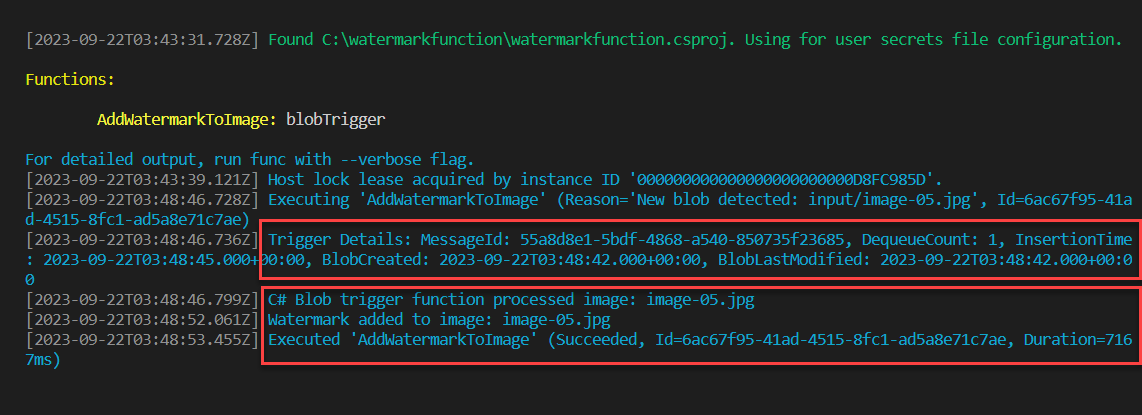 Fig. 12: Visual Studio Code Terminal window showing the Azure Function trigger logs from the upload file action executed previously
The first red-highlighted part acknowledges the Trigger Details, confirming that the Blob Trigger was executed based on the BlobCreated action.
The second part confirms that the AddWatermarkToImage Function was successfully processed. This involves uploading the image file, adding the watermark, and saving it to the image output folder.
You can validate the updated image file from the Azure Storage Account’s /output blob container:
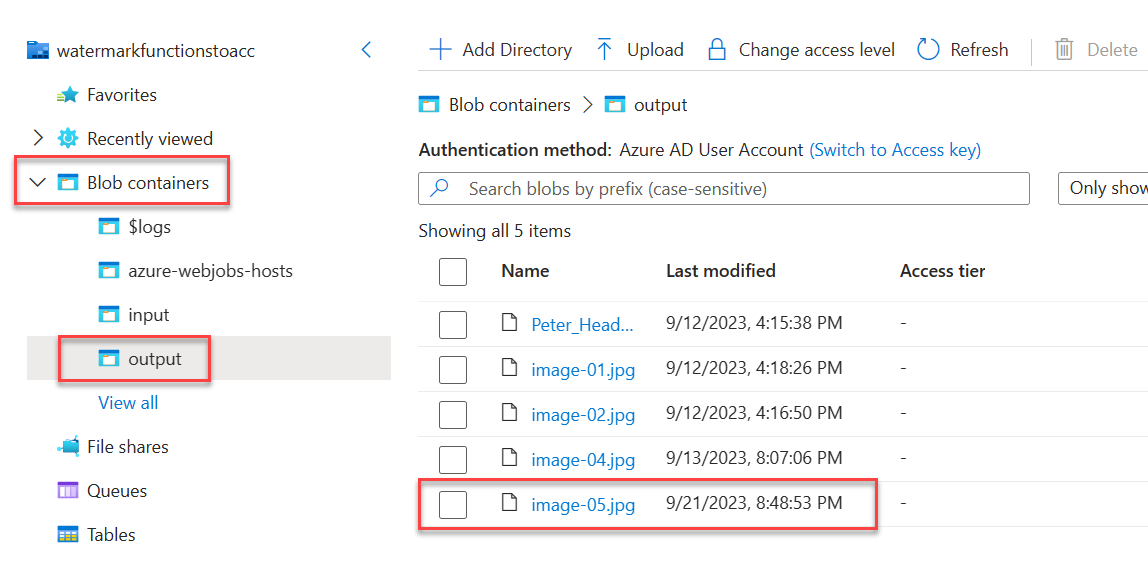 Fig. 13: Result view in Azure Storage Account container explorer showing the new image file blob created under the output container location
In the Overview window, first, select the image file. Then, click Download from the top menu to download the new image file from Blob storage to your local machine, or copy the URL path to a new browser tab to open the image file there:
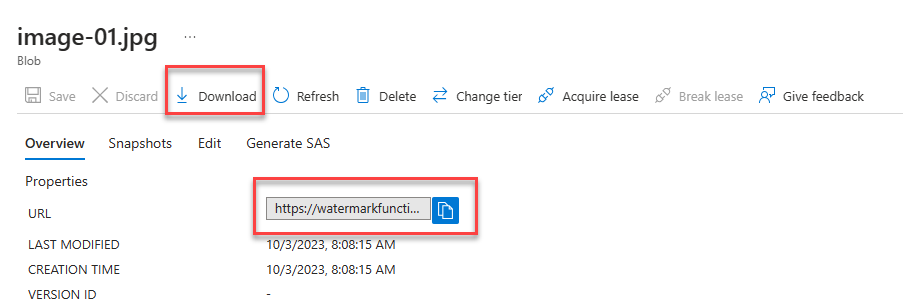 Fig. 14: Copying the Blob URL path to download the resulting file from the Functions trigger execution
Here’s the overview shown in context, with the image file open:
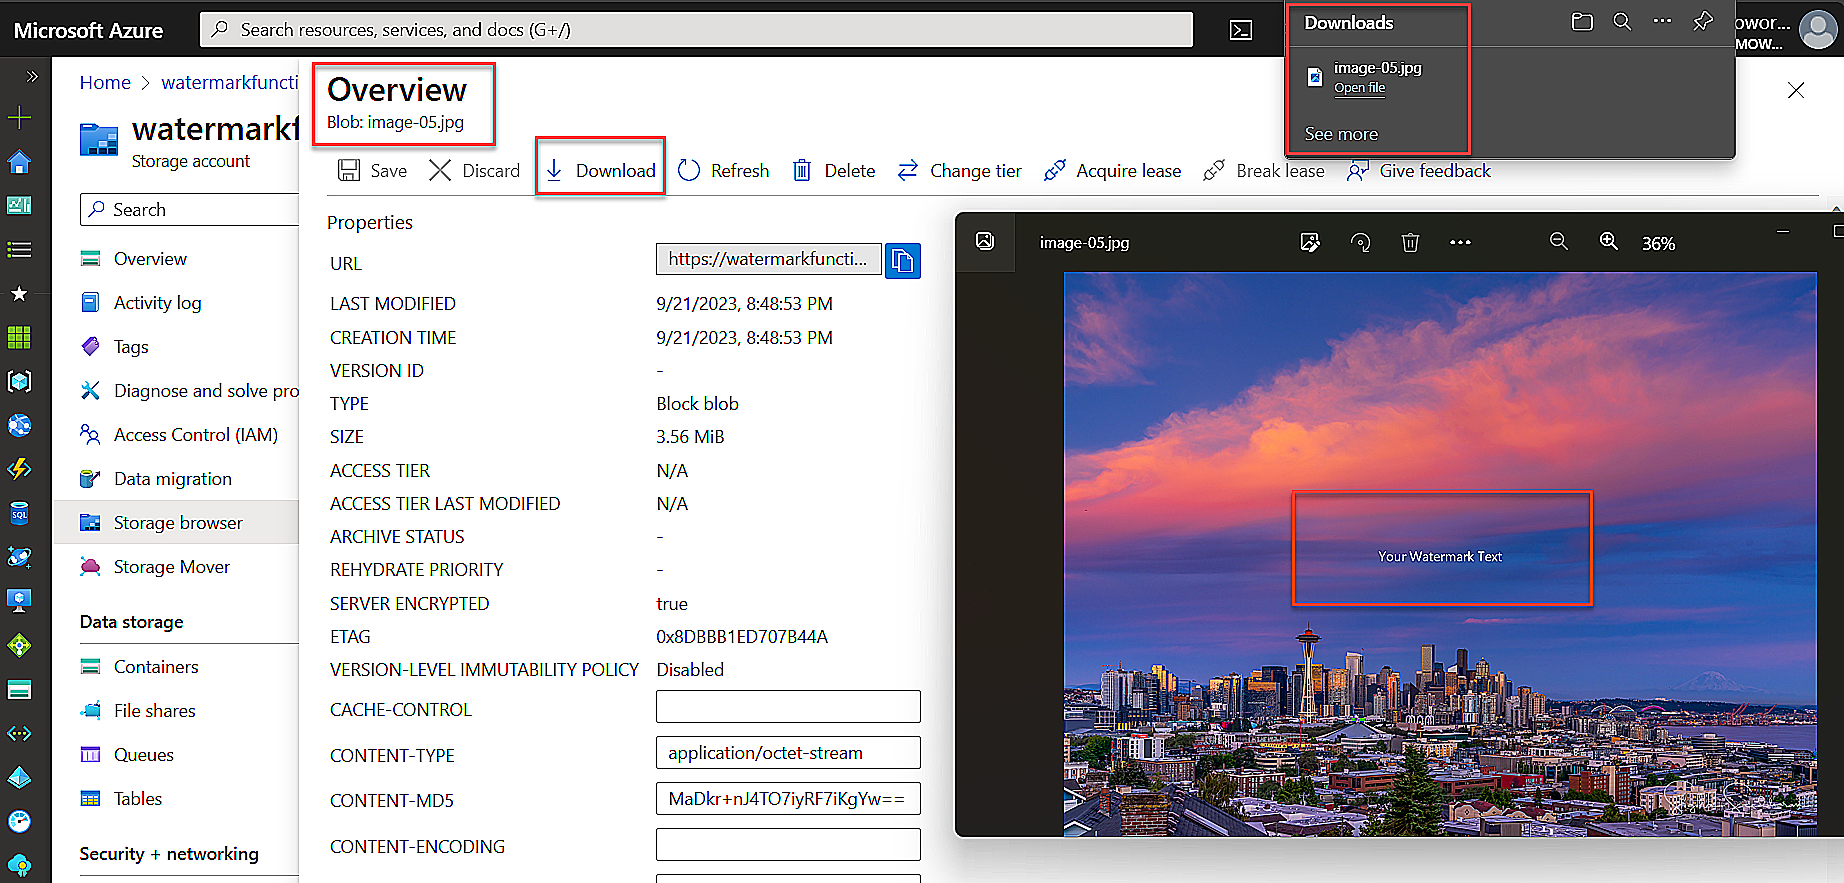 Fig. 15: Downloaded image file showing the text watermark
You’re now done validating and testing the Azure Function locally. The final step is to deploy the Function code to Azure Functions, which you can do using the Azure Functions extension for Visual Studio Code.
Inside Visual Studio Code, you’ll notice the Azure Functions extension in the side menu bar, represented by the Azure logo. Click the logo to access the Workspace (local) section:
 Fig. 16: Starting the Azure Function deployment from the Visual Studio Function Extension Workspace
Click the Azure Functions logo in the context menu to the right of the Workspace location (the first icon to the left). Then, select Create Function App in Azure.
The next step prompts you with three questions for creating the Azure Function.
First, enter a globally unique name for the new function app. For this demo, provide a unique name like “watermarkfunction.”
Next, select a runtime stack. For this example, choose .NET6 (LTS) Isolated.
Finally, select a location. Specify the same location as the Azure Storage account earlier.
Now, wait for the Azure Function Resource to be created. You can track the process from the AZURE:ACTIVITY LOG in the terminal window, as shown:
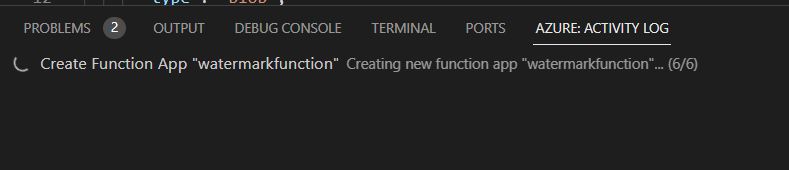 Fig. 17: Checking the Azure Activity Log in the VS Code terminal window
The Create Function App process is running, and the stage (x/6) is updating continuously. When the process is complete, a “succeeded” message is displayed.
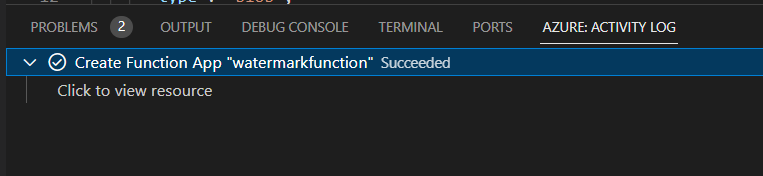 Fig. 18: Waiting for the confirmation message in the Azure Activity Log of a successful Function App creation
Switch to the Azure Portal and navigate to the Azure Functions Resources section of the portal. You should see a new Azure Function listed there named “watermarkfunction”:
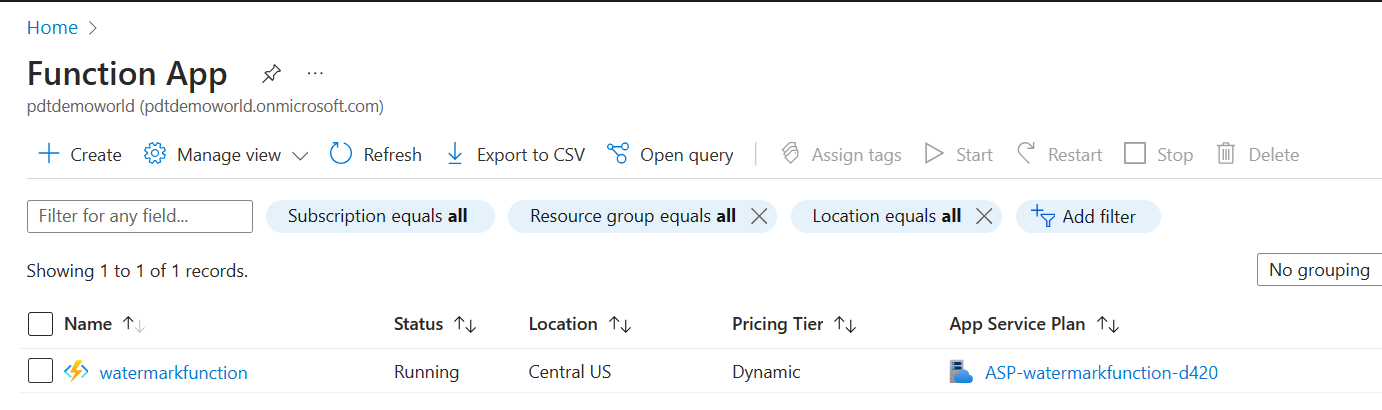 Fig. 19: Azure Portal showing the Azure Function App resource “watermarkfunction”
This screen confirms that the “watermarkfunction” resource has been created. Now, you’ll continue using the extension to publish the Azure Functions code.
Return to Visual Studio Code, where you’ll complete the process by deploying the Azure Function code to the Azure Function you’ve created.
Navigate to the Azure extension and click the Azure Functions context menu. Then, select Deploy to Function App…
Next, you need to confirm a series of prompts.
First, confirm “watermarkfunction” as the resource for the Azure Function code deployment
Then, confirm that you want to deploy watermarkfunction:
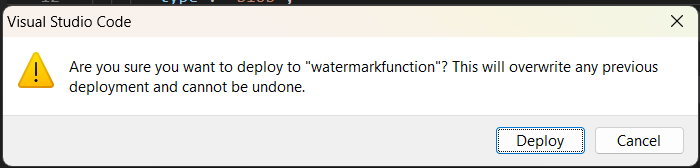 Fig. 20: Popup message confirming the actual deployment
Here’s the terminal output of the deployment:
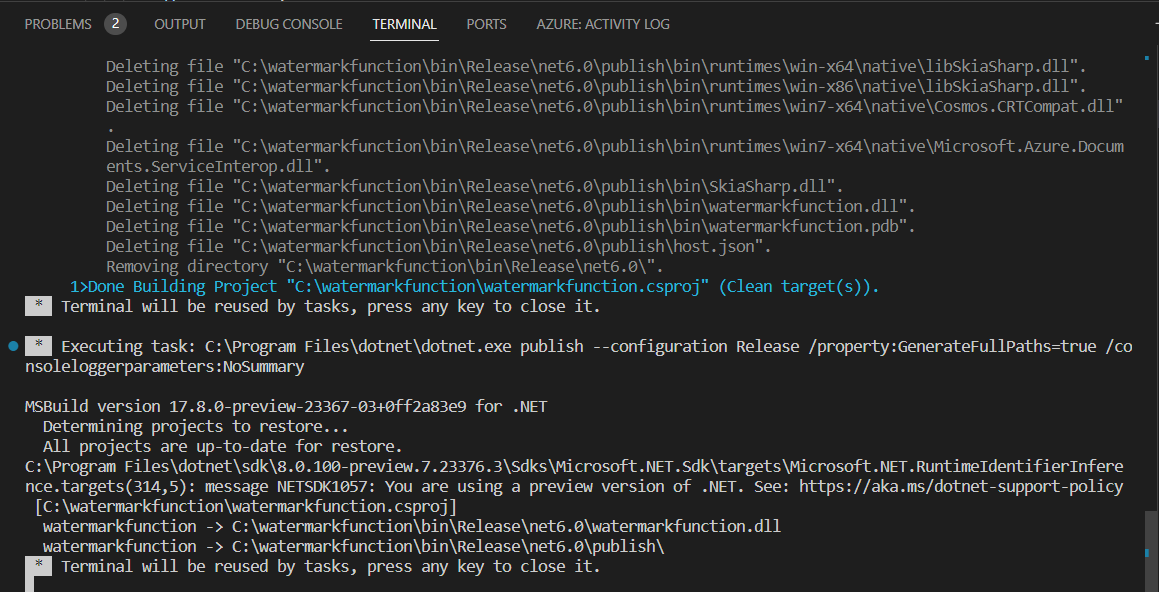 Fig. 21: VS Code terminal window showing the output of the actual function code deployment process
Wait for the deployment process to complete, and then close the terminal window.
Now, switch back to the Azure Portal and navigate to the Azure Functions resource you created earlier. There’s a minor change you need to make in the Functions Configuration > AzureWebJobsStorage application settings.
When you deployed your Azure Function from VS Code, a new Azure Storage Account was automatically created because the Functions runtime, triggers, and bindings depend on the WebJobs architecture. However, since you have an existing Azure Storage Account with the required containers, you must update the AzureWebJobsStorage Configuration parameter to the connection string of your pre-existing storage account. You can find this connection string in VSCode’s local.settings.json file or the Azure portal under your storage account settings.
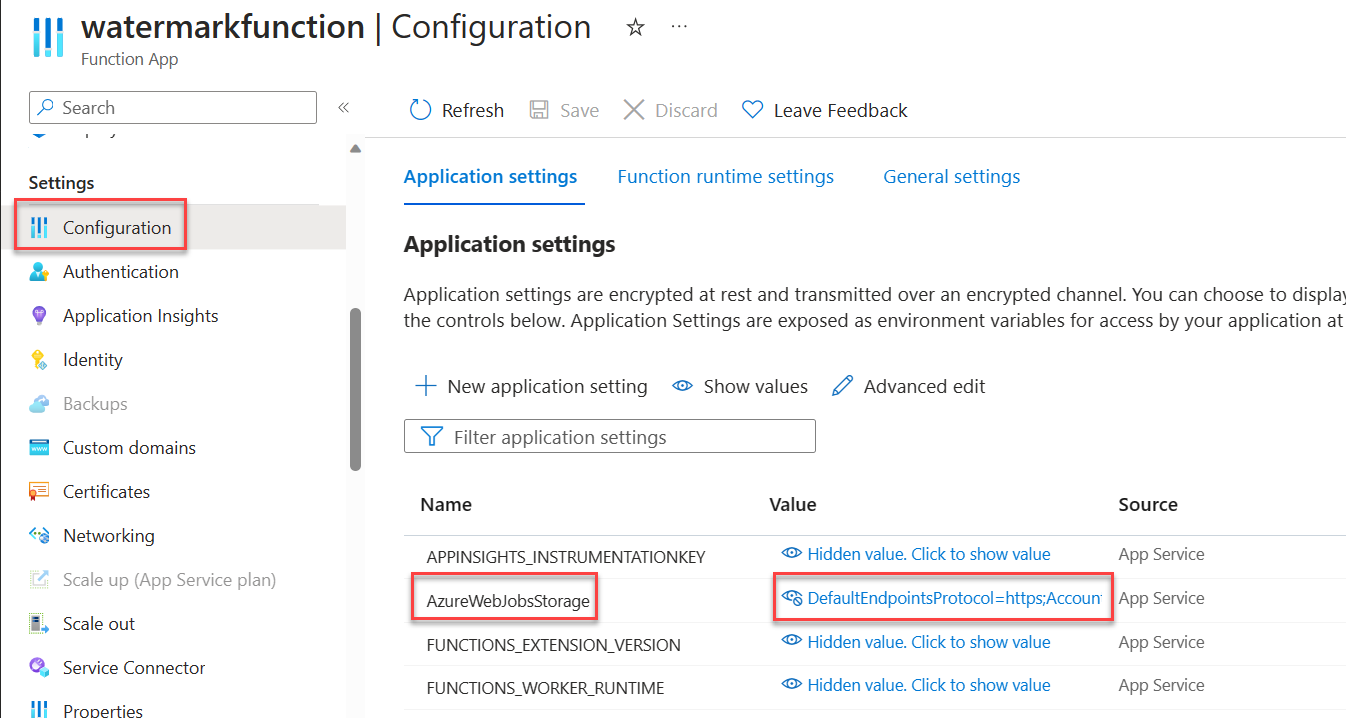 Fig. 22: Updating the AzureWebJobsStorage application setting for the Azure Function App
The Azure Function is now ready for a final test. Navigate back to the Azure Storage Account and upload a new image (or several) into the /input blob container.
You’ll see that new image files with the watermark are now in the /output blob container.
Remember, Azure Functions operate on a serverless compute model, which means you don’t have the server back end to troubleshoot if needed. However, being serverless doesn’t mean you can’t monitor the service. When you use the Function App extension in Visual Studio Code and deploy the Azure Function itself, you can also deploy Azure Application Insights and other Azure monitoring features.
Here’s how to perform this step.
Navigate back to the Azure Function resource and select the function. Then, select Monitor on the left-hand side. For each file upload trigger, a Function execution is logged, as shown below:
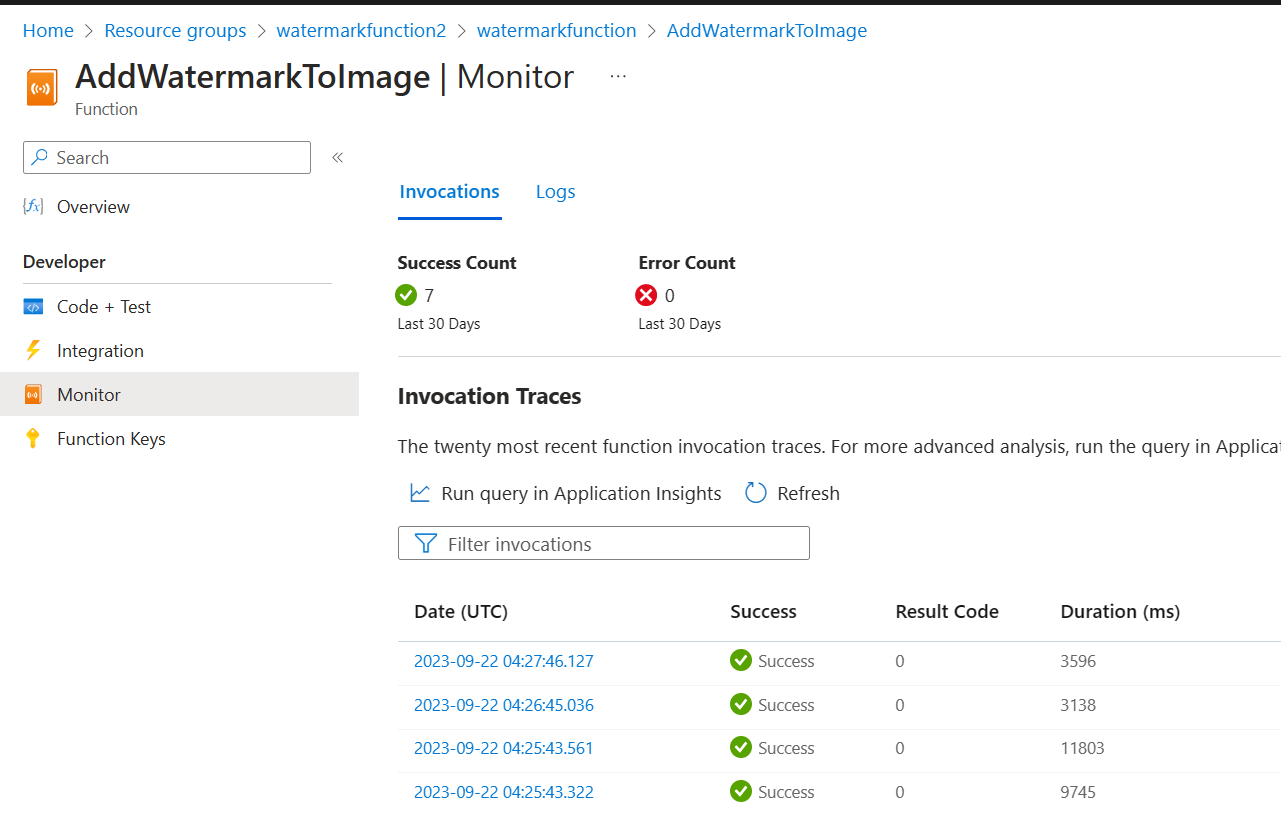 Fig. 23: Azure Function Monitor blade showing the status of triggered function calls
Select an item from the list for detailed logs on the Function executions:
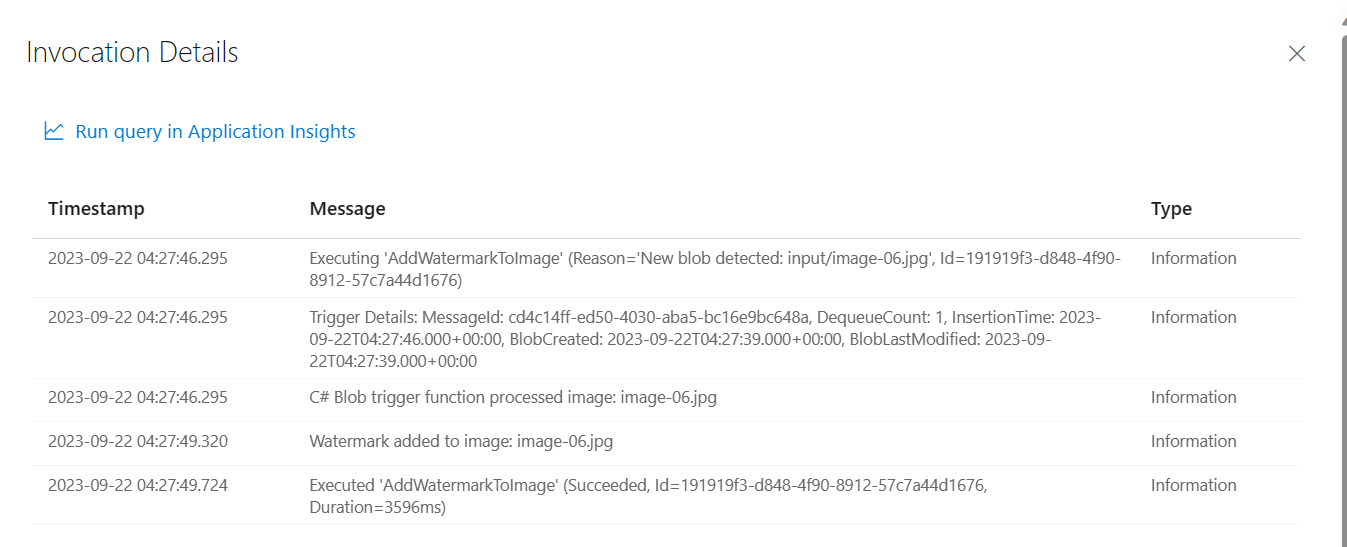 Fig. 24: Azure Function Monitor showing invocation details for a specific triggered action
You’ve now completed the deployment and monitoring of your Azure function.
When you’re deploying applications into public cloud environments, it’s important to consider how cloud computing can aid your workload. For short, repetitive tasks, taking a serverless approach might be beneficial. Serverless architecture allows for performance optimization and better cost savings, as you typically only pay for the actual execution runtime of triggered serverless processes, such as Azure Functions.
Azure Functions offer countless use cases that you can explore, from using HTTP triggers to interact with REST API calls to Blob triggers for Azure Blob Storage events and more.
This tutorial introduced you to Azure Functions using the .NET Framework as the codebase. You used tools and practices that you’re already likely familiar with as a .NET developer, including Visual Studio Code, NuGet Packages, and Azure deployments.
Keep experimenting with other image-related tasks, such as resizing or creating thumbnails. Harnessing Azure Functions with the .NET Core can overhaul the responsiveness and efficiency of your applications.
To ensure your serverless infrastructure is healthy, performant, and can handle critical functions as efficiently as possible, try Site24x7. Our ability to monitor Azure Functions helps you track key Azure Functions metrics to boost application development and improve throughput.
Yes, Site24x7 provides comprehensive monitoring for Azure Functions. You can track execution times, failure rates, and resource consumption to ensure your serverless .NET applications run smoothly.
Site24x7 provides detailed performance metrics and traces for Azure Functions. This helps identify bottlenecks in your .NET Core Azure Functions, enabling you to optimize code execution and improve application efficiency.
Yes, Site24x7 allows you to set up custom thresholds and receive instant alerts via email, SMS, or third-party integrations when your Azure Functions experience errors or high latency. Site24x7 also supports dynamic thresholds for anomaly detection.