Component Groups
A component group can be formed by grouping similar functional services or resources. Creating a component group can help declutter the status page to give it a more organized and comprehensible look.
The status of a component group will always be the status of the component with the highest severity. Based on severity, component status has the following hierarchy:
- Major Outage
- Partial Outage
- Under Maintenance
- Degraded Performance
- Suspended
For instance, let us take a component group named CG as an example. CG has five components, in this case five servers, A, B, C, D, and E, and the status of the components are as follows:
- Server A: Partial Outage
- Server B: Under Maintenace
- Server C: Major Outage
- Server D: Operational
- Server E: Operational
The status of the component group CG will be shown as Major Outage only, as it is the status of the highest severity. However, if all the components have the same status (say Operational), then the status of the component group will be shown as Operational.
Creating a component group
While creating a component, you can associate it to a component group by either creating a new component group or by choosing one from the preconfigured component groups featured in the drop-down list in the Add Component page.
To create a component group:
- Go to your Status Page, and click the Add Component button.
- In the Add Component page that opens, you can either choose a component group from the drop-down list, or add a new component group.
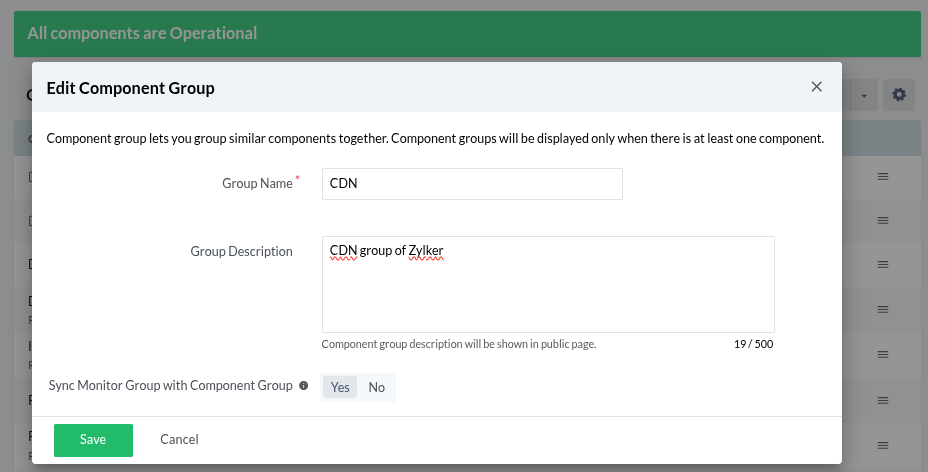
- After filling in the required details, click the + button next to the component group field to create a new component group. In the Add Component Group page that opens, provide the following details:
- Group Name: Give your group a name for your users to view. This is a mandatory field.
- Group Description: Provide a description to the component group, and it will be displayed in the public status page.

- Click Save, and a new component group will be created.
Editing a component group
To edit a component group follow the steps below:
- Go to your Status Page, and the component group will be listed under Component Summary.
- Click on the
 icon near the component group, and click Edit.
 - Make the necessary changes, and click Save.
Importing Monitor Groups from Site24x7
Bulk import Monitor Groups from Site24x7 as Component Groups to StatusIQ by following the given steps:
- Navigate to Status Page in StatusIQ > Add Component.
- On the Add Component page, enable the radio button near Import monitors from Site24x7 in the Add resource field.
- Choose Monitor Groups in the Resource type to be imported field, choose the monitor groups of your preference from the options provided next to Monitors to be imported field.
- Enable Sync Component Group with Monitor Group to apply all changes made to the monitor group in the component group and click Save.
When a monitor is added to or removed from a monitor group, the change will be automatically updated in the component group instead of requiring a manual update. The monitors in both groups will always remain in sync.
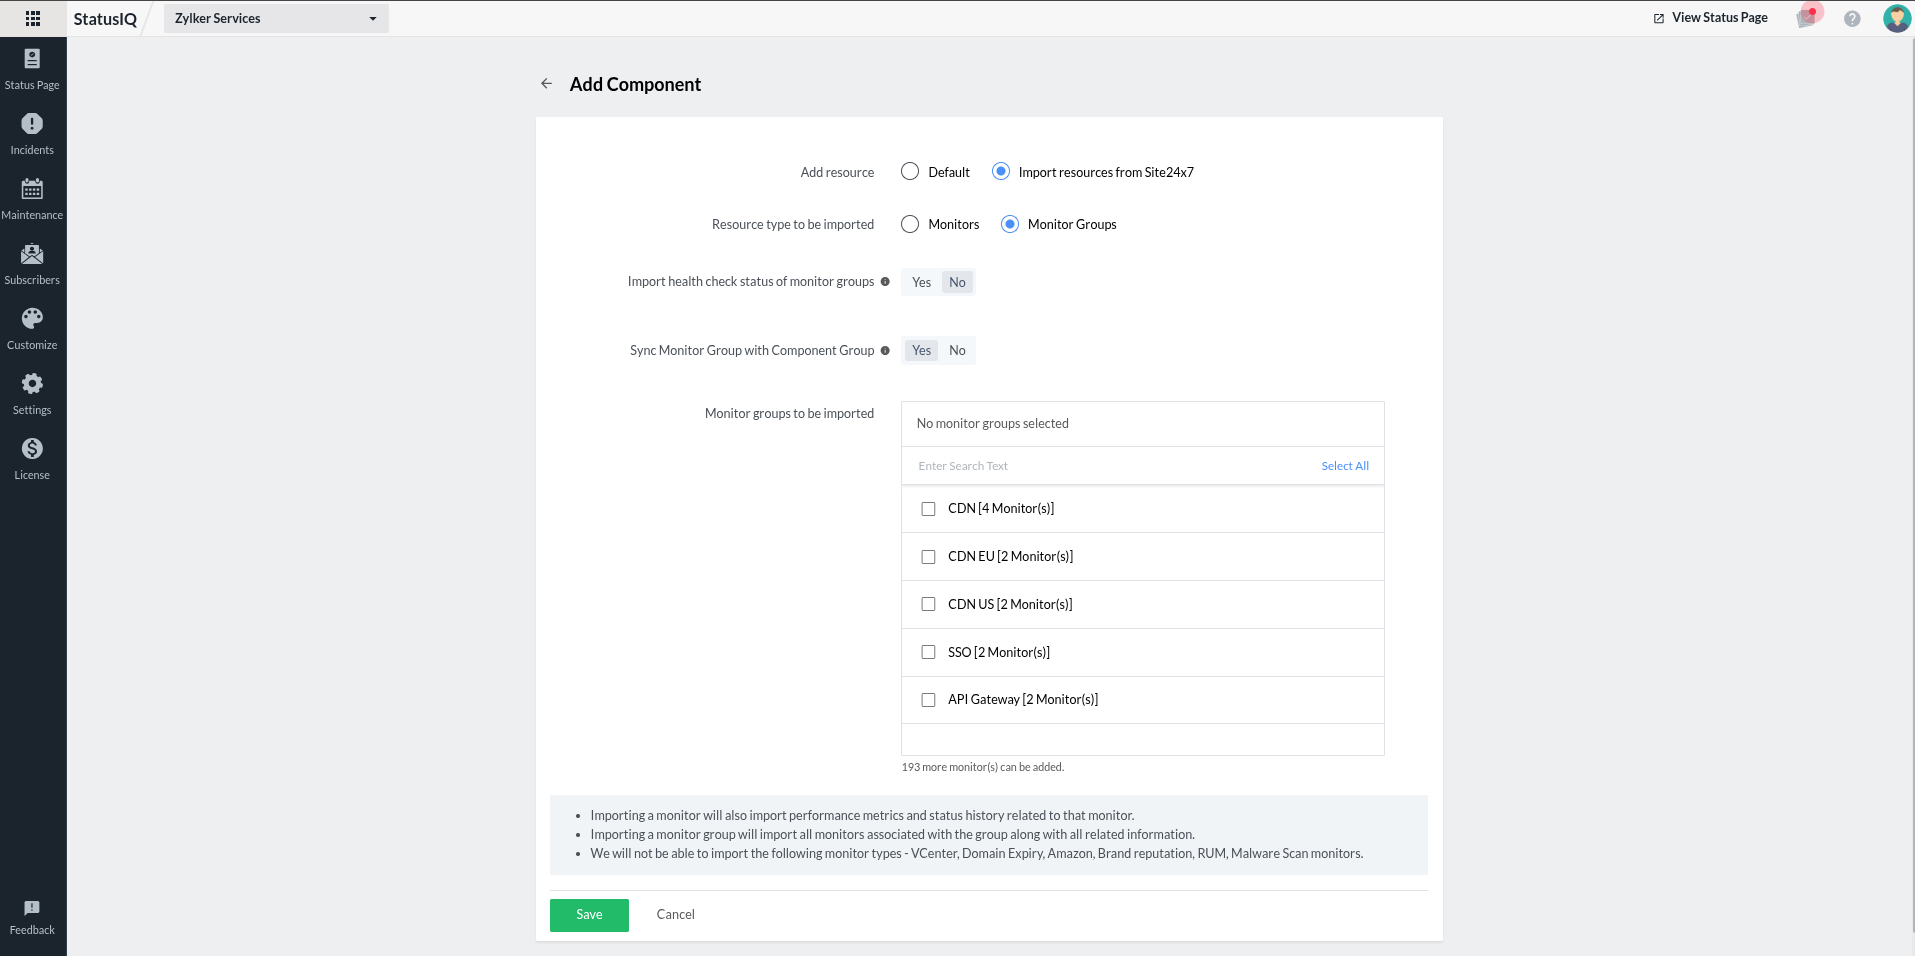
If you own a Basic or Free page you can import 10 components. If you're using a Green plan, you can add up to 50 components. If you're using a Blue plan, you can add up to 200 components. Once imported, you can view the monitor groups in the Component Summary section after 5-10 minutes.
Editing imported Monitor Groups
Edit imported Monitor Groups by following the given steps:
- To change the name of the imported Monitor Groups, click the
 icon next to them.
 - In the Edit Component Group pop-up that opens, provide the Component Group name and the description.
- Click Save.
After importing the monitor groups successfully, you can ungroup selected imported components or monitors from an existing group, or join them to form new groups.
Learn how to import Monitors to StatusIQ as Components.
Import Subgroups from Site24x7
While importing monitor groups from Site24x7, the subgroups within them are not imported. The required subgroups can be imported as a separate component group in StatusIQ. Follow the steps below to import subgroups:
- In StatusIQ, navigate to the Status Page > Add Component.
- On the Add Component page, select the Import monitors from Site24x7 radio button in the Add resource field.
- Click Save.
Deleting a component group
Follow the given steps to delete a component group.
- Go to your Status Page, click on the icon next to the component group you need to delete.
- Click Delete.
While deleting a component group, you will get a pop-up message asking whether you want to delete the components associated with the group. If that option is not enabled, your component group will be deleted, but the components that were part of the component group will be listed as individual components.