
Security Questionnaire in Digital Risk Analyzer
Any organization would want to understand the security posture of a vendor or partner before collaborating with them. Digital Risk Analyzer simplifies this evaluation with its Security Questionnaire feature. Users can share a standardized cybersecurity questionnaire covering key areas such as application, network, domain, and email security to vendors. The questionnaire assessment provides a structured and comprehensive view of a vendor’s security readiness.
Instead of creating your own checklist or depending on scattered information, you can rely on this built-in questionnaire to assess how well a company protects its systems and data. All responses are centrally captured within Digital Risk Analyzer, making it easier to review, track, and compare vendors based on their security practices.
Use cases
- Before purchasing a SaaS tool, send the questionnaire to assess the vendor’s security controls and decide if they meet your standards.
- Use the questionnaire to collect and maintain proof of third-party security practices for audits like ISO, SOC 2, or GDPR.
- Send the same questionnaire to multiple vendors to easily compare their security practices and choose the safer option.
- Reassess existing partners regularly by sending the same standardized questionnaire to track any changes in their security posture.
- Create custom questionnaire templates for your own assessment needs, with evidence requirements and conditional questions.
Creating a security questionnaire
To create a new security questionnaire, follow the steps below:
- Log in to your Digital Risk Analyzer account.
- Click the vendor domain you want to assess using the security questionnaire.
- In the left navigation menu, navigate to Security Questionnaire.
- On the Security Questionnaire page, click View Template(s).
- On the Questionnaire Templates page, click Create Template.
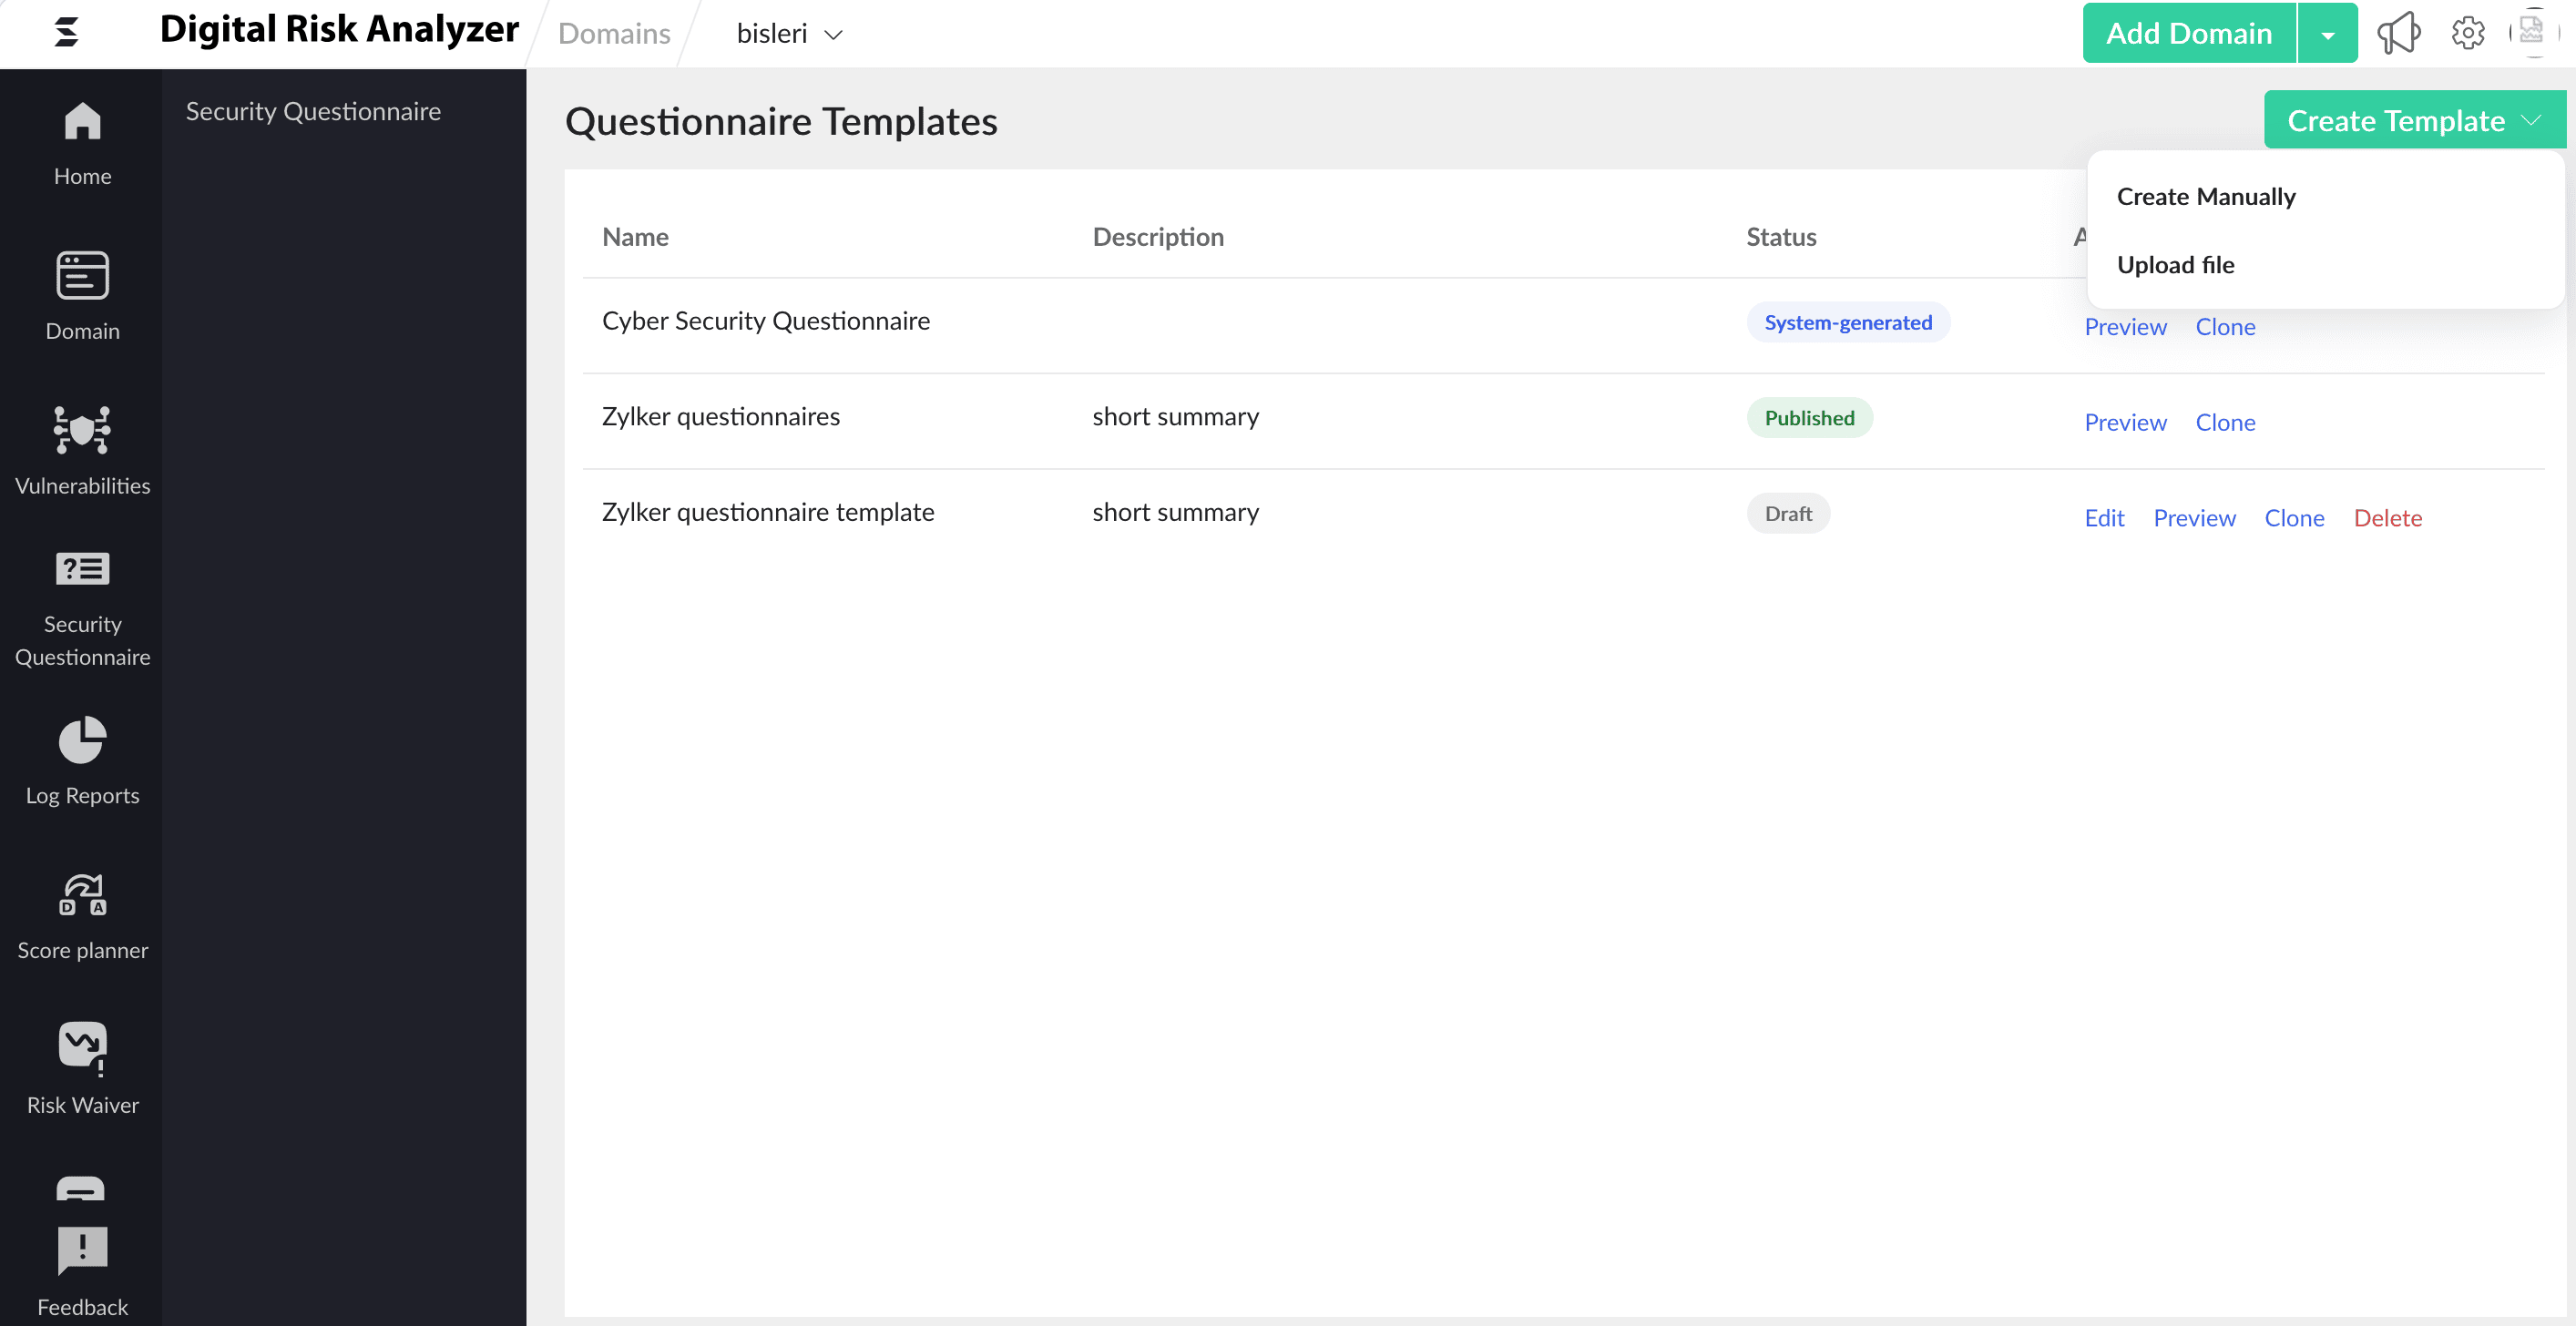
- From the drop-down menu that appears, select one of these options:
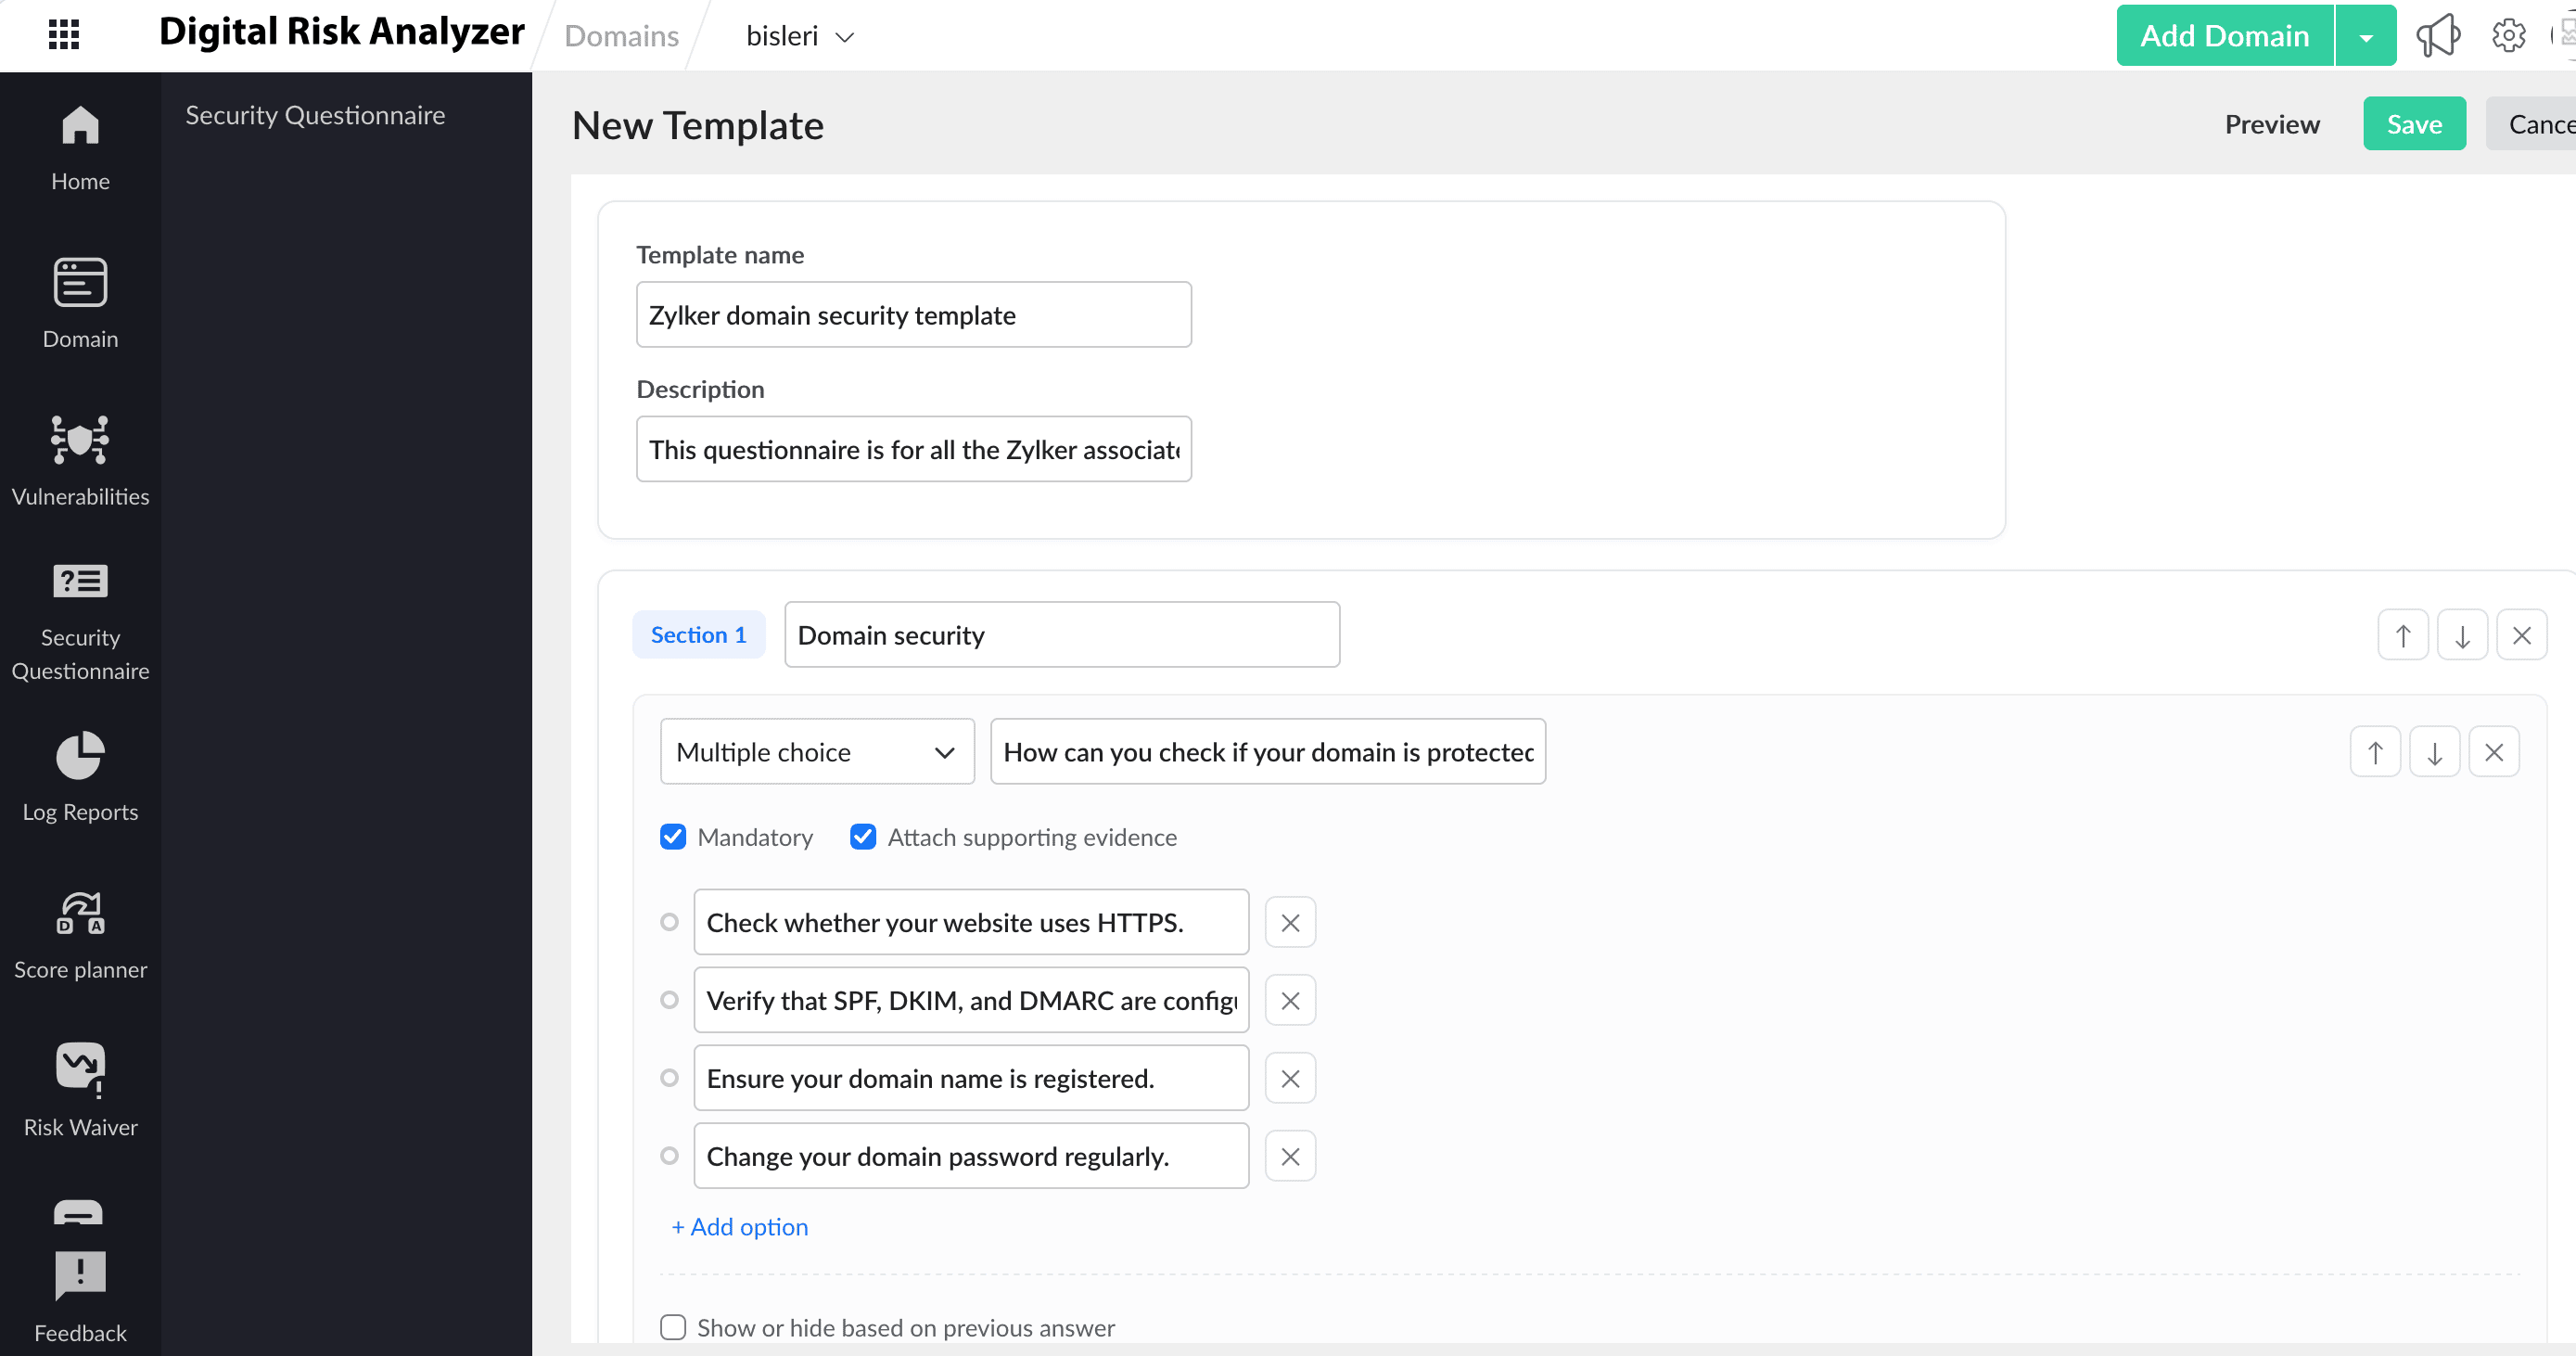
- Create Manually: This enables you to build a new template from scratch. Once you select Create Manually, in the New Template form that appears:
- Enter the Template name and Description and add section-wise headings, questions, and risks.
- Configure questions as Mandatory, select Attach supporting evidence to require file uploads, or enable Show or hide based on previous answer to control question visibility.
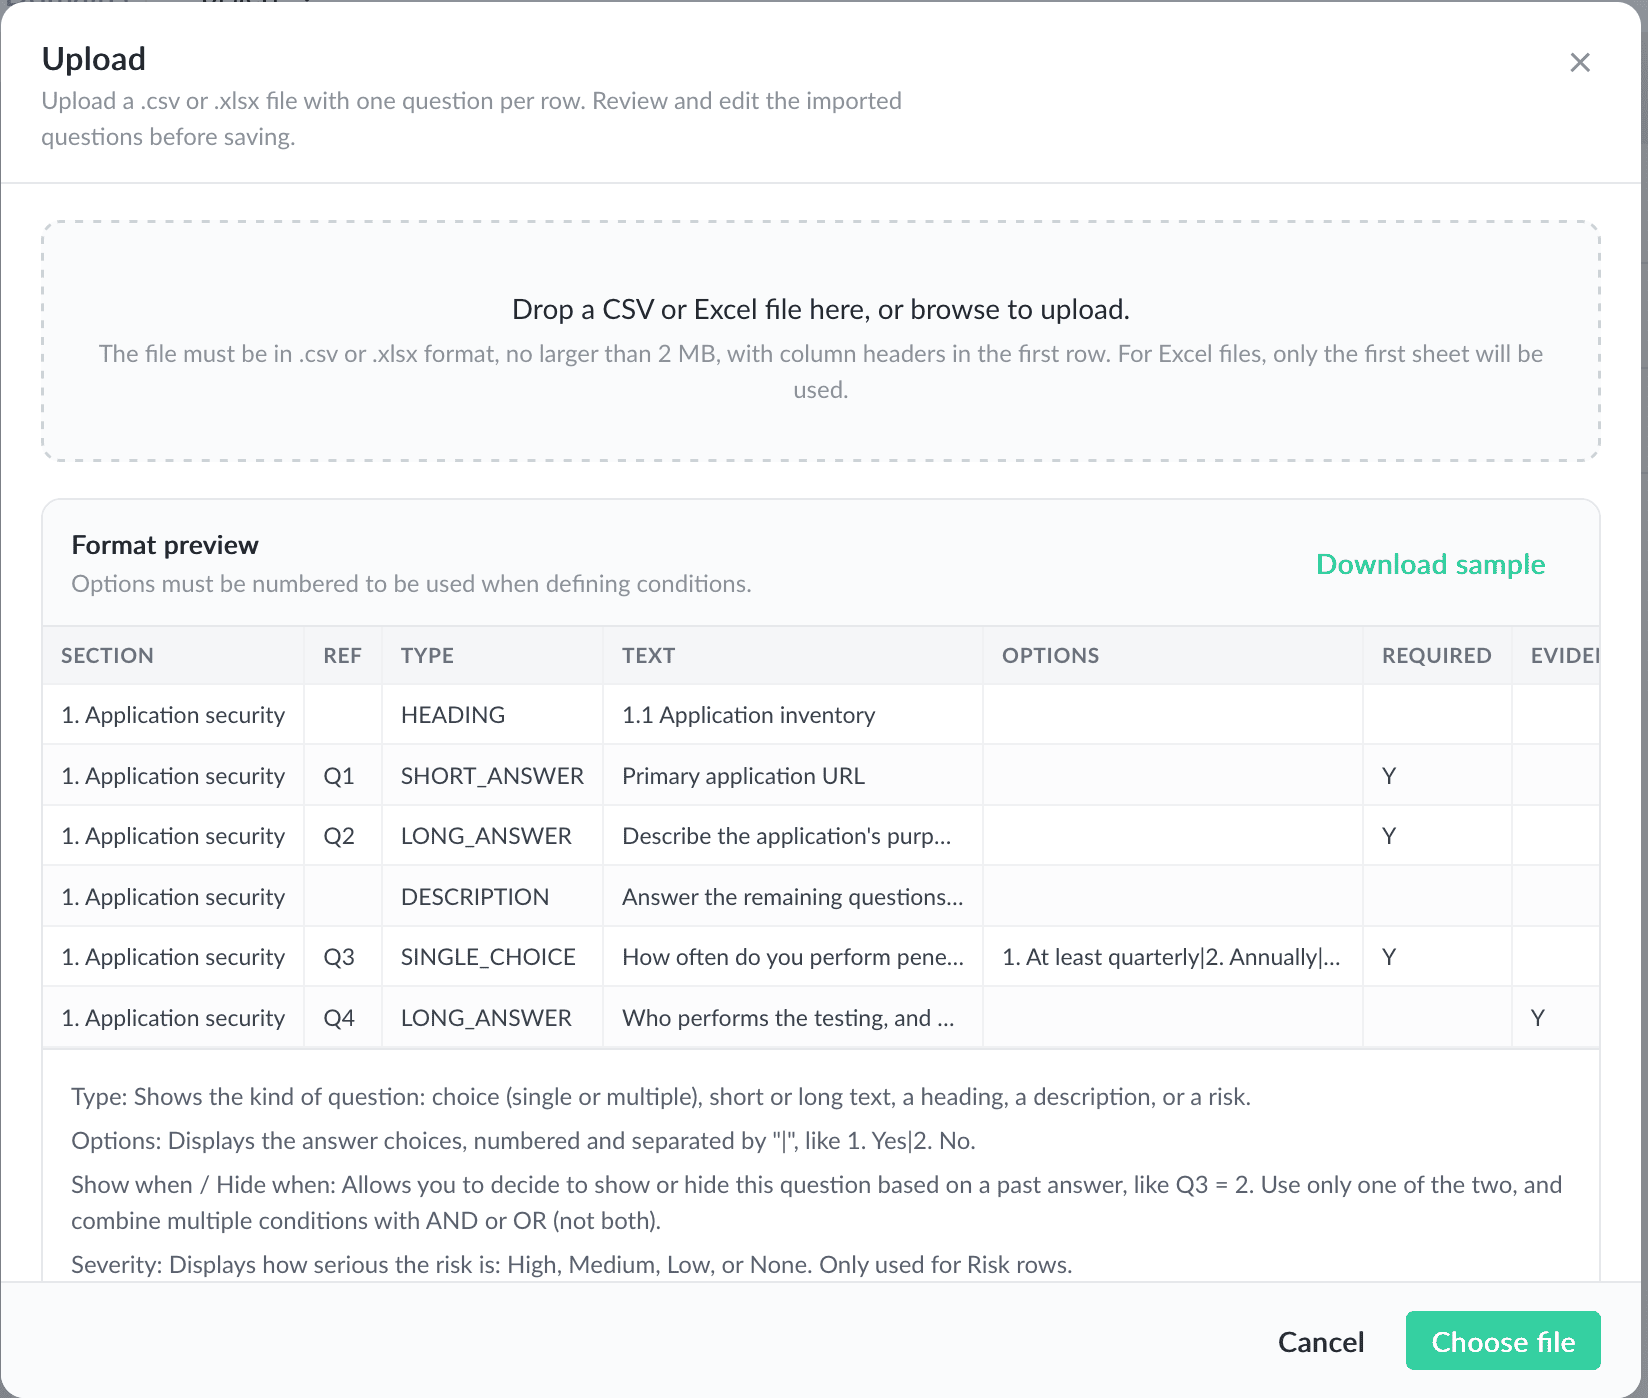
- Upload file: This enables you to upload a CSV or Excel file to create the template.
- In the Upload window, drop a CSV or XLSX file in the upload area, or click Choose file to browse to it.
- Review and edit the imported questions, then save the template.
- Create Manually: This enables you to build a new template from scratch. Once you select Create Manually, in the New Template form that appears:
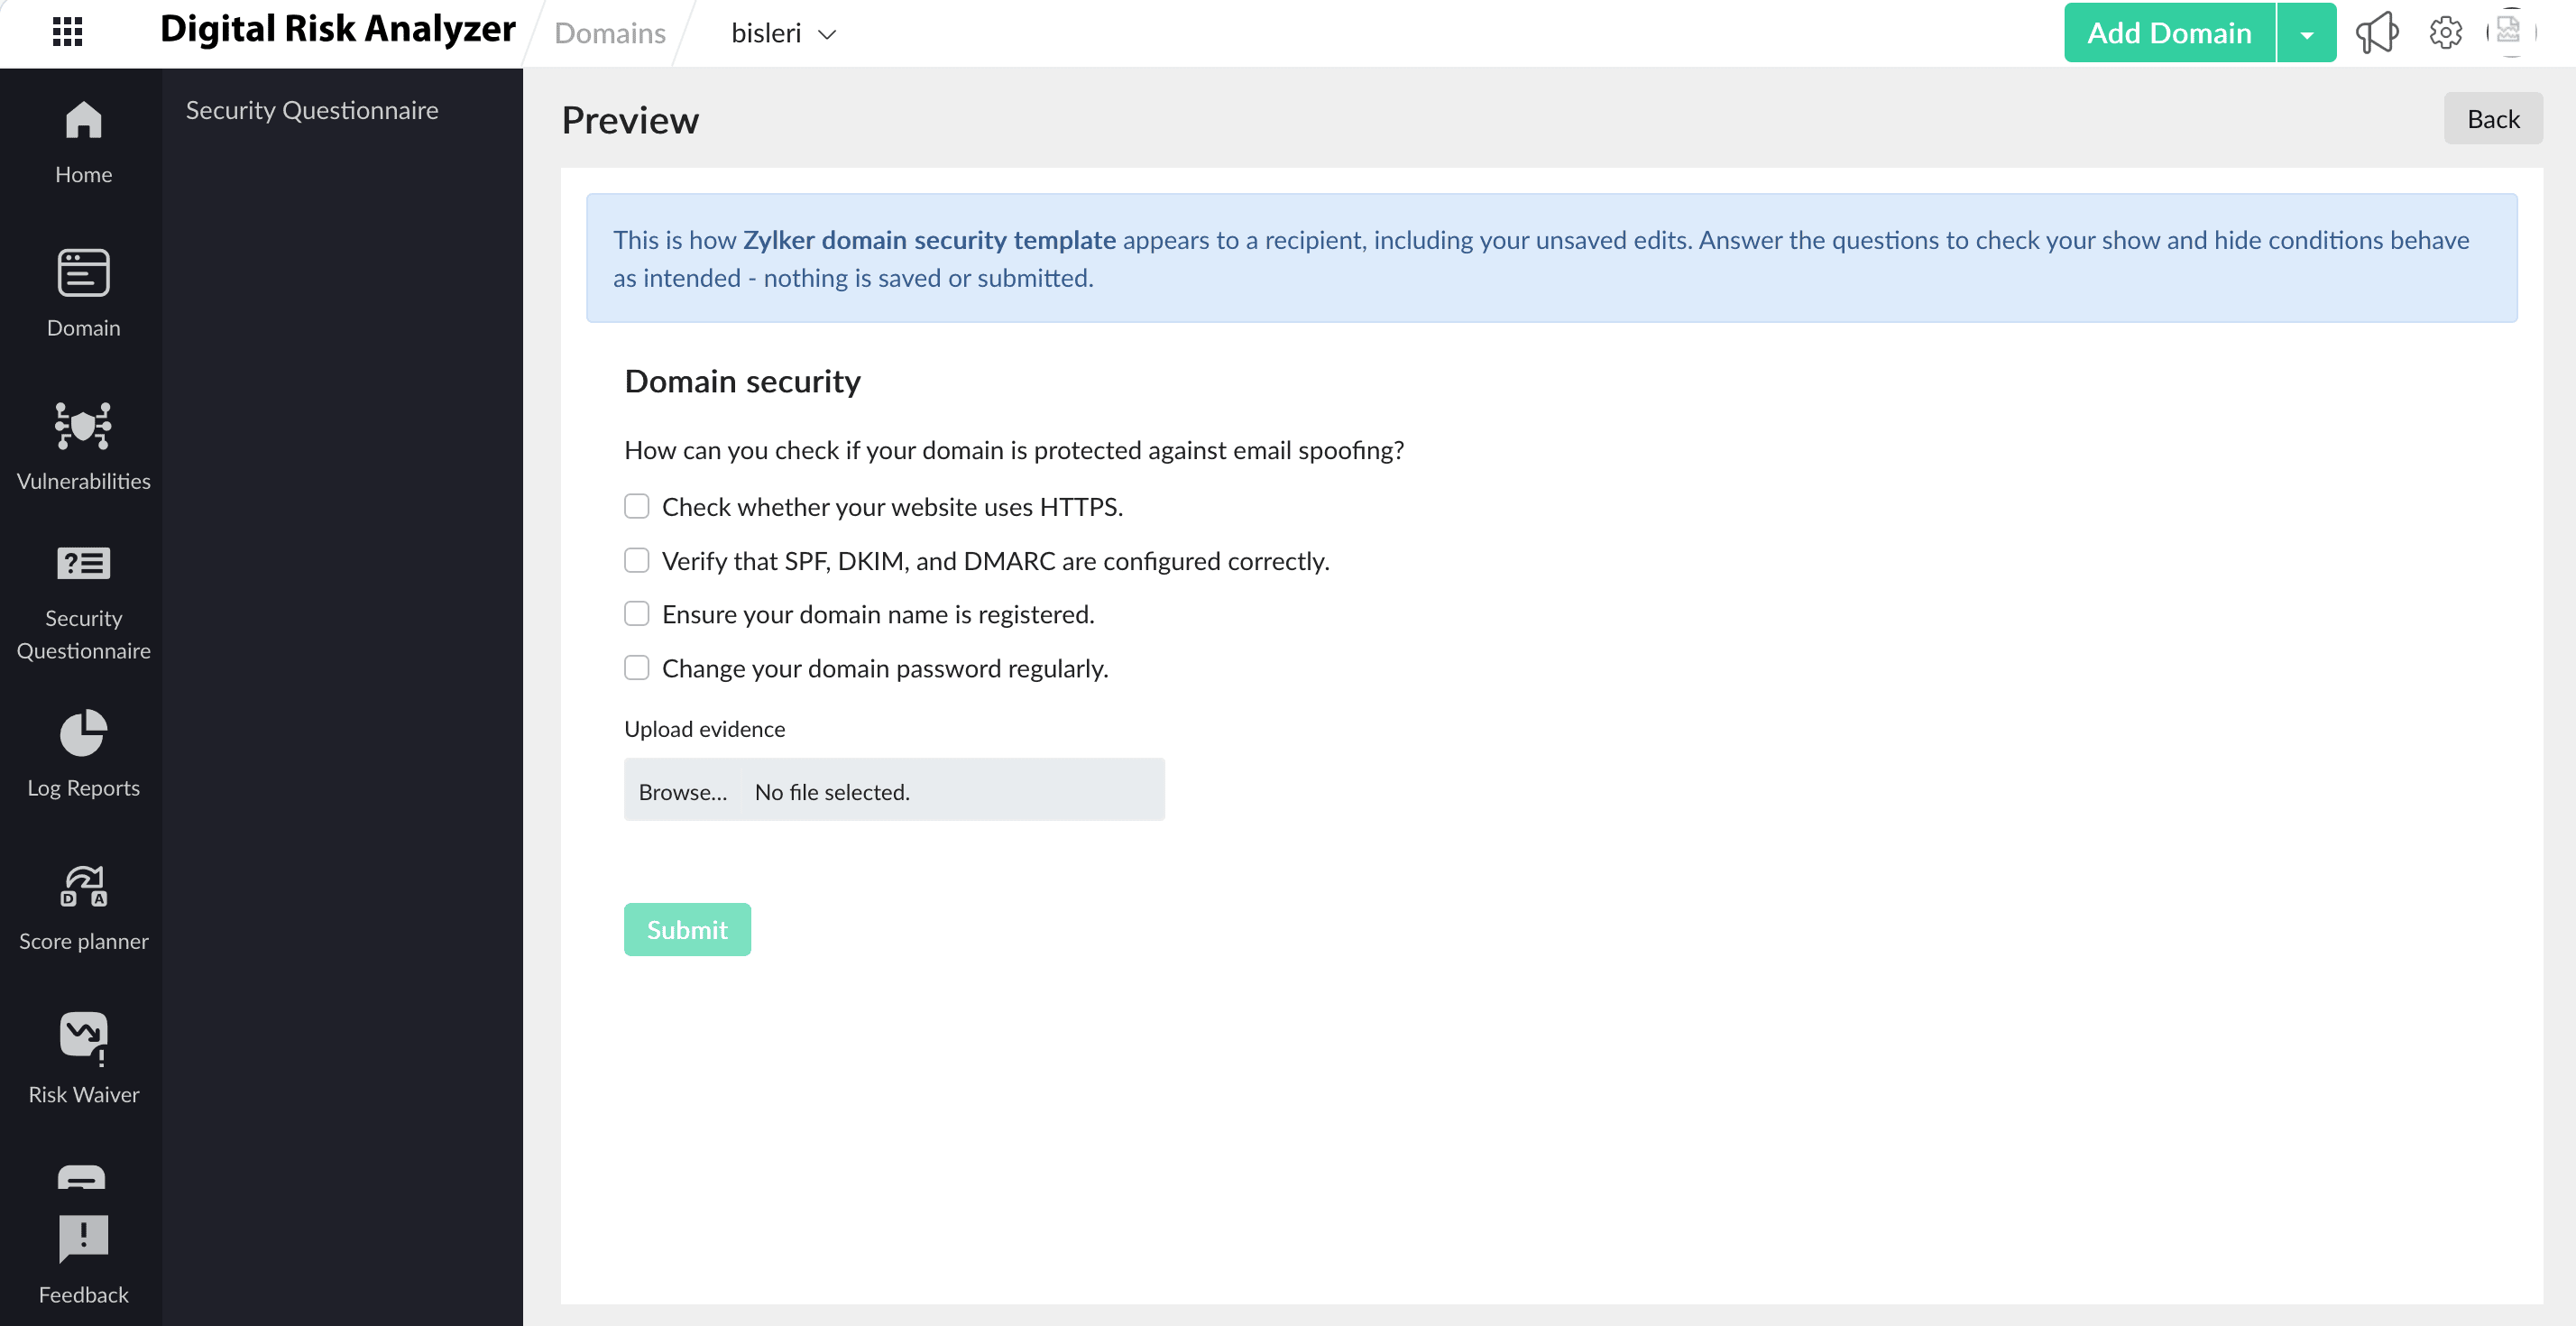
- Click Preview to check the template, then click Save.
- The file must be in CSV or XLSX format and no larger than 2MB, with column headers in the first row.
- For Excel files, only the first sheet is used.
- Each row in the file is one question.
- Uploading a file doesn’t save the template, so you can review and edit the imported questions before you save.
- Click Download sample to get a file in the expected format.
- If any row has an invalid URL, the questions won’t be imported, and the message Unable to upload will appear. Correct the file and upload it again.
Sending a security questionnaire to a vendor
To send a security questionnaire to a vendor, follow the steps below:
- In the left navigation menu, navigate to Security Questionnaire > Send Questionnaire.
- In the form that appears, use the Select Questionnaire drop-down menu to select Cyber Security Questionnaire or any published custom template.

- Click Preview to view a quick, read-only snapshot of the questionnaire.

- By default, the Show Risks option is disabled so that associated risks are revealed dynamically based on the answers provided. If you want to hide risks, contact support.
- You can choose to show the associated risks identified based on vendor response in your report. Check the Exclude Risks from Report field to hide the risks identified from the questionnaire.
- Provide the email IDs, one per line, of all vendors and collaborators who will answer the questions in the User Email IDs field.
- Click Send. The questionnaire details will appear on the Security Questionnaire list page with the status Yet to start.
Accessing questionnaire templates
To access the previously published security questionnaire, follow the steps below:
- From the left navigation menu, navigate to Security Questionnaire > View Template(s).
- View the Questionnaire Templates page, which lists each template with the following details:
- Name: This is the display name of the security questionnaire.
- Description: This is the purpose and more instructions related to the security questionnaire.
- Status: This displays the template status as System-generated for built-in questionnaires, Published for questionnaires ready to be sent to vendors, or Draft for questionnaires still in progress.
- Action: This enables you to Preview, Edit, Clone, or Delete a template.
Role of collaborators
A collaborator is a person who answers the questionnaire. Their functions are as follows:
- Once the questionnaire is created, the collaborator receives a mail from the Digital Risk Analyzer with a link to the security questionnaire.
- They can click the link to open the questionnaire and start answering the questions. The collaborator can share the link with other collaborators so they can contribute before submission.
Note- While answering, the associated risks are displayed based on the selected choice and the questionnaire configuration. Vendors can also add comments or additional details to provide better clarity to the sender.
- If a collaborator has clicked Submit, then no other collaborator can answer the questionnaire.
- To enable multiple submissions from multiple collaborators, please contact support.
- If a question asks for supporting evidence, collaborators can upload a file under Upload evidence.
- Some questions may appear or disappear depending on earlier answers, based on the template’s show and hide conditions.
User actions on security questionnaire
The steps below list the actions performed by the user once the questionnaire is submitted by the vendor:
- Once all collaborators from the vendor have submitted their responses, the questionnaire status changes to Submitted.
- To review the response, click the hamburger
 icon, and select View Response.

- From the Questionnaire Risks page, the user can analyze the vendor risk and comments and waive any risks using the Waive button.

- After reviewing the risks, on the Security Questionnaire list page, the user can click the hamburger icon and select Mark as Complete. The questionnaire status changes to Complete and the security score is included in the report in the upcoming scan.

- If the user wants to add more collaborators later, on the Security Questionnaire list page, click the hamburger icon, and select Mark as open. They can click the edit
 icon and add more collaborators' email IDs in the User Email IDs field and click Save.